8. Tutorial for turtle Module#
8.1. Table of Contents#
[Introduction]
[Examples]
[Beginning with turtle]
[Moving]
[Drawing]
[Color]
[Filling in Shapes]
[Stamping]
[Animation]
[Turtle Status]
[Input]
[Events]
[The Turtle]
[The World]
8.2. Introduction#
Turtle graphics is a popular way to teach programming. A drawing pen cursor (called the “turtle”) can be programmed to move around the screen. The turtle draws lines as it moves. You can write programs that draw beautiful shapes and learn to program at the same time.
This tutorial only explains Python’s turtle.py module. It does not explain the Python programming language. This guide assumes you know basic Python concepts: variables, operators, for loops, function calls, and random numbers. This guide assumes you have Python installed and are writing Python code using IDLE, Spyder, Visual Studio Code, or some other code editor.
Commonly used turtle methods are :
Method |
Parameter |
Description |
|---|---|---|
Turtle() |
None |
Creates and returns a new turtle object |
forward() |
amount |
Moves the turtle forward by the specified amount |
backward() |
amount |
Moves the turtle backward by the specified amount |
right() |
angle |
Turns the turtle clockwise |
left() |
angle |
Turns the turtle counterclockwise |
penup() |
None |
Picks up the turtle’s Pen |
pendown() |
None |
Puts down the turtle’s Pen |
up() |
None |
Picks up the turtle’s Pen |
down() |
None |
Puts down the turtle’s Pen |
color() |
Color name |
Changes the color of the turtle’s pen |
fillcolor() |
Color name |
Changes the color of the turtle will use to fill a polygon |
heading() |
None |
Returns the current heading |
position() |
None |
Returns the current position |
goto() |
x, y |
Move the turtle to position x,y |
begin_fill() |
None |
Remember the starting point for a filled polygon |
end_fill() |
None |
Close the polygon and fill with the current fill color |
dot() |
None |
Leave the dot at the current position |
stamp() |
None |
Leaves an impression of a turtle shape at the current location |
shape() |
shapename |
Should be ‘arrow’, ‘classic’, ‘turtle’ or ‘circle’ |
8.3. Quickstart#
Let’s write a program that draws a square. In a new file enter the following Python code:
from turtle import *

forward(100)
left(90)
forward(100)
left(90)
forward(100)
left(90)
forward(100)
done()
When you run this program, a new window will appear and you will see the an arrow cursor. This arrow is the drawing turtle. The program tells the turtle where to move, and the turtle draws lines while moving:

The steps given to the program are:
Move forward 100 steps. (In the beginning, the turtle is facing to the right.)
Turn 90 degrees to the left.
Move forward 100 steps.
Turn 90 degrees to the left.
Move forward 100 steps.
Turn 90 degrees to the left.
Move forward 100 steps. (The turtle has ended up where it started.)
With these seven steps, the turtle draws a square. The from turtle import * is an instruction needed at the beginning of all of your turtle programs. It imports the turtle module so you can do the turtle instructions.
There are many instructions like left() and forward(). These instructions are called functions. This tutorial explains many of the functions in the turtle module. When you learn more of these functions, you will be able to draw many different shapes and beautiful pictures!
8.4. Examples#
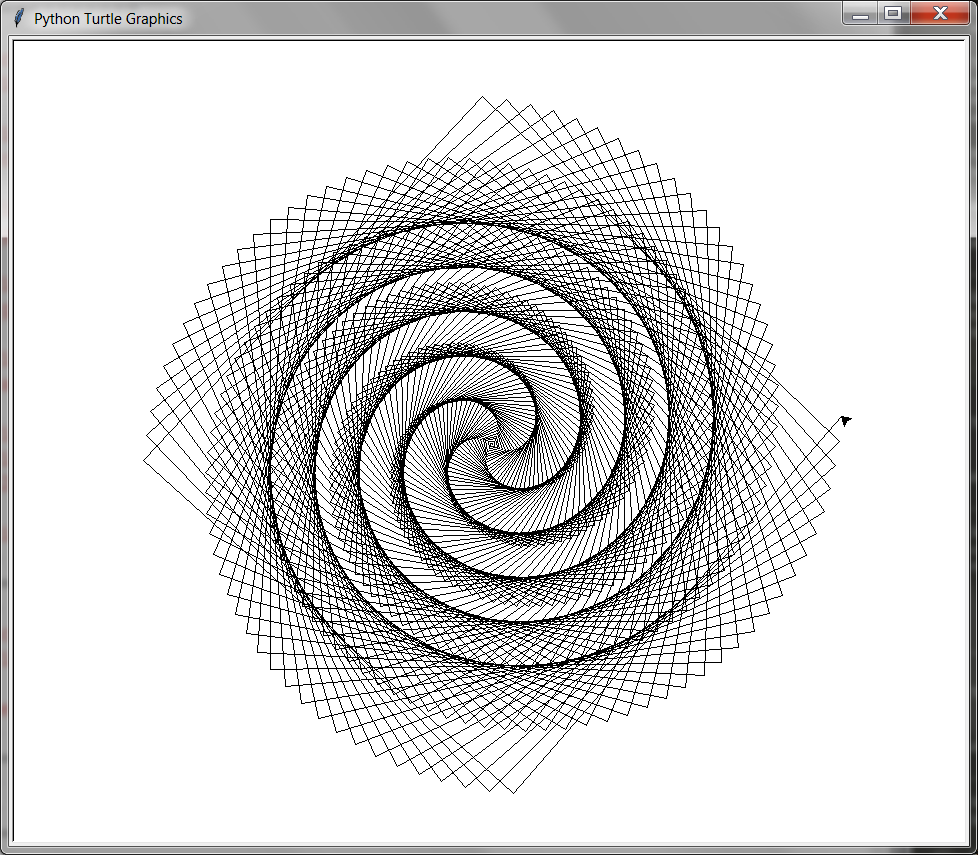
This is a square spiral program:
from turtle import *
for i in range(500): # this "for" loop will repeat these functions 500 times
    forward(i)
    left(91)
done()
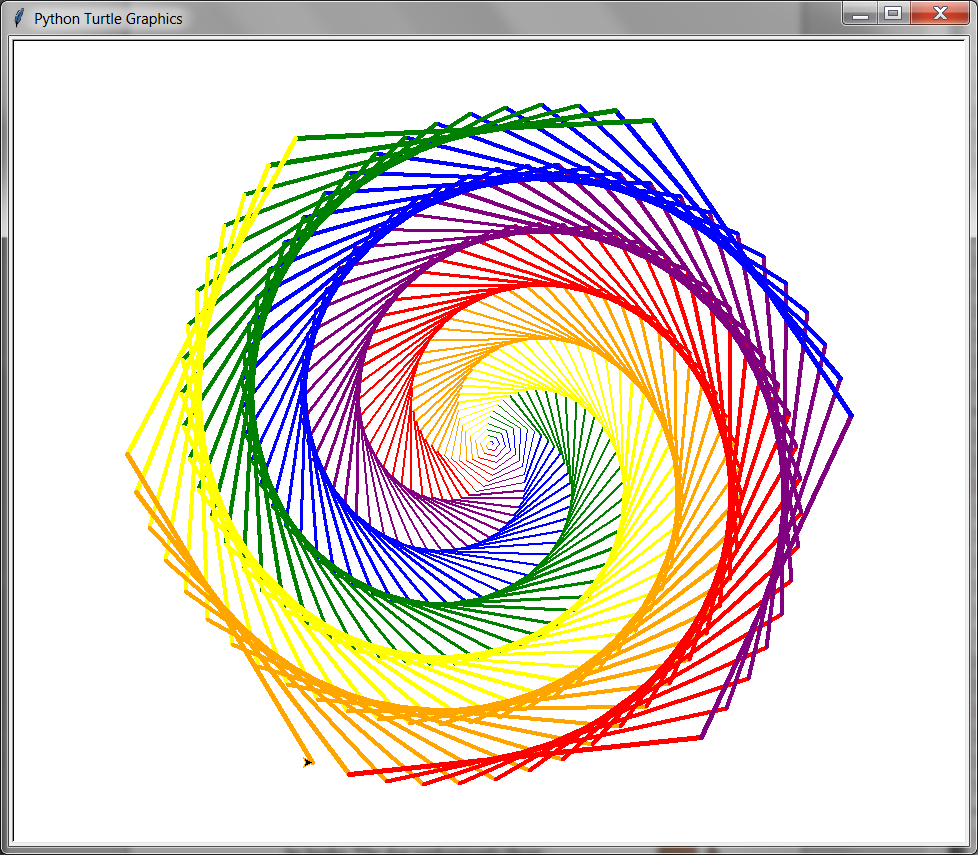
This is a hexagon spiral program:
from turtle import *
colors = ['red', 'purple', 'blue', 'green', 'yellow', 'orange']
for x in range(360):
    pencolor(colors[x % 6])
    width(x / 100 + 1)
    forward(x)
    left(59)
done()
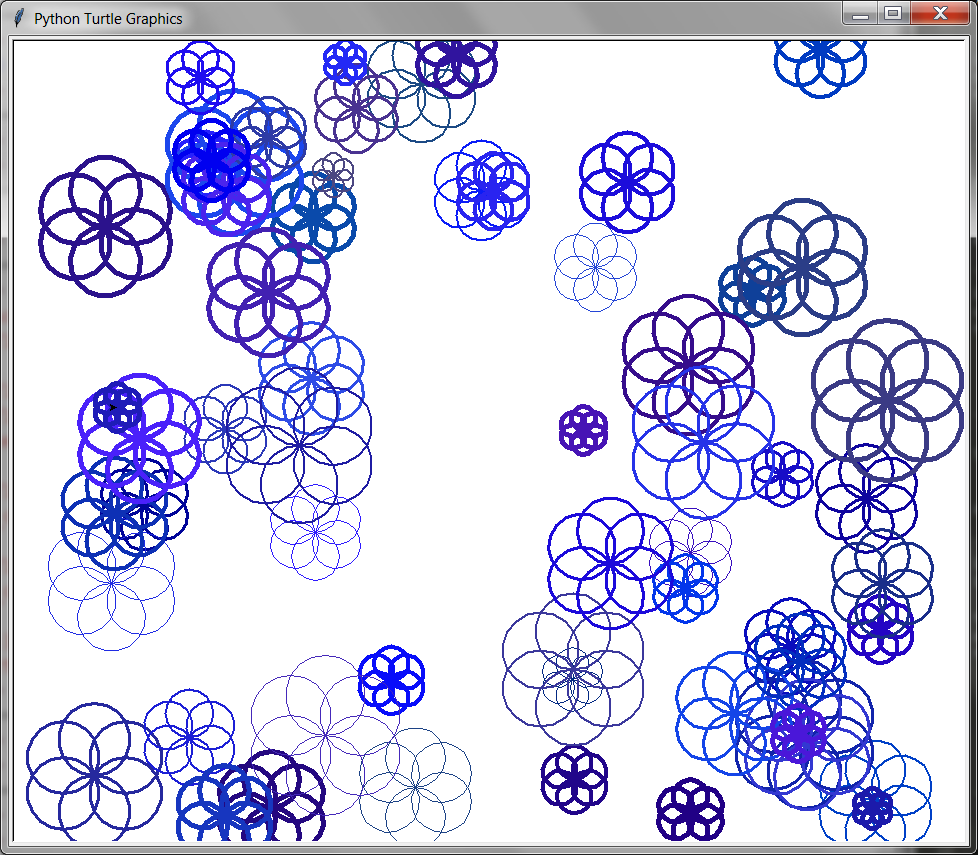
This is a program that draws blue flowers:
from turtle import *
import random

for n in range(60):
    penup()
    goto(random.randint(-400, 400), random.randint(-400, 400))
    pendown()

    red_amount   = random.randint( 0,  30) / 100.0
    blue_amount  = random.randint(50, 100) / 100.0
    green_amount = random.randint( 0,  30) / 100.0
    pencolor((red_amount, green_amount, blue_amount))

    circle_size = random.randint(10, 40)
    pensize(random.randint(1, 5))

    for i in range(6):
        circle(circle_size)
        left(60)
done()
8.5. Moving#
By calling these functions, the turtle can be made to move around the screen. Imagine the turtle holding a pen down on the ground and drawing a line as it moves around.
The turtle’s position is two numbers: the X coordinate and Y coordinate. The turtle also
8.5.1. forward(distance)#
The forward() function moves the turtle distance number of steps in the current direction. If the pen is down (see pendown() and penup()) a line will be drawn as the turtle moves forward. If distance is a negative number, the turtle will move backwards.
8.5.2. backward(distance)#
The backward() function moves the turtle distance number of steps in opposite direction the current direction. If the pen is down (see pendown() and penup()) a line will be drawn as the turtle moves backward. If distance is a negative number, the turtle will move forward.
8.5.3. right(angle)#
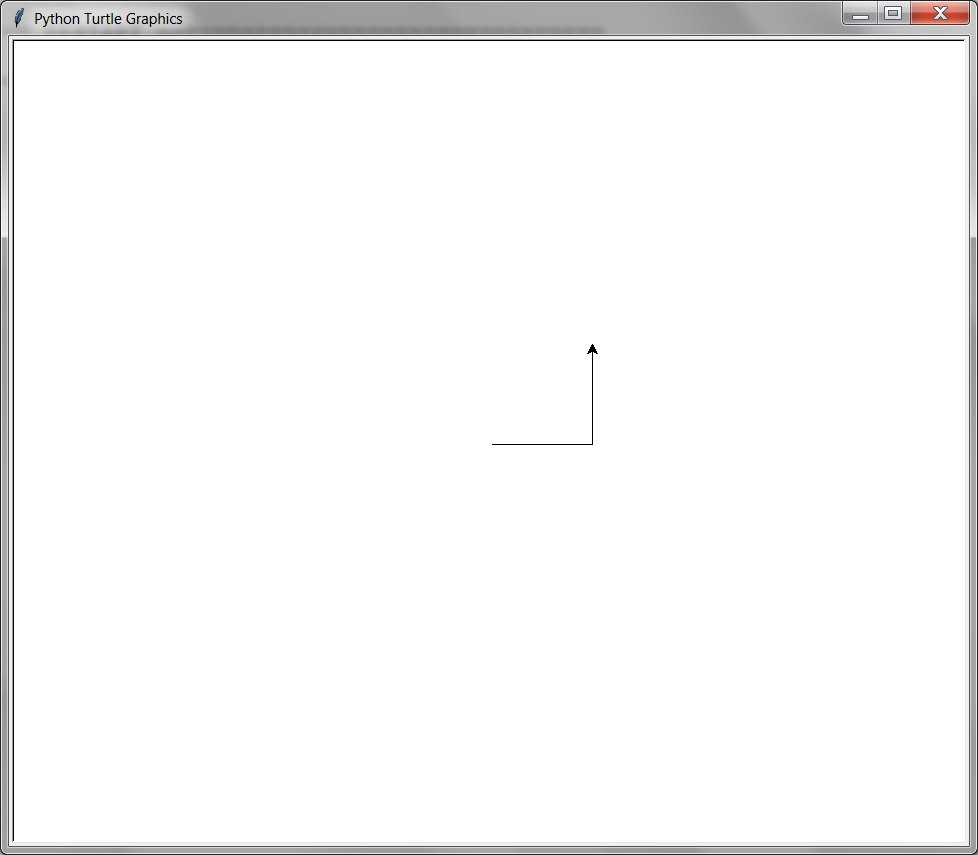
The right() function will change the current direction clockwise by angle degrees. If you imagine being above the turtle looking down, the turtle turning right looks like it is turning clockwise. The turtle will not move; it will only change the direction it is facing.
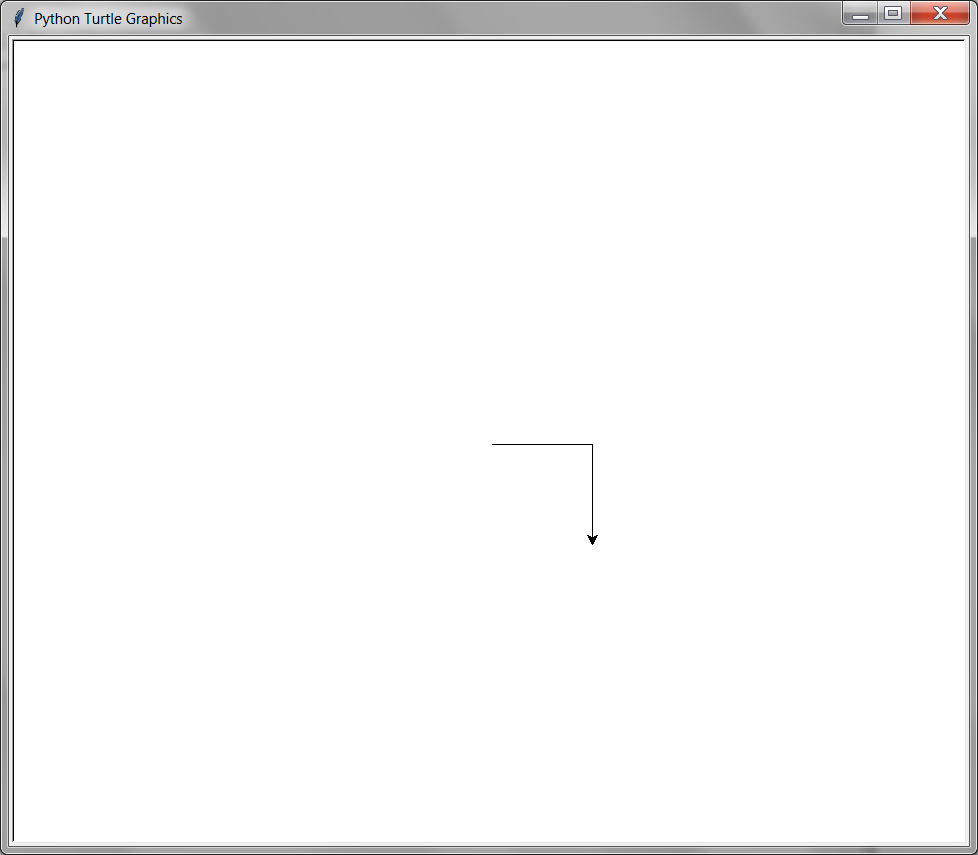
This example moves the turtle forward, then turns right by 90 degrees, then moves forward again:
This example moves the turtle forward, then turns left by 90 degrees, then moves forward again:
from turtle import *
forward(100)
right(90)
forward(100)
done()
8.5.4. left(angle)#
The left() function will change the current direction counter-clockwise or anti-clockwise by angle degrees. If you imagine being above the turtle looking down, the turtle turning left looks like it is turning counter-clockwise or anti-clockwise. The turtle will not move; it will only change the direction it is facing.
This example moves the turtle forward, then turns left by 90 degrees, then moves forward again:
from turtle import *
forward(100)
left(90)
forward(100)
done()
8.5.5. goto(x, y)#
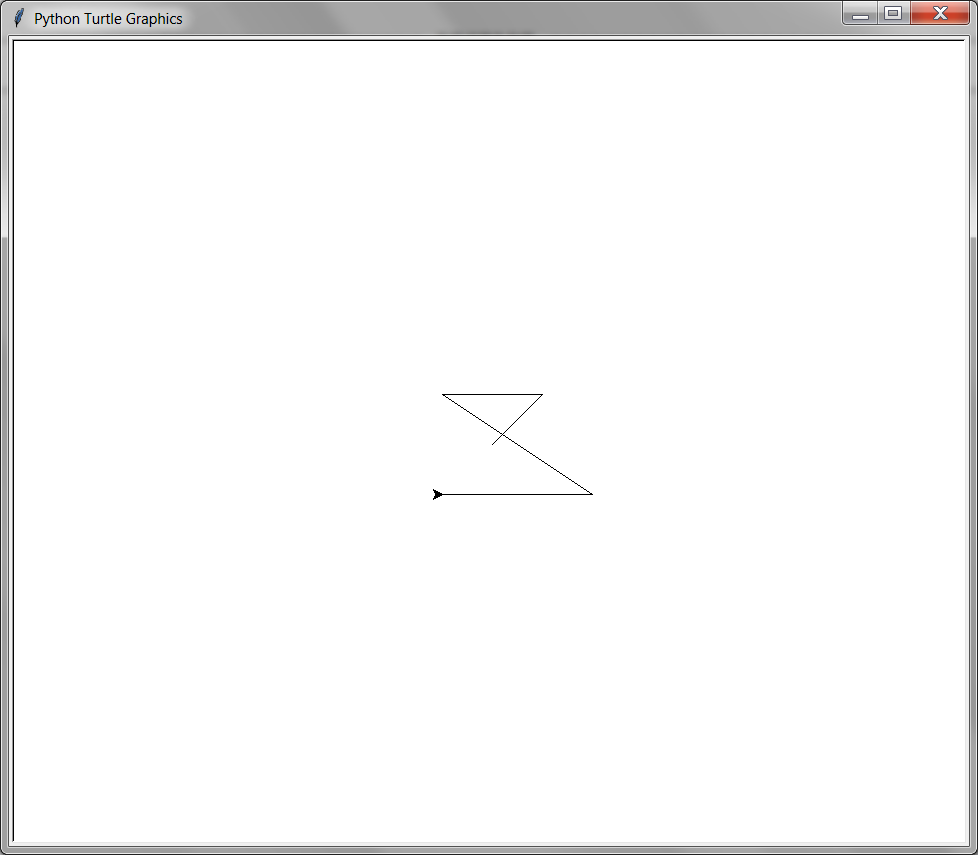
The goto() function will immediately move the turtle to the given x and y coordinates. If the pen is down (see pendown() and penup()) a line will be drawn from the previous coordinates to the new coordinates.
This example moves the to several x and y coordinates while drawing a line behind it:
from turtle import *

goto(50, 50)
goto(-50, 50)
goto(100, -50)
goto(-50, -50)
done()
8.5.6. setx(x)#
The goto() function will immediately move the turtle to the given x coordinate. The turtle’s y coordinate will stay the same. If the pen is down (see pendown() and penup()) a line will be drawn from the previous coordinates to the new coordinates.
8.5.7. sety(y)#
The goto() function will immediately move the turtle to the given y coordinate. The turtle’s x coordinate will stay the same. If the pen is down (see pendown() and penup()) a line will be drawn from the previous coordinates to the new coordinates.
8.5.8. setheading(heading)#
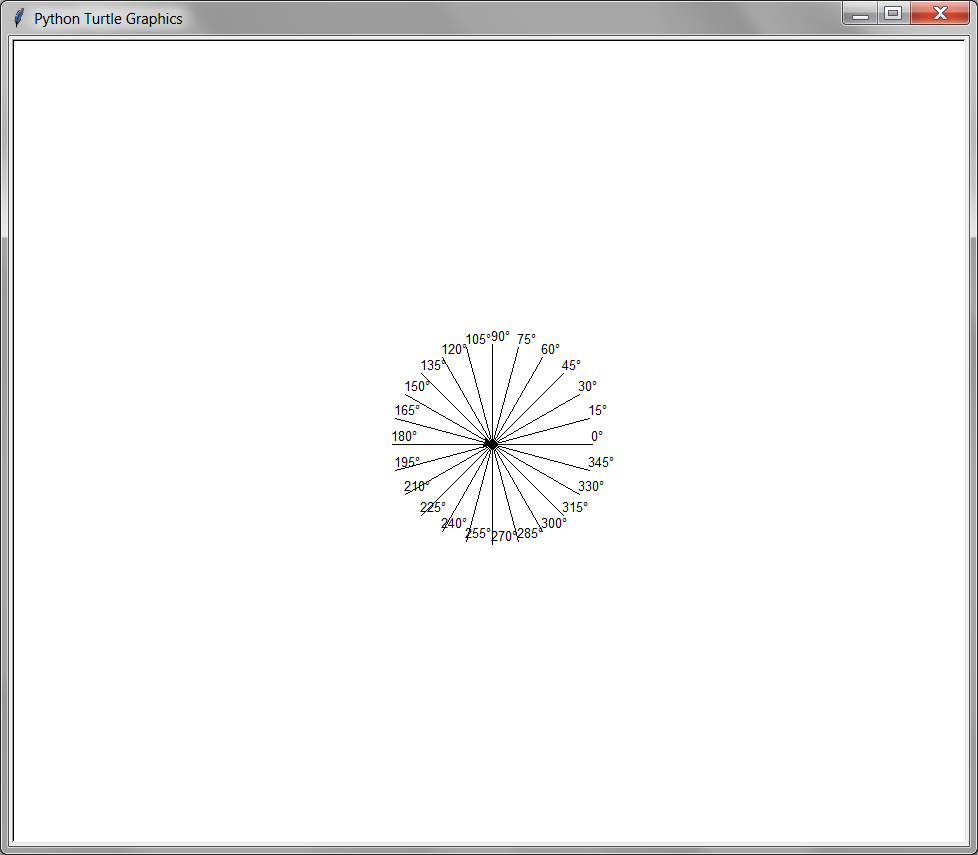
The setheading() function will change the current direction to the heading angle. If you imagine being above the turtle looking down, the turtle turning left looks like it is turning counter-clockwise or anti-clockwise. The turtle will not move; it will only change the heading it is facing.
from turtle import *

for angle in range(0, 360, 15):
    setheading(angle)
    forward(100)
    write(str(angle) + '°')
    backward(100)
done()
8.5.9. undo()#
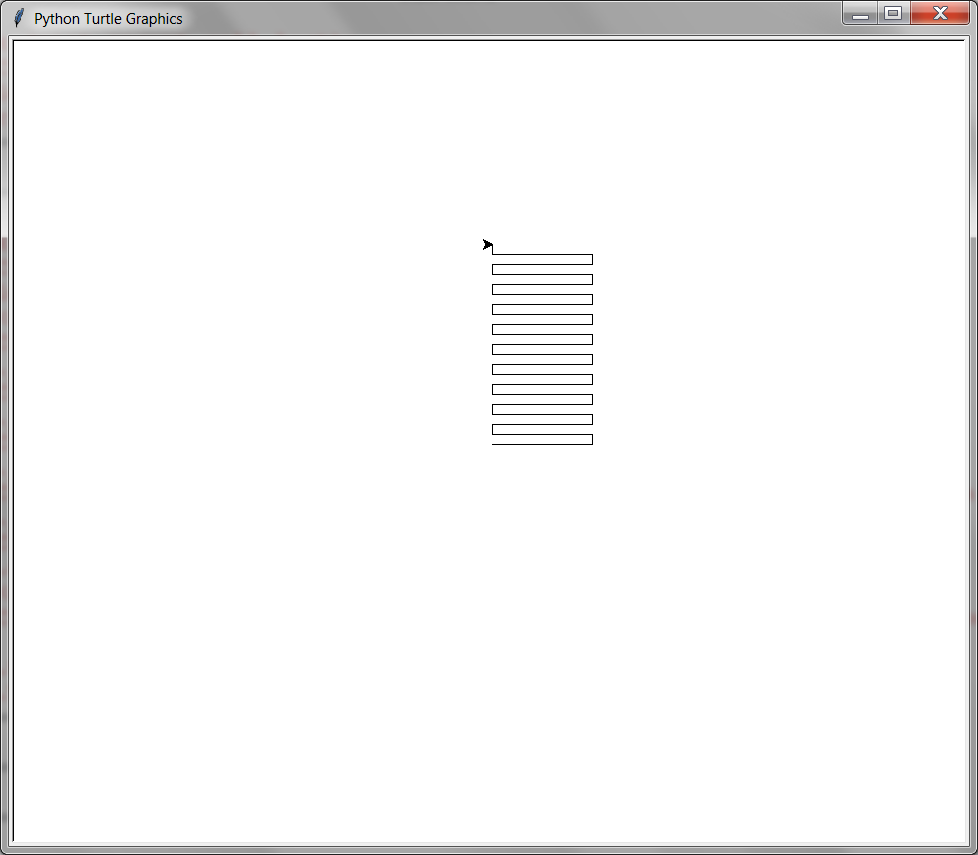
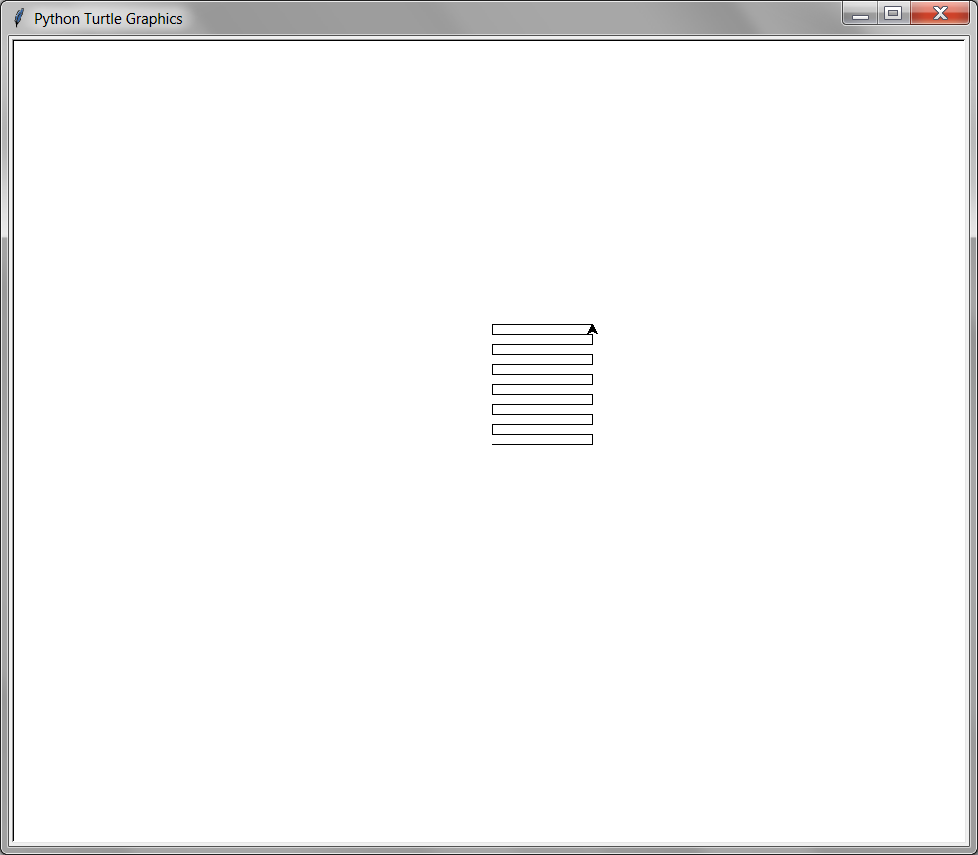
The undo() function will undo the turtle’s last action. It will be as though the last action was never made. For example, if the last action was a call to the forward(100) function, calling undo will move the turtle backwards 100 steps and erase any line that was drawn. The undo() function can be called many times to erase more and more of the turtle
from turtle import *

for i in range(10):
    forward(100)
    left(90)
    forward(10)
    left(90)
    forward(100)
    right(90)
    forward(10)
    right(90)

for i in range(30):
    undo()
done()
8.5.10. home()#
The home() function will move the turtle to it’s original position at the coordinates (0, 0) and set it’s direction to 0 degrees. Calling home() is the same as calling goto(0, 0) and setheading(0). If the pen is down (see pendown() and penup()) a line will be drawn as the turtle moves back home.
from turtle import *

forward(100)
right(90)
forward(100)
home()
done()

8.6. Drawing#
8.6.1. pendown()#
The pendown() function will cause the turtle to draw as it moves around. The line it draws can be set with the pencolor() and pensize() functions.
8.6.2. penup()#
The penup() function will cause the turtle to draw as it moves around. The line it draws can be set with the pencolor() and pensize() functions.
8.6.3. pensize(size)#
The pensize() function sets the width of the line that the turtle draws as it moves.
8.6.4. pencolor(), pencolor(color), pencolor((red, green, blue)), pencolor(red, green, blue)#
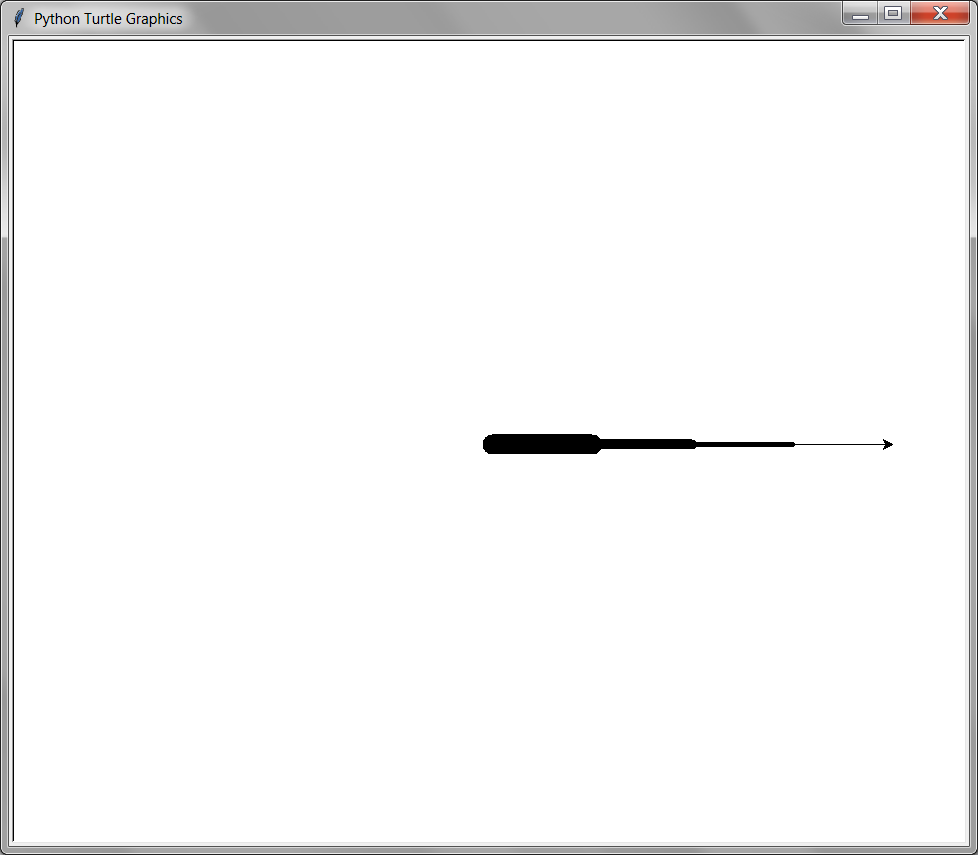
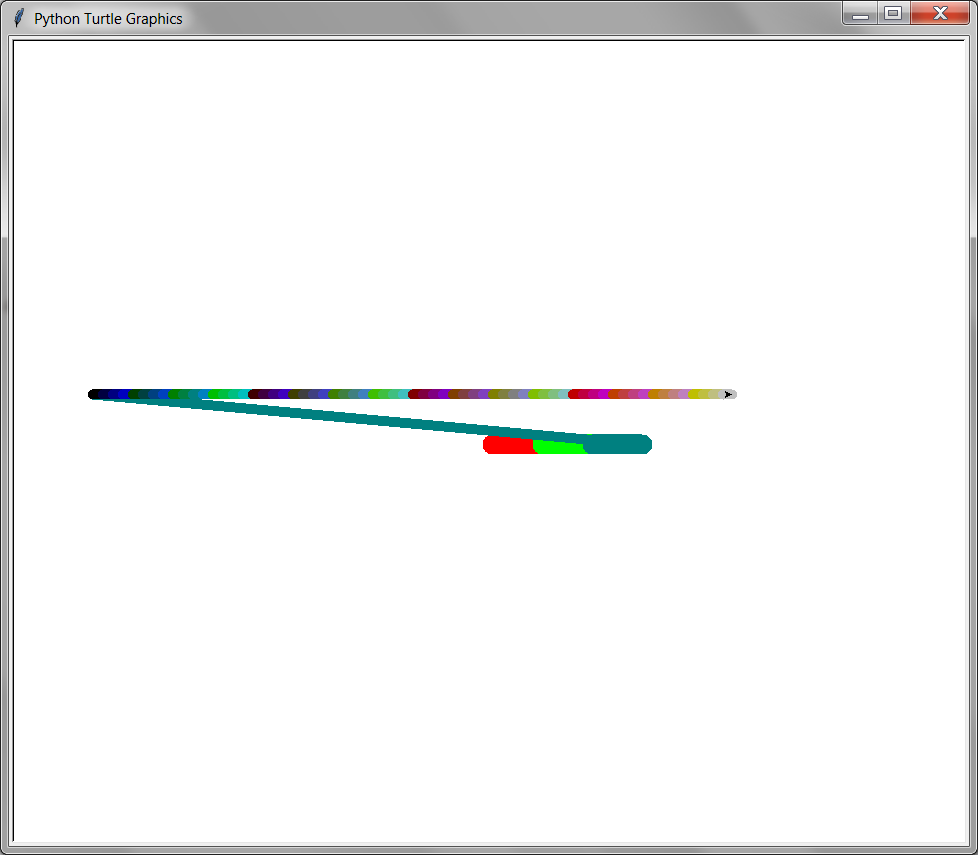
The pencolor() function sets the color of the line that the turtle draws. The pencolor() function can be passed a string of the color, such as ‘red’ or ‘black’. Or, the pencolor() function can be passed an “RGB color tuple” (see the Color section).
from turtle import *

pensize(20)
pencolor('red')
forward(50)
pencolor(0, 1.0, 0)
forward(50)
pencolor((0, 0.5, 0.5))
forward(50)

pensize(10)
goto(-400, 50)

for red in range(4):
    for green in range(4):
        for blue in range(4):
            pencolor(red / 4.0, green / 4.0, blue / 4.0)
            forward(10)
done()
8.6.5. clear()#
The clear() function will erase all the line drawings on the screen. This function does not move the turtle.
8.6.6. reset()#
The reset()) function will erase all the line drawings on the screen and return the turtle to the (0, 0) coordinate and facing 0 degrees. This function does the same thing as calling the clear() and home() function.
8.7. Color#
Red, green, and blue are the three primary colors of light.
The float value 0.0 represents none of that color. The float value 1.0 represents a full color. So the color red is represented by the RGB color tuple (1.0, 0, 0). The color purple is half-red and half-blue, so it is represented by the RGB color tuple (0.5, 0.0, 0.5). Full red and blue makes pink: (1.0, 0.0, 1.0). The full list of possible colors availabel are in this link.
Here are some RGB color tuples:
| (0.2, 0.0, 0.0) | (0.2, 0.1, 0.0) | (0.2, 0.2, 0.0) | (0.1, 0.2, 0.0) | (0.0, 0.2, 0.0) | (0.0, 0.2, 0.1) | (0.0, 0.2, 0.2) | (0.0, 0.1, 0.2) | (0.0, 0.0, 0.2) | (0.1, 0.0, 0.2) | (0.2, 0.0, 0.2) | (0.2, 0.0, 0.1) | (0.0, 0.0, 0.0) |
| (0.4, 0.0, 0.0) | (0.4, 0.2, 0.0) | (0.4, 0.4, 0.0) | (0.2, 0.4, 0.0) | (0.0, 0.4, 0.0) | (0.0, 0.4, 0.2) | (0.0, 0.4, 0.4) | (0.0, 0.2, 0.4) | (0.0, 0.0, 0.4) | (0.2, 0.0, 0.4) | (0.4, 0.0, 0.4) | (0.4, 0.0, 0.2) | (0.13, 0.13, 0.13) |
| (0.6, 0.0, 0.0) | (0.6, 0.3, 0.0) | (0.6, 0.6, 0.0) | (0.3, 0.6, 0.0) | (0.0, 0.6, 0.0) | (0.0, 0.6, 0.3) | (0.0, 0.6, 0.6) | (0.0, 0.3, 0.6) | (0.0, 0.0, 0.6) | (0.3, 0.0, 0.6) | (0.6, 0.0, 0.6) | (0.6, 0.0, 0.3) | (0.25, 0.25, 0.25) |
| (0.8, 0.0, 0.0) | (0.8, 0.4, 0.0) | (0.8, 0.8, 0.0) | (0.4, 0.8, 0.0) | (0.0, 0.8, 0.0) | (0.0, 0.8, 0.4) | (0.0, 0.8, 0.8) | (0.0, 0.4, 0.8) | (0.0, 0.0, 0.8) | (0.4, 0.0, 0.8) | (0.8, 0.0, 0.8) | (0.8, 0.0, 0.4) | (0.38, 0.38, 0.38) |
| (1.0, 0.0, 0.0) | (1.0, 0.5, 0.0) | (1.0, 1.0, 0.0) | (0.5, 1.0, 0.0) | (0.0, 1.0, 0.0) | (0.0, 1.0, 0.5) | (0.0, 1.0, 1.0) | (0.0, 0.5, 1.0) | (0.0, 0.0, 1.0) | (0.5, 0.0, 1.0) | (1.0, 0.0, 1.0) | (1.0, 0.0, 0.5) | (0.5, 0.5, 0.5) |
| (1.0, 0.2, 0.2) | (1.0, 0.6, 0.2) | (1.0, 1.0, 0.2) | (0.6, 1.0, 0.2) | (0.2, 1.0, 0.2) | (0.2, 1.0, 0.6) | (0.2, 1.0, 1.0) | (0.2, 0.6, 1.0) | (0.2, 0.2, 1.0) | (0.6, 0.2, 1.0) | (1.0, 0.2, 1.0) | (1.0, 0.2, 0.6) | (0.63, 0.63, 0.63) |
| (1.0, 0.4, 0.4) | (1.0, 0.7, 0.4) | (1.0, 1.0, 0.4) | (0.7, 1.0, 0.4) | (0.4, 1.0, 0.4) | (0.4, 1.0, 0.7) | (0.4, 1.0, 1.0) | (0.4, 0.7, 1.0) | (0.4, 0.4, 1.0) | (0.7, 0.4, 1.0) | (1.0, 0.4, 1.0) | (1.0, 0.4, 0.7) | (0.75, 0.75, 0.75) |
| (1.0, 0.6, 0.6) | (1.0, 0.8, 0.6) | (1.0, 1.0, 0.6) | (0.8, 1.0, 0.6) | (0.6, 1.0, 0.6) | (0.6, 1.0, 0.8) | (0.6, 1.0, 1.0) | (0.6, 0.8, 1.0) | (0.6, 0.6, 1.0) | (0.8, 0.6, 1.0) | (1.0, 0.6, 1.0) | (1.0, 0.6, 0.8) | (0.88, 0.88, 0.88) |
| (1.0, 0.8, 0.8) | (1.0, 0.9, 0.8) | (1.0, 1.0, 0.8) | (0.9, 1.0, 0.8) | (0.8, 1.0, 0.8) | (0.8, 1.0, 0.9) | (0.8, 1.0, 1.0) | (0.8, 0.9, 1.0) | (0.8, 0.8, 1.0) | (0.9, 0.8, 1.0) | (1.0, 0.8, 1.0) | (1.0, 0.8, 0.9) | (1.0, 1.0, 1.0) |
RGB Color Tuple:
8.8. Filling in Shapes#
The turtle can draw the outline of a shape and then fill it in with color using the fill functions. The filling process starts when the begin_color() function is called. The turtle can move around as normal. When the end_fill() function is called, the shape the turtle was drawing will be filled with the fill color. The fill color is separate from the pen color.
from turtle import *

fillcolor('purple')
pensize(10)
pencolor('black')
forward(100)

begin_fill()
forward(100)
left(90)
forward(100)
left(90)
forward(100)
left(90)
forward(100)
left(90)
end_fill()
done()

8.8.1. fillcolor(), fillcolor(color), fillcolor((red, green, blue)), fillcolor(red, green, blue)#
The fillcolor() function sets the color of the filled in shape when end_fill() is called. The fillcolor() function can be passed a string of the color, such as ‘red’ or ‘black’. Or, the fillcolor() function can be passed an “RGB color tuple” (see the Color section).
8.8.2. begin_fill()#
The begin_fill() starts recording the moves that will be the outline of the filled-in shape. The filled-in shape will not be drawn until end_fill() is called.
8.8.3. end_fill()#
The end_fill() function will stop recording the moves for the filled-in shape and draw the shape.
8.9. Stamping#
8.9.1. stamp()#
from turtle import *

penup()

for i in range(30, -1, -1):
    stamp()
    left(i)
    forward(20)
done()

8.9.2. clearstamp()#
8.9.3. clearstamps()#
8.10. Animation#
8.10.1. tracer()#
8.11. Turtle Status#
8.11.1. position()#
8.11.2. towards()#
8.11.3. distance()#
8.11.4. degrees()#
8.11.5. radians()#
8.11.6. isdown()#
8.11.7. isvisible()#
8.12. Input#
8.13. Events#
8.13.1. listen()#
8.13.2. onkey()#
from turtle import *

def up():
    setheading(90)
    forward(100)

def down():
    setheading(270)
    forward(100)

def left():
    setheading(180)
    forward(100)

def right():
    setheading(0)
    forward(100)

listen()

onkey(up, 'Up')
onkey(down, 'Down')
onkey(left, 'Left')
onkey(right, 'Right')

onkey(up, 'w')
onkey(down, 's')
onkey(left, 'a')
onkey(right, 'd')
done()
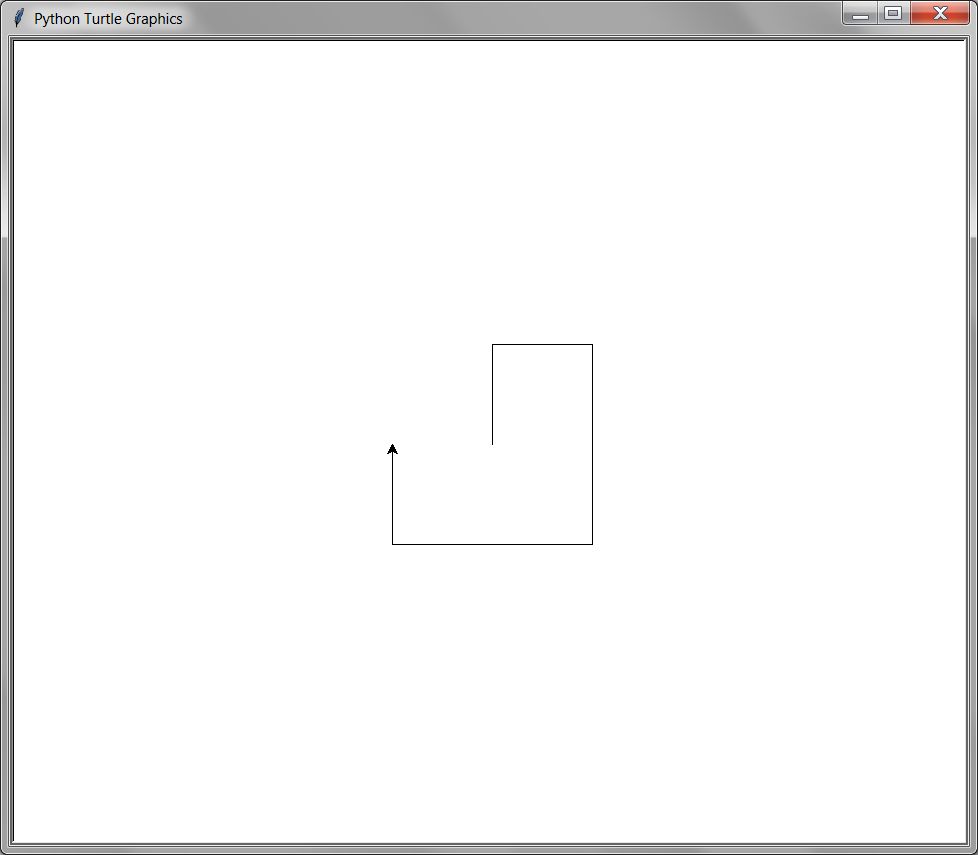
up, right, down, down, left, left, up
8.13.3. onkeypress()#
from turtle import *

def blue_screen():
    bgcolor(0.7, 1.0, 1.0)

def white_screen():
    bgcolor(1.0, 1.0, 1.0)

listen()
onkeypress(blue_screen, 'space')
onkey(white_screen, 'space')
8.13.4. onclick()#
8.13.5. ontimer()#
8.13.6. done()#
8.13.7. exitonclick()#
8.14. The Turtle#
8.14.1. showturtle()#
8.14.2. hideturtle()#
8.14.3. shape()#
8.15. The World#
8.15.1. bgcolor()#
8.15.2. bgpic()#
8.15.3. title()#
8.15.4. screensize()#
8.15.5. window_height()#
8.15.6. window_width()#
8.15.7. listen()#
8.16. More examples#
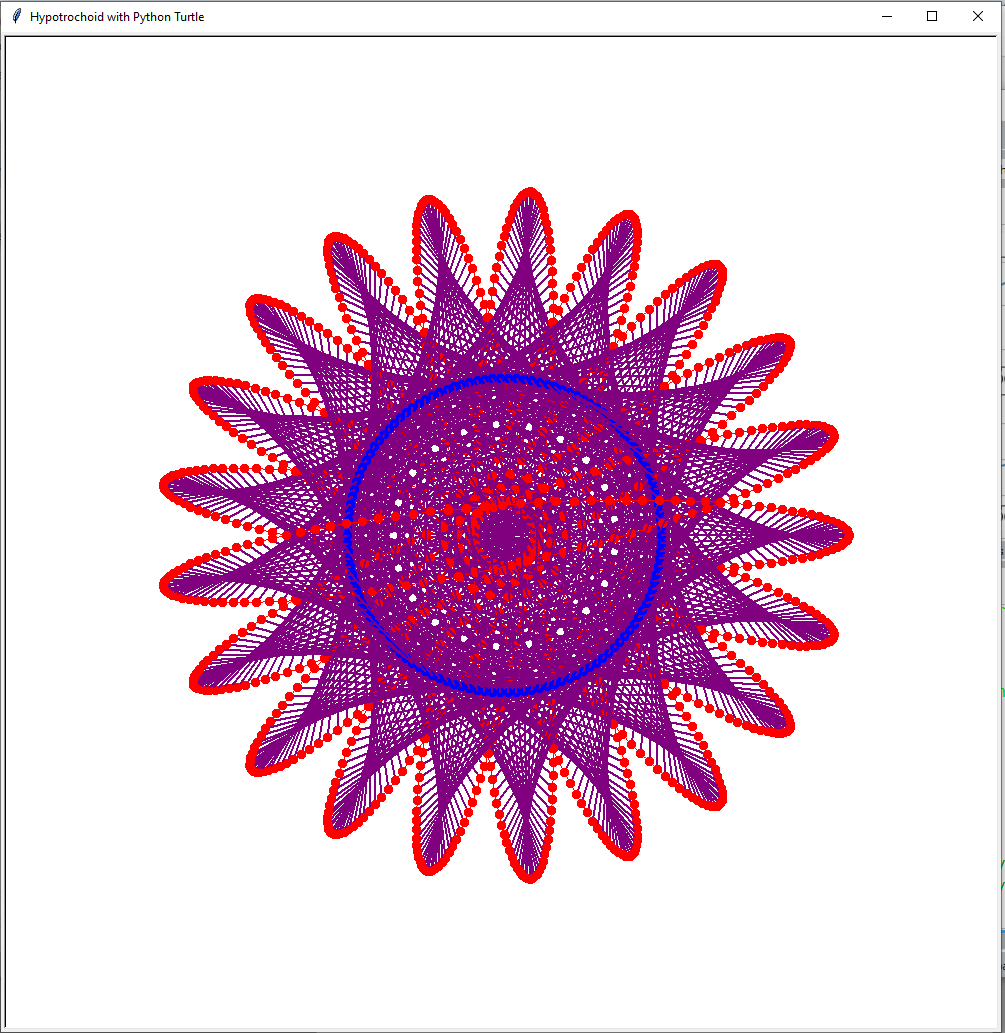
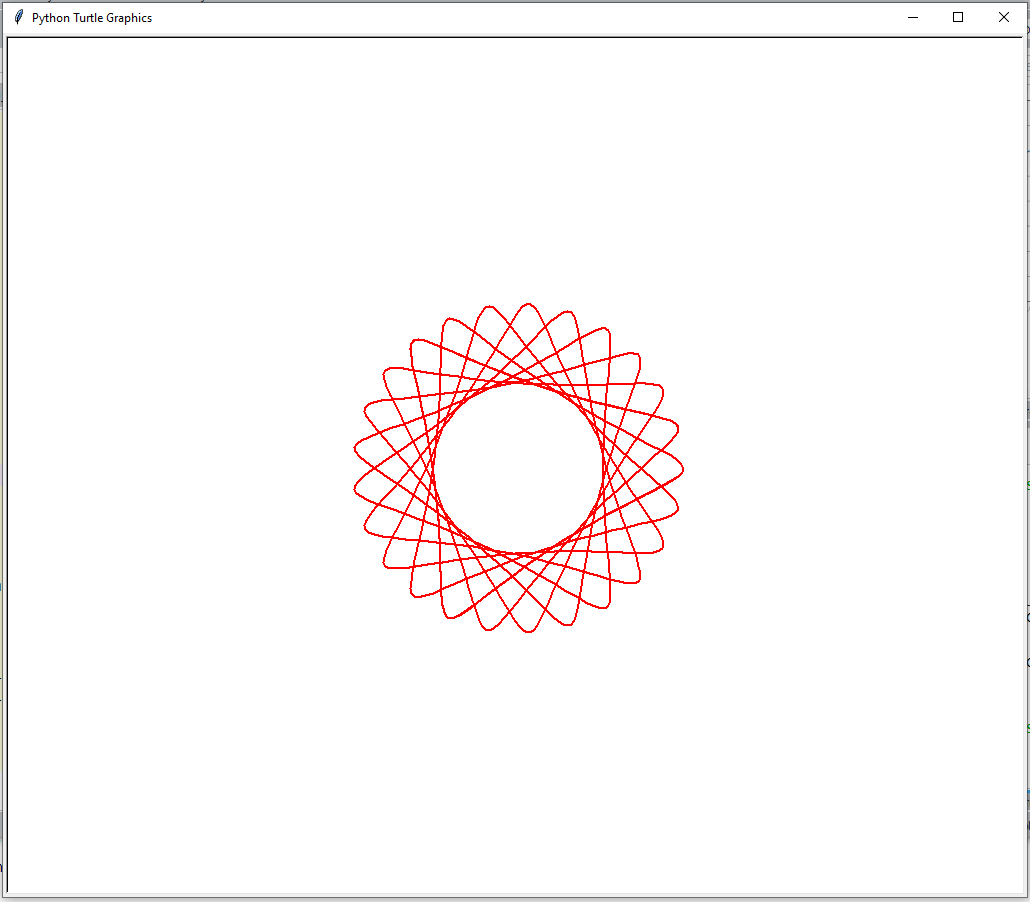
Hypotrochoids and epitrochoids are curves formed by tracing a point extending from the center of a circle as it rolls around the inside (for a hypotrochoid) or the outside (for an epitrochoid) of a fixed circle.
The resulting curves can be incredibly intricate, elegant, and pleasing to the eye and have a surprisingly wide range of applications ranging from engineering and astronomy to even patterns printed on banknotes and passports as security measures against counterfeiting.
8.16.1. Exploring the math behind these patterns#
Hypotrochoids and epitrochoids can be broken down to a few key inputs and a set of parametric equations.
The inputs are:
\(R\): the radius of the fixed circle
\(r\): the radius of the rolling circle
\(d\): the distance from the interior of the rolling circle
\(\theta\): the angle formed by the horizontal and the center of the rolling circle
with the parametric equations defined as:
Hypotrochoid
Epitrochoid
Given this information, we can draw our curves using the output \((x,y)\) coordinates calculated by the parametric equations.
On top of hypotrochoids and epitrochoids, we can define special cases of these curves such as the:
Hypocycloid
Epicycloid
Deltoid
Astroid
Some examples are:
Hypotrochoid:
from turtle import *
import math

screen = Screen()
screen.setup(1000,1000)
screen.title("Hypotrochoid with Python Turtle")
screen.tracer(0,0)

speed(0)
hideturtle()
up()
pensize(2)
t = Turtle()
t.up()
t.hideturtle()
t.speed(0)
tt = Turtle()
tt.hideturtle()
tt.speed(0)
first = True

r_big=300
r_small=r_big/2.1
d = r_big/1.6

t3 = Turtle()
t3.hideturtle()
t3.speed(0)
t3.pensize(2)
t3.up()
t3.seth(0)
t3.goto(0,-r_big)
t3.down()
#t3.circle(r_big,steps=200)

tt.up()
tt.pensize(1)
tt.color('red')
first = True

def draw_circle(x,y,angle):
    global first
##    clear()
##    up()
##    seth(0)
##    goto(x,y-r_small)
##    down()
##    color('black')
#    circle(r_small,steps=200)
    up()
    goto(x,y)
    dot(10,'blue')
    down()
    seth(angle)
    color('purple')
    fd(d)
    dot(10,'red')
    tt.goto(xcor(),ycor())
    if first:
        tt.down()
        first = False

angle = 0
dist = -r_small*angle*math.pi/180
big_radian = dist/r_big
x = (r_big-r_small)*math.cos(big_radian)
y = (r_big-r_small)*math.sin(big_radian)
draw_circle(x,y,angle+big_radian*180/math.pi)
while True:
    angle -= 6
    dist = -r_small*angle*math.pi/180
    big_radian = dist/r_big
    x = (r_big-r_small)*math.cos(big_radian)
    y = (r_big-r_small)*math.sin(big_radian)
    draw_circle(x,y,angle+big_radian*180/math.pi)
    if angle % 360 == 0 and int(round(big_radian*180/math.pi)) % 360 == 0:
        break
    update()

# uncomment to get only the last curve
#clear()
t3.clear()
update()

done()
Result:
Spidograph:
import turtle
from math import cos,sin, pi

window = turtle.Screen()
myPen = turtle.Turtle()
myPen.hideturtle()
myPen.speed(0)
myPen.pensize(2)
myPen.color("red")

R = 125
r = 85
d = 125
angle = 0

myPen.up()
myPen.goto(R-r+d,0)
myPen.down()

theta = 0.2
steps = 8 * int(6*pi/theta)

for t in range(0,steps):
    angle+=theta
    x = (R - r) * cos(angle) + d * cos(((R-r)/r)*angle)
    y = (R - r) * sin(angle) - d * sin(((R-r)/r)*angle)
    myPen.goto(x,y)

myPen.done()
Result:
8.16.2. Recursion#
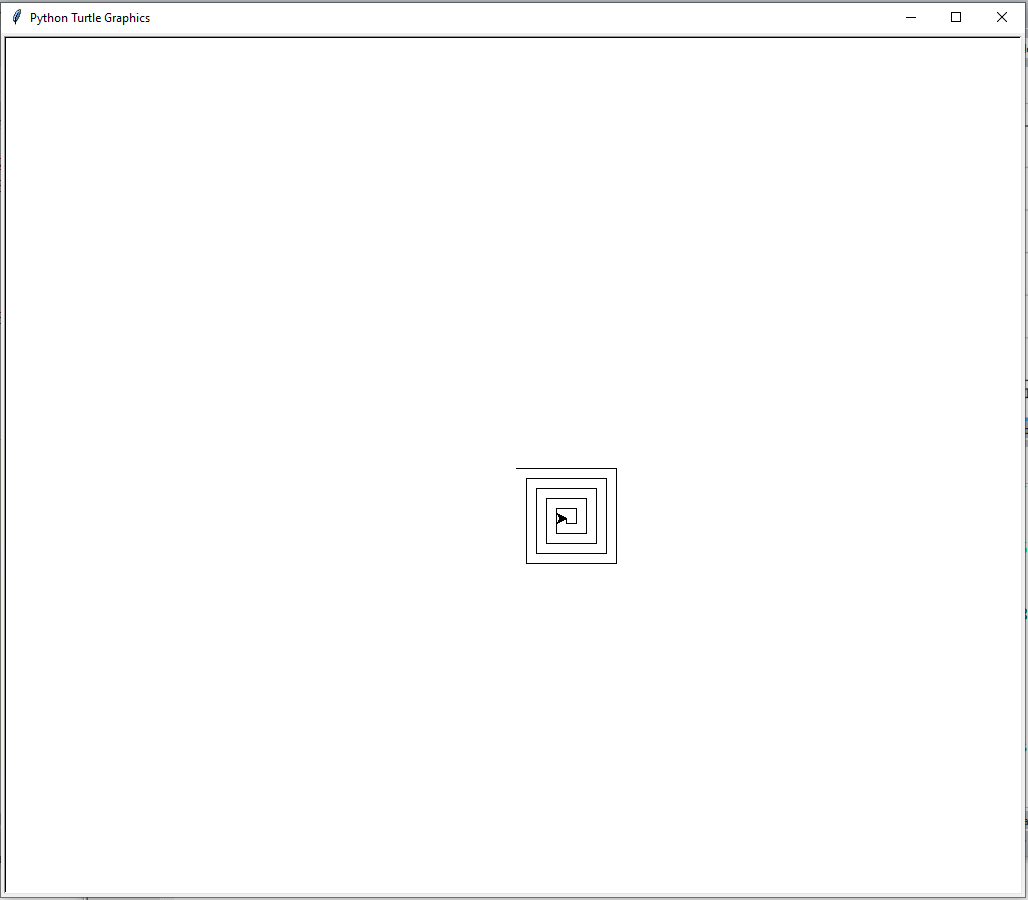
We can use recursion to draw some interesting pictures. The following are some example:
8.16.2.1. Spirals#
import turtle

myTurtle = turtle.Turtle()
myWin = turtle.Screen()

def drawSpiral(myTurtle, lineLen):
    if lineLen > 0:
        myTurtle.forward(lineLen)
        myTurtle.right(90)
        drawSpiral(myTurtle,lineLen-5)

drawSpiral(myTurtle,100)
myWin.exitonclick()
Result:
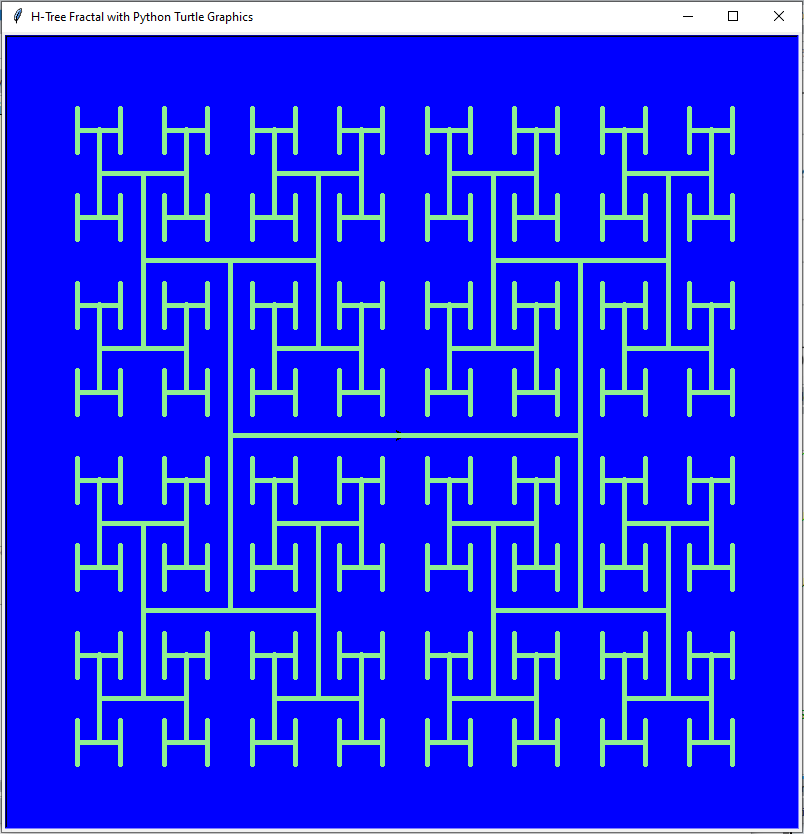
8.16.2.2. H-tree fractals#
from turtle import *

SPEED = 0
BG_COLOR = "blue"
PEN_COLOR = "lightgreen"
SCREEN_WIDTH = 800
SCREEN_HEIGHT = 800
DRAWING_WIDTH = 700
DRAWING_HEIGHT = 700
PEN_WIDTH = 5
TITLE = "H-Tree Fractal with Python Turtle Graphics"
FRACTAL_DEPTH = 3


def draw_line(tur, pos1, pos2):
    # print("Drawing from", pos1, "to", pos2)  # Uncomment for tracing the algorithm.
    tur.penup()
    tur.goto(pos1[0], pos1[1])
    tur.pendown()
    tur.goto(pos2[0], pos2[1])


def recursive_draw(tur, x, y, width, height, count):
    draw_line(
        tur,
        [x + width * 0.25, height // 2 + y],
        [x + width * 0.75, height // 2 + y],
    )
    draw_line(
        tur,
        [x + width * 0.25, (height * 0.5) // 2 + y],
        [x + width * 0.25, (height * 1.5) // 2 + y],
    )
    draw_line(
        tur,
        [x + width * 0.75, (height * 0.5) // 2 + y],
        [x + width * 0.75, (height * 1.5) // 2 + y],
    )

    if count <= 0:  # The base case
        return
    else:  # The recursive step
        count -= 1
        # Top left
        recursive_draw(tur, x, y, width // 2, height // 2, count)
        # Top right
        recursive_draw(tur, x + width // 2, y, width // 2, height // 2, count)
        # Bottom left
        recursive_draw(tur, x, y + width // 2, width // 2, height // 2, count)
        # Bottom right
        recursive_draw(tur, x + width // 2, y + width // 2, width // 2, height // 2, count)


if __name__ == "__main__":
    # Screen setup
    screen = Screen()
    screen.setup(SCREEN_WIDTH, SCREEN_HEIGHT)
    screen.title(TITLE)
    screen.bgcolor(BG_COLOR)

    # Turtle artist (pen) setup
    artist = Turtle()
    artist.hideturtle()
    artist.pensize(PEN_WIDTH)
    artist.color(PEN_COLOR)
    artist.speed(SPEED)

    # Initial call to recursive draw function
    recursive_draw(artist, - DRAWING_WIDTH / 2, - DRAWING_HEIGHT / 2, DRAWING_WIDTH, DRAWING_HEIGHT, FRACTAL_DEPTH)

    # Every Python Turtle program needs this (or an equivalent) to work correctly.
    done()
Result:
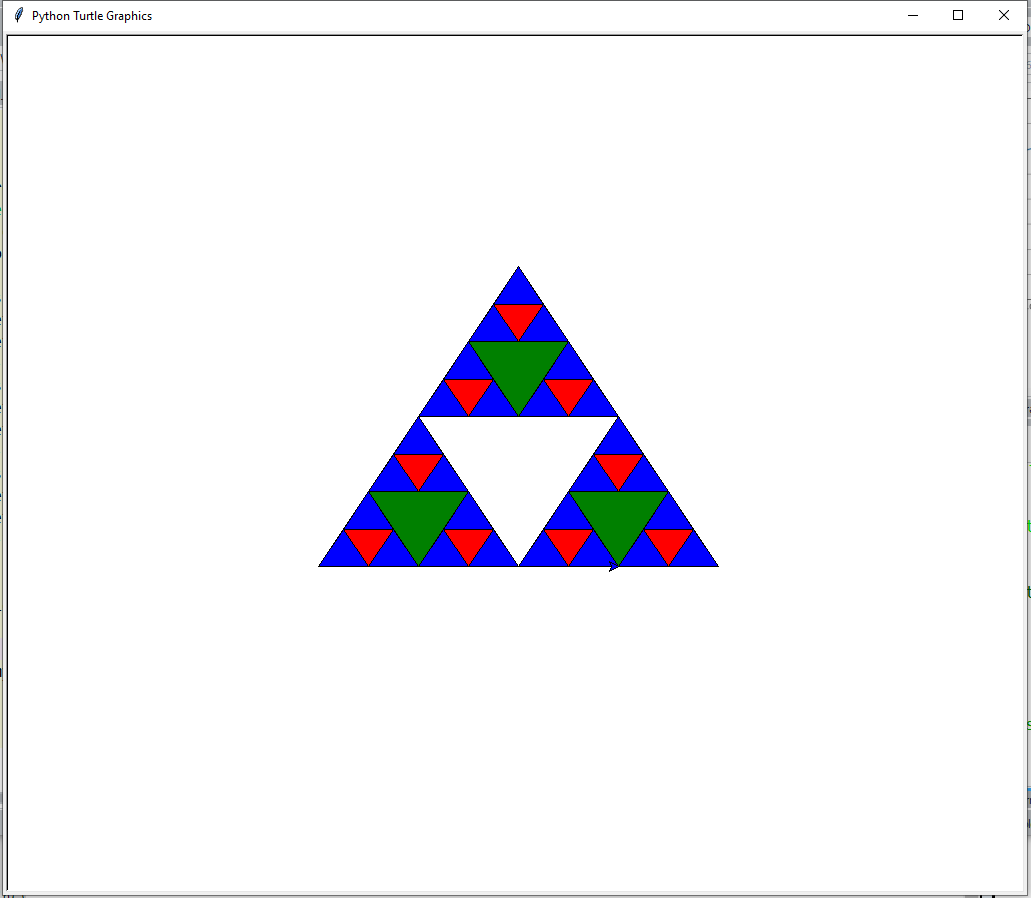
8.16.2.3. Sierpinski’s triangles#
import turtle

def drawTriangle(points,color,myTurtle):
    myTurtle.fillcolor(color)
    myTurtle.up()
    myTurtle.goto(points[0][0],points[0][1])
    myTurtle.down()
    myTurtle.begin_fill()
    myTurtle.goto(points[1][0],points[1][1])
    myTurtle.goto(points[2][0],points[2][1])
    myTurtle.goto(points[0][0],points[0][1])
    myTurtle.end_fill()

def getMid(p1,p2):
    return ( (p1[0]+p2[0]) / 2, (p1[1] + p2[1]) / 2)

def sierpinski(points,degree,myTurtle):
    colormap = ['blue','red','green','white','yellow',
                'violet','orange']
    drawTriangle(points,colormap[degree],myTurtle)
    if degree > 0:
        sierpinski([points[0],
                        getMid(points[0], points[1]),
                        getMid(points[0], points[2])],
                   degree-1, myTurtle)
        sierpinski([points[1],
                        getMid(points[0], points[1]),
                        getMid(points[1], points[2])],
                   degree-1, myTurtle)
        sierpinski([points[2],
                        getMid(points[2], points[1]),
                        getMid(points[0], points[2])],
                   degree-1, myTurtle)

def main():
   myTurtle = turtle.Turtle()
   myWin = turtle.Screen()
   myPoints = [[-200,-100],[0,200],[200,-100]]
   sierpinski(myPoints,3,myTurtle)
   myWin.exitonclick()

main()
Result:
8.16.2.4. Tree#
import turtle

def tree(branchLen,t):
    if branchLen > 5:
        t.forward(branchLen)
        t.right(20)
        tree(branchLen-15,t)
        t.left(40)
        tree(branchLen-15,t)
        t.right(20)
        t.backward(branchLen)

def main():
    t = turtle.Turtle()
    myWin = turtle.Screen()
    t.left(90)
    t.up()
    t.backward(100)
    t.down()
    t.color("green")
    tree(100,t)
    myWin.exitonclick()

main()
Result:

