Using Java Collection Frameworks
A collections framework is a unified
architecture for representing and manipulating collections. All collections
frameworks contain the following:
- Interfaces: These are abstract data types that represent
collections. Interfaces allow collections to be manipulated independently of
the details of their representation. In object-oriented languages, interfaces
generally form a hierarchy.
- Implementations: These are the concrete implementations of the
collection interfaces. In essence, they are reusable data structures.
- Algorithms: These are the methods that perform useful computations,
such as searching and sorting, on objects that implement collection
interfaces. The algorithms are said to be polymorphic: that is, the
same method can be used on many different implementations of the appropriate
collection interface. In essence, algorithms are reusable functionality.
This hands-on lab takes you through the basics of
using Java Collection Framework for developing Java applications.
Exercise 1: Build and run "Set" Collection Objects
The
Set
interface extends the Collection interface and, by definition, forbids
duplicates within the collection. All the original methods are present and no
new methods are introduced. The concrete Set implementation classes rely on the
equals() method of the object added to check for equality.
The
Collections Framework provides two general-purpose implementations of the Set
interface:
HashSet and
TreeSet. More often than not, you will use a
HashSet for storing your duplicate-free
collection. For efficiency, objects added to a HashSet need to implement the
hashCode() method in a manner that properly distributes the hash codes. While
most system classes override the default hashCode() implementation in Object,
when creating your own classes to add to a HashSet remember to override
hashCode(). The TreeSet implementation is useful when you need to extract
elements from a collection in a sorted manner. In order to work property,
elements added to a TreeSet must be sortable. The Collections Framework adds
support for Comparable elements and will be covered in detail later. For now,
just assume a tree knows how to keep elements of the java.lang wrapper classes
sorted. It is generally faster to add elements to a HashSet, then convert the
collection to a TreeSet for sorted traversal.
To optimize HashSet space
usage, you can tune the initial capacity and load factor. The TreeSet has no
tuning options, as the tree is always balanced, ensuring log(n) performance for
insertions, deletions, and queries.
Tasks to be performed:
- Build
and run an application that uses HashSet
- Find
duplication via HashSet
- Find
duplication via HasetSet 2
- Build
and run an application that uses TreeSet
- Build
and run an application that uses LinkedHashSet
- Set
and polymorphism
(1.1) Build and run
an application that uses HashSet
In this step, you are going to build an
application that uses
HashSet. You
are going to exercise various methods of the
HashSet class. The following is quoted
from online
JavaDoc of
the HashSet
This class implements the Set interface,
backed by a hash table (actually a HashMap instance). It makes no
guarantees as to the iteration order of the set; in particular, it does not
guarantee that the order will remain constant over time. This class permits the
null element.
This class offers constant time performance for the
basic operations (add, remove, contains and
size), assuming the hash function disperses the elements properly among
the buckets. Iterating over this set requires time proportional to the sum of
the HashSet instance's size (the number of elements) plus the
"capacity" of the backing HashMap instance (the number of buckets).
Thus, it's very important not to set the initial capacity too high (or the load
factor too low) if iteration performance is important.
0. Start NetBeans IDE
if you have not done so yet.
1. Create a new NetBeans project
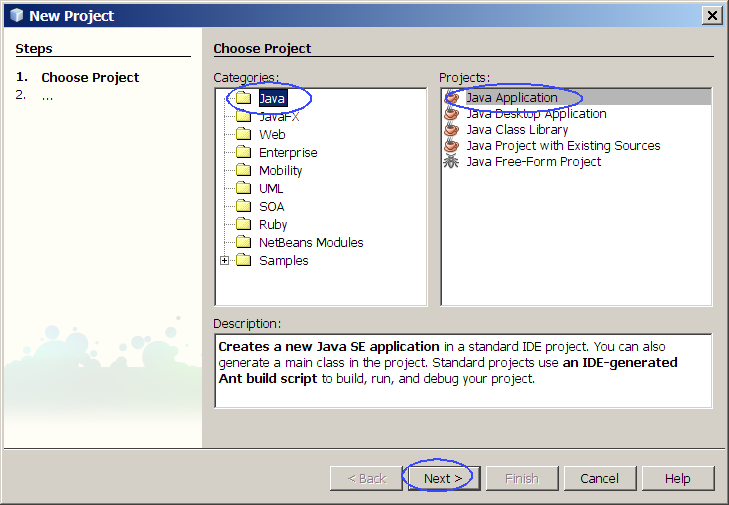
- Select File->New Project (Ctrl+Shift+N). The New Project dialog box appears.
- Under Choose Project pane, select
Java under Categories and Java Application under Projects.
- Click Next.
- Under Name and Location pane, for
the Project Name field, type in Set-HashSet-add as project name.
- For Create Main Class field, take
the default value sethashsetadd.Main
provided by the IDE.
- Click Finish.
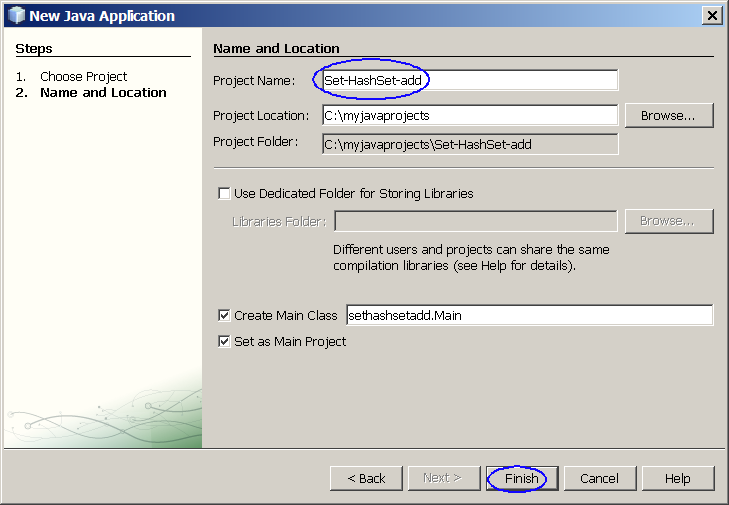
Figure-1.10: Create a new project
- Observe that Set-HashSet-add
project appears and IDE generated Main.java is displayed in the source editor
window of NetBeans IDE.
2. Modify the IDE generated
Main.java as shown in Code-1.10 below.
Study the code by paying special attention to the bold fonted comments.
package sethashsetadd;
import
java.util.HashSet;
public class Main {
public static void main(String[] args)
{
// Create HashSet
object
HashSet hs =
new HashSet(5, 0.5f);
System.out.println(hs.add("one"));
System.out.println(hs.add("two"));
System.out.println(hs.add("three"));
System.out.println(hs.add("four"));
System.out.println(hs.add("five"));
// Print out the HashSet
object
System.out.println(hs);
// Add a duplicate item to the
HashSet
Boolean b =
hs.add("one");
System.out.println("Duplicate item allowed = " +
b);
System.out.println(hs);
}
}
|
Code-1.10: Modified
Main.java
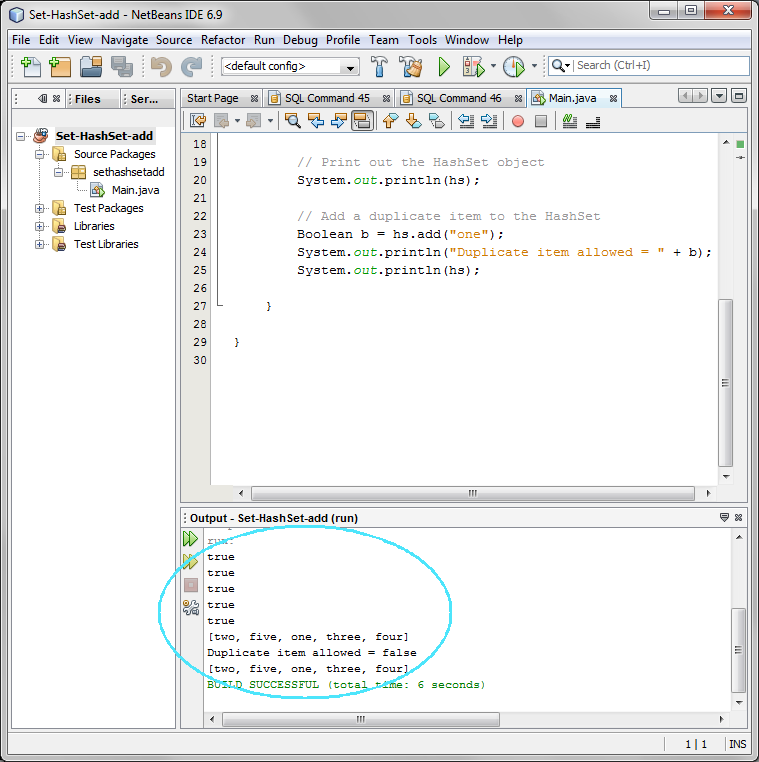
3. Build and run the project
- Right click Set-HashSet-add project
and select Run.
- Observe the result in the Output
window. (Figure-1.11 below)
true
true
true
true
true
[one,
two, five, three, four]
Duplicate item allowed = false
[one, two,
five, three, four]
|
Figure-1.11: Result of running
Set-HashSet-add application
 Trouble-shooting
and solution
Trouble-shooting
and solution: If you are seeing
the following warning message during compilation, that is expected
behavior. This warning message is generated by javac compiler since you
are not specifying the type of the collection using Generics. For now,
just ignore the message.
- Compiling 1 source file to
C:\ej_java\Main.java
uses unchecked or unsafe operations.
Note: Recompile with -Xlint:unchecked
for details.
4. For your own exercise, please do the
following
- Create your own NetBeans project named as MyHashSet
- Create your own HashSet object with
initial capacity of 5
- Add the following objects to the newly created HashSet object
- 2 String objects
- 2 MyOwnClass object (You will have to create MyOwnClass.java first)
- 3 Integer objects
- Display the HashSet object
return
to top of the exercise(1.2) Find
duplication via HashSet
1. Create a new NetBeans project
- Select File->New Project (Ctrl+Shift+N). The New Project dialog box appears.
- Under Choose Project pane, select
Java under Categories and Java Application under Projects. Click Next.
- Under Name and Location pane, for
the Project Name field, type in Set-HashSet-FindDup as project
name.
- For Create Main Class field, take
the default value sethashsetfinddup.Main provided by the IDE.
- Click Finish.
- Observe that Set-HashSet-FindDup
project appears and IDE generated Main.java is displayed in the source editor
window of NetBeans IDE.
2. Modify the IDE generated
Main.java as shown in Code-1.20 below.
Study the code by paying special attention to the bold fonted part.
package sethashsetfinddup;
import
java.util.HashSet;
import java.util.Set;
public class Main
{
public static void
main(String[] args) {
// Set up test
data
String name[] =
{
new
String("Sang"),
new
String("Shin"),
new
String("Boston"),
new String("Shin")
};
// Create
HashSet object instance and
//
assign it to a variable of Set
type.
Set s = new
HashSet();
for (int
i=0; i<name.length;
i++)
if
(!s.add(name[i]))
System.out.println("Duplicate detected:
"+name[i]);
System.out.println(s.size()+" distinct words detected:
"+s);
}
}
|
Code-1.20:
Modified Main.java
3. Build and run the project
- Right click Set-HashSet-FindDup
project and select Run.
- Observe the result in the Output
window. (Figure-1.21 below)
Duplicate detected: Shin
3 distinct
words detected: [Shin, Sang, Boston]
|
Figure-1.21:
Result of running Set-HashSet-FindDup application
4. For your own exercise, please do the following tasks:
- Modify Main.java as following
- Create your array of Strings called myownnames[] with duplicates
- Create a HashSet object from the array and display it and make sure
there is no duplcates in the set.
return
to top of the exercise
(1.3) Find
duplication via HashSet 2
In this step, you are going to exercise
removeAll() method.
1. Create a new NetBeans project
- Select File->New Project (Ctrl+Shift+N). The New Project dialog box appears.
- Under Choose Project pane, select
Java under Categories and Java Application under Projects. Click Next.
- Under Name and Location pane, for
the Project Name field, type in Set-HashSet-FindDup2 as project
name.
- For Create Main Class field, take
the default value provided by the IDE.
- Click Finish.
- Observe that Set-HashSet-FindDup2
project appears and IDE generated Main.java is displayed in the source editor
window of NetBeans IDE.
2. Modify the IDE generated
Main.java as shown in Code-1.30 below.
Study the code by paying special attention to the bold fonted part.
package sethashsetfinddup2;
import
java.util.HashSet;
import java.util.Set;
public class Main
{
public static void
main(String[] args) {
// Set up test
data
String name[] =
{
new
String("Sang"),
new
String("Shin"),
new
String("Boston"),
new String("Shin")
};
Set uniques
= new HashSet();
Set
dups = new HashSet();
for (int i=0;
i<name.length;
i++)
if
(!uniques.add(name[i]))
dups.add(name[i]);
// Remove items that duplicates
uniques.removeAll(dups);
System.out.println("Unique
words: " +
uniques);
System.out.println("Duplicate words: " + dups);
}
}
|
Code-1.30: Modified
Main.java
3. Build and run the project
- Right click Set-HashSet-FindDup2
project and select Run.
- Observe the result in the Output
window. (Figure-1.31 below)
Unique words: [Sang,
Boston]
Duplicate words: [Shin]
|
Figure-1.31:
Result of running Set-HashSet-FindDup2 application
4. For your own exercise, please do the following tasks:
- Modify Main.java or create your own project as following
- Create your array of Strings called myownnames[] with duplicates
- Create two HashSet objectts and use removeAll() method to remove items
that have duplicates from the original set.
- Display the two HashSet objects
return
to top of the exercise
(1.4) Build and run
an application that uses TreeSet
In this step, you are going to build an
application that uses
TreeSet. You
are going to exercise various methods of the
TreeSet class. The following is quoted
from online
JavaDoc of
the TreeSet
This class implements the Set interface, backed by a
TreeMap instance. This class guarantees that the sorted set will be in
ascending element order, sorted according to the natural order of the
elements (see Comparable), or by the comparator provided at set
creation time, depending on which constructor is used.
This implementation provides guaranteed log(n) time cost for the basic
operations (add, remove and contains).
Note that the ordering maintained by a set (whether or not an explicit
comparator is provided) must be consistent with equals if it is to
correctly implement the Set interface. (See Comparable or
Comparator for a precise definition of consistent with equals.)
This is so because the Set interface is defined in terms of the
equals operation, but a TreeSet instance performs all key
comparisons using its compareTo (or compare) method, so two
keys that are deemed equal by this method are, from the standpoint of the set,
equal. The behavior of a set is well-defined even if its ordering is
inconsistent with equals; it just fails to obey the general contract of the
Set interface.
1. Create a NetBeans project
- Select File->New Project (Ctrl+Shift+N). The New Project dialog box appears.
- Under Choose Project pane, select
Java under Categories and Java Application under Projects. Click Next.
- Under Name and Location pane, for
the Project Name field, type in Set-TreeSet as project name.
- For Create Main Class field, take
the default value provided by the IDE.
- Click Finish.
- Observe that Set-TreeSet project
appears and IDE generated Main.java is
displayed in the source editor window of NetBeans IDE.
2. Modify the
IDE generated
Main.java as shown in
Code-1.40 below.
package settreeset;
import
java.util.Set;
import java.util.TreeSet;
public class Main
{
public static void
main(String[] args) {
Set ts = new
TreeSet();
ts.add("one");
ts.add("two");
ts.add("three");
ts.add("four");
ts.add("three");
System.out.println("Members
from TreeSet = " + ts);
Set ts2 = new
TreeSet();
ts2.add(1);
ts2.add(2);
ts2.add(3);
ts2.add(4);
ts2.add(2);
System.out.println("Members
from TreeSet = " + ts2);
}
}
|
Code-1.40: Modified
Set-TreeSet.java
3. Build and run the project
- Right click Set-TreeSet project and
select Run.
- Observe the result in the Output
window. (Figure-1.41 below)
[Members from TreeSet = [four, one, three,
two]
Members from TreeSet = [1, 2, 3,
4]
|
Figure-1.41: Result of running Set-TreeSet
application
return
to top of the exercise
(1.5) Build and run
an application that uses LinkedHashSet
1. Create a new NetBeans project
- Select File->New Project (Ctrl+Shift+N). The New Project dialog box appears.
- Under Choose Project pane, select
Java under Categories and Java Application under Projects. Click Next.
- Under Name and Location pane, for
the Project Name field, type in Set-LinkedHashSet as project name.
- For Create Main Class field, take
the default value provided by the IDE.
- Click Finish.
- Observe that Set-LinkedHashSet
project appears and IDE generated Main.java is displayed in the source editor
window of NetBeans IDE.
2. Modify the IDE generated
Main.java as shown in Code-1.50 below.
Study the code by paying special attention to the bold fonted part.
package setlinkedhashset;
import
java.util.LinkedHashSet;
import java.util.Set;
public class Main
{
public static void
main(String[] args) {
Set ts = new
LinkedHashSet();
ts.add("one");
ts.add("two");
ts.add("three");
ts.add("four");
ts.add("two");
System.out.println("Members
from LinkedHashSet = " +
ts);
Set ts2 = new
LinkedHashSet();
ts2.add(2);
ts2.add(1);
ts2.add(3);
ts2.add(3);
System.out.println("Members
from LinkedHashSet = " + ts2);
}
}
|
Code-1.50: Modified
Main.java
3. Build and run the project
- Right click Set-LinkedHashSet
project and select Run.
- Observe the result in the Output
window. (Figure-1.51 below)
Members from LinkedHashSet = [one, two,
three, four]
Members from LinkedHashSet = [2, 1,
3]
|
Figure-1.51: Result of running Set-LinkedHashSet
application
return
to top of the exercise
(1.6) Set and
polymorphism
1. Create a new NetBeans project
- Select File->New Project (Ctrl+Shift+N). The New Project dialog box appears.
- Under Choose Project pane, select
Java under Categories and Java Application under Projects. Click Next.
- Under Name and Location pane, for
the Project Name field, type in Set-Polymorphism as project name.
- For Create Main Class field, take
the default value provided by the IDE.
- Click Finish.
- Observe that Set-Polymorphism
project appears and IDE generated Main.java is displayed in the source editor
window of NetBeans IDE.
2. Modify the IDE generated
Main.java as shown in Code-1.60 below.
Study the code by paying special attention to the bold fonted part.
package setpolymorphism;
import
java.util.HashSet;
import java.util.LinkedHashSet;
import
java.util.Set;
import java.util.TreeSet;
public class Main
{
public static void
main(String[] args) {
// Set up test
data
String numbers[] =
{
new
String("2"),
new
String("3"),
new
String("4"),
new
String("1"),
new String("2")
};
Set s = new
HashSet();
MyOwnUtilityClass.checkDuplicate(s, numbers);
s =
new TreeSet();
MyOwnUtilityClass.checkDuplicate(s, numbers);
s =
new LinkedHashSet();
MyOwnUtilityClass.checkDuplicate(s, numbers);
}
}
|
Code-1.60: Modified Main.java
3.
Write MyOwnUtilityClass.java.
package setpolymorphism;
import
java.util.Set;
public class MyOwnUtilityClass
{
public static void
checkDuplicate(Set s, String[]
numbers){
for (int i=0;
i<numbers.length;
i++)
if (!s.add(numbers[i]))
System.out.println("Set type = " + s.getClass().getName() + " " +
s);
}
}
|
Code-1.61:
MyOwnUtilityClass.java
4. Build and run the project
- Right click Set-Polymorphism
project and select Run.
- Observe the result in the Output
window. (Figure-1.62 below)
Set type = java.util.HashSet [3, 2, 4,
1]
Set type = java.util.TreeSet [1, 2, 3, 4]
Set type =
java.util.LinkedHashSet [2, 3, 4, 1]
|
Figure-1.62:
Result of running Set-Polymorphism application
return
to top of the exerciseSummary
In this exercise, you have learned how to use
HashSet, TreeSet, and LinkedHashSet.
Exercise 2: Build and run applications that use List
Collection objects
The List interface extends the Collection interface
to define an ordered collection, permitting duplicates. The interface adds
position-oriented operations, as well as the ability to work with just a part of
the list.
There are two general-purpose List
implementations in the Collections Framework: ArrayList and LinkedList. Which of the two List
implementations you use depends on your specific needs. If you need to support
random access, with inserting or removing elements from any place other than the
end, then ArrayList offers the optimal collection. If, however, you need to
frequently add and remove elements from the middle of the list and only access
the list elements sequentially then LinkedList offers the better
implementation.
In this step, you are going to build an application
that uses ArrayList. You are going
to exercise various methods of the ArrayList
class. The following is quoted from online JavaDoc
of the ArrayList.
ArrayList is
a resizable-array implementation of the List interface. Implements all optional
list operations, and permits all elements, including null. In addition to
implementing the List interface, this class provides methods to manipulate the
size of the array that is used internally to store the list. (This class is
roughly equivalent to Vector, except that it is unsynchronized.)
The
size, isEmpty, get, set, iterator, and listIterator operations run in constant
time. The add operation runs in amortized constant time, that is, adding n
elements requires O(n) time. All of the other operations run in linear time
(roughly speaking). The constant factor is low compared to that for the
LinkedList implementation.
Each ArrayList instance has a capacity. The
capacity is the size of the array used to store the elements in the list. It is
always at least as large as the list size. As elements are added to an
ArrayList, its capacity grows automatically. The details of the growth policy
are not specified beyond the fact that adding an element has constant amortized
time cost.
An application can increase the capacity of an ArrayList
instance before adding a large number of elements using the ensureCapacity
operation. This may reduce the amount of incremental reallocation.
- Build
and run an application that uses ArrayList
- Build
and run another application that uses ArrayList
- Build
and run an application that uses LinkedList
(2.1) Build and run
an application that uses ArrayList
0. Start NetBeans IDE if you have not done so yet.
1. Create a new NetBeans project.
- Select File->New Project (Ctrl+Shift+N). The New Project dialog box appears.
- Under Choose Project pane, select
Java under Categories and Java Application under Projects. Click Next.
- Under Name and Location pane, for
the Project Name field, type in List-ArrayList as project name.
- For Create Main Class field, take
the default value that is provided by the IDE. (Figure-2.11 below)
- Click Finish.
- Observe that List-ArrayList project
appears and IDE generated Main.java is
displayed in the source editor window of NetBeans IDE.
2. Modify the IDE generated Main.java as shown in Code-2.12 below.
package
listarraylist;
import java.util.ArrayList;
import
java.util.ListIterator;
public class Main {
public static void main(String[] args)
{
// Create ArrayList object with capacity of 2
elements
ArrayList al
= new ArrayList(2);
System.out.println(al+", size =
"+al.size());
// Add items to the
ArrayList
al.add("R");
al.add("U");
al.add("O");
al.add(new
String("x"));
al.add(2, new
Integer(10));
System.out.println(al+", size = " +
al.size());
// Remove
item
al.remove("U");
System.out.println(al+", size = " +
al.size());
// Check if the list contains the specified
element
Boolean b =
al.contains("x");
System.out.println("The list contains x = " +
b);
b =
al.contains("p");
System.out.println("The list contains p = " +
b);
b = al.contains(new
Integer(10));
System.out.println("The list contains Integer of 10 = " +
b);
// Create ListIterator and iterate entries in
it
ListIterator li =
al.listIterator();
while
(li.hasNext())
System.out.println("From ListIterator = " +
li.next());
// Create Object array from
ArrayList
Object a[]
= al.toArray();
for (int
i=0; i<a.length;
i++)
System.out.println("From an Array = " + a[i]);
}
}
|
Code-2.12:
Modified LinkedListDemo.java
3. Build and run the project
- Right click List-ArrayList project
and select Run.
- Observe the result in the Output
window. (Figure-2.13 below)
[], size = 0
[R, U, 10, O, x], size =
5
[R, 10, O, x], size = 4
The list contains x = true
The list
contains p = false
The list contains Integer of 10 = true
From
ListIterator = R
From ListIterator = 10
From ListIterator =
O
From ListIterator = x
From an Array = R
From an Array =
10
From an Array = O
From an Array =
x
|
Figure-2.13: Result of running List-ArrayList
application
4. For your own exercise, please do the
following
- Create your own NetBeans project named as MyOwnArrayList
- Create your own ArrayList object
with initial capacity of 5
- Add the following objects to the newly created ArrayList object.
- 2 String objects
- 1 MyOwnClass object (You will have to create MyOwnClass.java first)
- 3 Integer ojbects
- Create Iterator object from the ArrayList
object and iterate them to get displayed
- Create Object array from the ArrayList
object and display them in a for
loop
return
to top of the exercise
(2.2) Build another
Java application that uses ArrayList
1. Create a new NetBeans project
- Select File->New Project (Ctrl+Shift+N). The New Project dialog box appears.
- Under Choose Project pane, select
Java under Categories and Java Application under Projects. Click Next.
- Under Name and Location pane, for
the Project Name field, type in List-ArrayList-Deal as project
name.
- For Create Main Class field, type
in listarraylistdeal.Deal.
- Click Finish.
- Observe that List-ArrayList-Deal
project appears and IDE generated Deal.java is displayed in the source editor
window of NetBeans IDE.
2. Modify the IDE generated
Deal.java as shown in Code-2.20 below.
Study the code.
package listarraylistdeal;
import
java.util.*;
class Deal {
public static void
main(String args[]) {
int numHands =
Integer.parseInt(args[0]);
int cardsPerHand =
Integer.parseInt(args[1]);
// Make a normal 52-card
deck
String[] suit = new
String[] {"spades", "hearts", "diamonds",
"clubs"};
String[] rank =
new String[]
{"ace","2","3","4","5","6","7","8","9","10","jack","queen","king"};
List deck = new ArrayList();
for (int i=0; i<suit.length;
i++)
for (int j=0; j<rank.length;
j++)
deck.add(rank[j] + " of " +
suit[i]);
Collections.shuffle(deck);
for (int i=0;
i<numHands;
i++)
System.out.println(dealHand(deck, cardsPerHand));
}
public static List
dealHand(List deck, int n) {
int deckSize = deck.size();
List handView = deck.subList(deckSize-n,
deckSize);
List hand = new
ArrayList(handView);
handView.clear();
return
hand;
}
}
|
Code-2.20:
Modified Deal.java
3. Build and run the project
- Right click List-ArrayList-Deal
project and select Run.
- Observe the result in the Output
window. (Figure-2.21 below)
[6 of spades, 4 of hearts, 8 of spades, 8
of hearts]
[ace of spades, 6 of hearts, ace of diamonds, king of
clubs]
[jack of hearts, 8 of clubs, 6 of diamonds, jack of
diamonds]
|
Figure-2.21: Result of running
List-ArrayList-Deal application
(2.3) Build and run
an application that uses LinkedList
In this step, you are going to build an application
that uses LinkedList. You are going
to exercise various methods of the LinkedList
class. The following is quoted from online JavaDoc
of the LinkedList.
LinkedList
is an implementation of the List
interface. It implements all optional list operations, and permits all
elements (including null). In addition to implementing the List interface, the
LinkedList class provides uniformly named methods to get, remove and insert an
element at the beginning and end of the list. These operations allow linked
lists to be used as a stack, queue, or double-ended queue (deque).
1. Create a new NetBeans project
- Select File->New Project (Ctrl+Shift+N). The New Project dialog box appears.
- Under Choose Project pane, select
Java under Categories and Java Application under Projects. Click Next.
- Under Name and Location pane, for
the Project Name field, type in List-LinkedList as project name.
- Click Finish.
- Observe that List-LinkedList
project appears and IDE generated Main.java is displayed in the source editor
window of NetBeans IDE.
2. Modify the IDE generated
Main.java as shown in Code-2.31 below.
package listlinkedlist;
import
java.util.LinkedList;
public class Main {
public static void main(String[] args)
{
// Create LinkedList object
and add 4 Integer objects to
it.
LinkedList list = new
LinkedList();
list.add(new
Integer(1));
list.add(new
Integer(2));
list.add(new
Integer(3));
list.add(new
Integer(1));
System.out.println(list+", size =
"+list.size());
// Add Integer objects to
the beginning and end of the LinkedList
object.
list.addFirst(new
Integer(0));
list.addLast(new
Integer(4));
System.out.println(list);
System.out.println(list.getFirst() + ", " +
list.getLast());
System.out.println(list.get(2)+",
"+list.get(3));
// Remove the first and the
last objects from the LinkedList
object.
list.removeFirst();
list.removeLast();
System.out.println(list);
// Remove the first
instance of Integer(1)
object
list.remove(new
Integer(1));
System.out.println(list);
// Add a String and Long
objects to the LinkedList
String s = new
String("Boston");
list.add(s);
list.add(2, new
Long(45L));
System.out.println(list);
// Get the index of the "Boston" String
object
System.out.println("Index of Boston String = " +
list.indexOf(s));
// Remove the 3rd object in
the Linked List
list.remove(2);
System.out.println(list);
// Set the value of the
second item to "one"
list.set(1, "one");
System.out.println(list);
// Clone the LinkedList
object
LinkedList
clonedLinkedList = (LinkedList)
list.clone();
clonedLinkedList.add(0, new String("Cloned
LinkedList"));
list.add(0,
new String("Original
LinkedList"));
System.out.println(list);
System.out.println(clonedLinkedList);
}
}
|
Code-2.31: Modified
Main.java
3. Build and run the project
- Right click List-LinkedList project
and select Run.
- Observe the result in the Output
window. (Figure-2.32 below)
[1, 2, 3, 1], size = 4
[0, 1, 2, 3, 1,
4]
0, 4
2, 3
[1, 2, 3, 1]
[2, 3, 1]
[2, 3, 45, 1,
Boston]
Index of Boston String = 4
[2, 3, 1, Boston]
[2, one, 1,
Boston]
[Original LinkedList, 2, one, 1, Boston]
[Cloned LinkedList,
2, one, 1, Boston]
|
Figure-2.32: Result of running
List-LinkedList application
4. For your own exercise, please do the
following
- Create your own NetBeans project named as MyOwnLinkedList
- Create your own LinkedList
object
- Add the following objects to the newly created LinkedList object
- 2 String objects
- 1 MyOwnClass object (You will have to create MyOwnClass.java first)
- 3 Integer ojbects
- Exercise the following methods
- Add the 2nd instance of the MyOwnClass object to the 3rd position
return
to top of the exerciseSummary
In this exercise, you have built and run Java
applications that use ArrayList and LinkedList Collection
objects.
return
to the top
Exercise 3: Build and run applications that use "Map"
Collection Objects
The Map interface is not an extension of the
Collection interface. Instead, the interface starts off its own interface
hierarchy, for maintaining key-value associations. The interface describes a
mapping from keys to values, without duplicate keys, by definition.
The
interface methods can be broken down into three sets of operations: altering,
querying, and providing alternative views.
The alteration operations
allow you to add and remove key-value pairs from the map. Both the key and value
can be null. However, you should not add a Map to itself as a key or
value.
* Object put(Object key, Object
value)
* Object remove(Object key)
*
void putAll(Map mapping)
* void clear()
The query
operations allow you to check on the contents of the
map:
* Object get(Object key)
*
boolean containsKey(Object key)
* boolean
containsValue(Object value)
* int
size()
* boolean isEmpty()
The last set of methods
allow you to work with the group of keys or values as a
collection.
* public Set
keySet()
* public Collection
values()
* public Set entrySet()
Since the
collection of keys in a map must be unique, you get a Set back. Since the
collection of values in a map may not be unique, you get a Collection back. The
last method returns a Set of elements that implement the Map.Entry interface,
described next.
The entrySet() method of Map returns a collection of
objects that implement Map.Entry interface. Each object in the collection is a
specific key-value pair in the underlying Map.
Iterating through this
collection, you can get the key or value, as well as change the value of each
entry. However, the set of entries becomes invalid, causing the iterator
behavior to be undefined, if the underlying Map is modified outside the
setValue() method of the Map.Entry interface.
The Collections Framework
provides two general-purpose Map implementations: HashMap and TreeMap . As with all the concrete
implementations, which implementation you use depends on your specific needs.
For inserting, deleting, and locating elements in a Map, the HashMap offers the
best alternative. If, however, you need to traverse the keys in a sorted order,
then TreeMap is your better alternative. Depending upon the size of your
collection, it may be faster to add elements to a HashMap, then convert the map
to a TreeMap for sorted key traversal. Using a HashMap requires that the class
of key added have a well-defined hashCode() implementation. With the TreeMap
implementation, elements added to the map must be sortable. Again, more on
sorting later.
(3.1) Build and run
a simple application that uses HashMap
1. Create a NetBeans project
- Select File->New Project (Ctrl+Shift+N). The New Project dialog box appears.
- Under Choose Project pane, select
Java under Categories and Java Application under Projects. Click Next.
- Under Name and Location pane, for
the Project Name field, type in Map-HashMap as project name.
- Click Finish.
- Observe that Map-HashMap project
appears and IDE generated Main.java is
displayed in the source editor window of NetBeans IDE.
2. Modify the IDE generated
Main.java as shown in Code-3.10 below.
package maphashmap;
import
java.util.HashMap;
import java.util.Map;
public class Main
{
private static final
Integer ONE = new Integer(1);
public static void main(String[] args)
{
// Set up testing
data
String name[] =
{
new
String("Sang"),
new
String("Shin"),
new
String("Boston"),
new
String("Passion"),
new String("Shin")
};
// Create a HashMap
object
Map m = new
HashMap();
// Initialize frequency table with testing
data
for (int i=0;
i<name.length; i++)
{
Integer freq = (Integer)
m.get(name[i]);
//
Adding an entry to the
HashMap
m.put(name[i], (freq==null ? ONE
:
new Integer(freq.intValue() +
1)));
}
// Display the size of the Map
object
System.out.println(m.size() + " distinct words
detected:");
// Display Map
object
System.out.println("Display of the HashMap object = " +
m);
}
}
|
Code-3.10:
Main.java
3. Build and run the
project
- Right click Map-HashMap project and
select Run.
- Observe the result in the Output
window. (Figure-3.11 below)
4 distinct words detected:
Display of
the HashMap object = {Shin=2, Sang=1, Passion=1,
Boston=1}
|
Figure-3.11: Result of the running the
application
4. For your own exercise, please do the
following
- Create your own NetBeans project named as MyHashMap
- Create your own HashMap object
- Add the following objects to the newly created HashMap object.
- 2 String objects with key-value pairs "1st"/"Hello", "2nd"/"Goodbye"
- 2 MyOwnClass objects with keys "3rd", "4th" - using your instances of
MyOwnClass objects
- 1 Integer ojbects with keys "5th"/56
(3.2) Build and run
a simple application that uses TreeMap
1. Create a NetBeans project
- Select File->New Project (Ctrl+Shift+N). The New Project dialog box appears.
- Under Choose Project pane, select Java under Categories and Java Application under Projects. Click Next.
- Under Name and Location pane, for
the Project Name field, type in Map-TreeMap as project name.
- Click Finish.
- Observe that Map-TreeMap project
appears and IDE generated Main.java is
displayed in the source editor window of NetBeans IDE.
2. Modify the IDE generated
Main.java as shown in Code-3.10 below.
package maptreemap;
import
java.util.Map;
import java.util.TreeMap;
public class Main
{
private static final
Integer ONE = new Integer(1);
public static void main(String[] args)
{
// Set up test
data
String name[] =
{
new
String("Sang"),
new
String("Shin"),
new
String("Boston"),
new
String("Passion"),
new String("Shin")
};
// Create TreeMap
object
Map m = new
TreeMap();
// Initialize frequency table with testing
data
for (int i=0;
i<name.length; i++)
{
Integer freq = (Integer)
m.get(name[i]);
//
Adding an entry to the
TreeMap
m.put(name[i], (freq==null ? ONE
:
new Integer(freq.intValue() +
1)));
}
// Display the size of the Map
object
System.out.println(m.size() + " distinct words
detected:");
// Display Map
object
System.out.println("Display of the TreeMap object = " +
m);
}
}
|
Code-3.10:
Main.java
3. Build and run the
project
- Right click Map-TreeMap project and
select Run.
- Observe the result in the Output
window. (Figure-3.11 below)
4 distinct words detected:
Display of
the TreeMap object = {Boston=1, Passion=1, Sang=1,
Shin=2}
|
Figure-3.11: Result of the running the
application
return
to top of the exercise
(3.3) Build and run
a simple application that uses LinkedHashMap
1. Create a NetBeans project
- Select File->New Project (Ctrl+Shift+N). The New Project dialog box appears.
- Under Choose Project pane, select Java under Categories and Java Application under Projects. Click Next.
- Under Name and Location pane, for
the Project Name field, type in Map-LinkedHashMap as project name.
- Click Finish.
- Observe that Map-LinkedHashMap
project appears and IDE generated Main.java is displayed in the source editor
window of NetBeans IDE.
2. Modify the IDE generated
Main.java as shown in Code-3.10 below.
package maplinkedhashmap;
import
java.util.LinkedHashMap;
import java.util.Map;
public class Main
{
private static final
Integer ONE = new Integer(1);
public static void main(String[] args)
{
// Set up testing
data
String name[] =
{
new
String("Sang"),
new
String("Shin"),
new
String("Boston"),
new
String("Passion"),
new String("Shin")
};
// Create a LinkedHashMap
object
Map m = new
LinkedHashMap();
// Initialize frequency table with testing
data
for (int i=0;
i<name.length; i++)
{
Integer freq = (Integer)
m.get(name[i]);
//
Adding an entry to the
LinkedHashMap
m.put(name[i], (freq==null ? ONE
:
new Integer(freq.intValue() +
1)));
}
// Display the size of the Map
object
System.out.println(m.size() + " distinct words
detected:");
// Display Map
object
System.out.println("Display of the LinkedHashMap object = " +
m);
}
}
|
Code-3.10:
Main.java
3. Build and run the
project
- Right click Map-LinkedHashMap
project and select Run.
- Observe the result in the Output
window. (Figure-3.11 below)
4 distinct words detected:
Display of
the LinkedHashMap object = {Sang=1, Shin=2, Boston=1,
Passion=1}
|
Figure-3.11: Result of the running the
application
return
to top of the exercise
(3.4) Map and
polymorphism
1. Create a new NetBeans project
- Select File->New Project (Ctrl+Shift+N). The New Project dialog box appears.
- Under Choose Project pane, select Java under Categories and Java Application under Projects. Click Next.
- Under Name and Location pane, for
the Project Name field, type in Map-Polymorphism as project name.
- For Create Main Class field, take
the default value provided by the IDE.
- Click Finish.
- Observe that Map-Polymorphism
project appears and IDE generated Main.java is displayed in the source editor
window of NetBeans IDE.
2. Modify the IDE generated
Main.java as shown in Code-3.40 below.
Study the code by paying special attention to the bold fonted part.
package mappolymorphism;
import
java.util.HashMap;
import java.util.LinkedHashMap;
import
java.util.Map;
import java.util.TreeMap;
public class Main
{
public static void
main(String[] args) {
// Set up testing
data
String names[] =
{
new
String("Sang"),
new
String("Shin"),
new
String("Boston"),
new
String("Passion"),
new String("Shin")
};
Map m = new
HashMap();
MyOwnUtilityClass.checkDuplicate(m,
names);
m = new
TreeMap();
MyOwnUtilityClass.checkDuplicate(m,
names);
m = new
LinkedHashMap();
MyOwnUtilityClass.checkDuplicate(m, names);
}
}
|
Code-3.40: Modified
Main.java
3. Write
MyOwnUtilityClass.java.
import java.util.Map;
public class
MyOwnUtilityClass {
private
static final Integer ONE = new Integer(1);
public static void checkDuplicate(Map m, String[]
names){
for (int i=0;
i<names.length; i++)
{
Integer freq = (Integer)
m.get(names[i]);
//
Adding an entry to the
HashMap
m.put(names[i], (freq==null ? ONE
:
new Integer(freq.intValue() +
1)));
}
System.out.println("Map
type = " + m.getClass().getName() + " " + m);
}
}
|
Code-3.41: MyOwnUtilityClass.java
4.
Build and run the project
- Right click Map-Polymorphism
project and select Run.
- Observe the result in the Output
window. (Figure-1.62 below)
Map type = java.util.HashMap {Shin=2,
Sang=1, Passion=1, Boston=1}
Map type = java.util.TreeMap {Boston=1,
Passion=1, Sang=1, Shin=2}
Map type = java.util.LinkedHashMap {Sang=1,
Shin=2, Boston=1, Passion=1}
|
Figure-3.42: Result of
running Map-Polymorphism application
return
to top of the exerciseSummary
In this exercise, you have created an
application that use HashMap and TreeMap Collection
objects.
return to the top
Exercise 4: Iterator
In this exercise, you are going to exercise how
to create Iterator object from a Collection object.
(4.1) Build and run
a simple application that uses Iterator
1. Create a NetBeans project
- Select File->New Project (Ctrl+Shift+N). The New Project dialog box appears.
- Under Choose Project pane, select Java under Categories and Java Application under Projects.
- Click Next.
- Under Name and Location pane, for
the Project Name field, type in Collection-Iterator as project
name.
- For Create Main Class field, type in collectioniterator.OysterMonths.
(Figure-4.10 below)
- Click Finish.
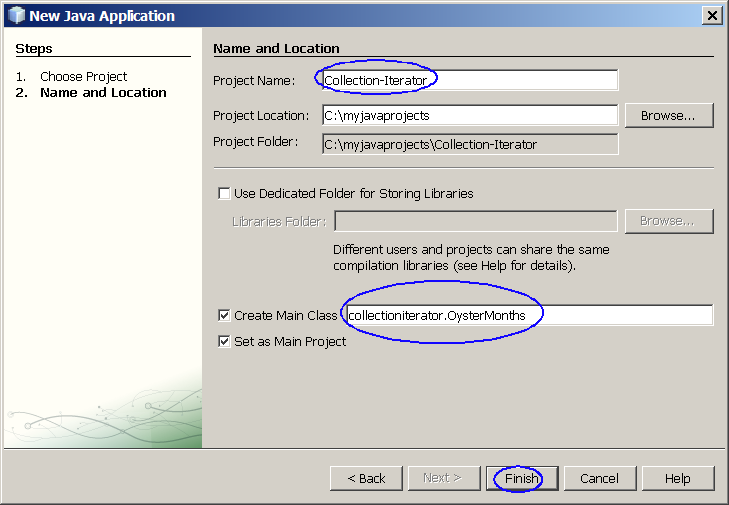
Figure-4.10: Create a new project
- Observe that Collection-Iterator
project appears and IDE generated OysterMonths.java is displayed in the source
editor window of NetBeans IDE.
2. Modify the IDE generated OysterMonths
.java as shown in Code-4.11 below.
package collectioniterator;
import
java.util.Collection;
import java.util.ArrayList;
import
java.util.Arrays;
import java.util.Iterator;
import
java.text.DateFormatSymbols;
public class OysterMonths
{
Collection
safeMonths;
public Collection
filter(Collection c) {
Collection
filteredCollection = new
ArrayList();
// Creator Iterator object from a
Collection object
//
and do the iteration.
for (Iterator i = c.iterator(); i.hasNext(); )
{
String s = (String)
i.next();
if
(condition(s))
{
filteredCollection.add(s);
}
}
return
filteredCollection;
}
public boolean
condition(String s) {
if (s.contains("r"))
{
return true;
}
return
false;
}
public static void
main(String[] args) {
OysterMonths om = new
OysterMonths();
DateFormatSymbols dfs = new
DateFormatSymbols();
String[] monthArray =
dfs.getMonths();
Collection months =
Arrays.asList(monthArray);
om.safeMonths =
om.filter(months);
System.out.println("The
following months are safe for
oysters:");
System.out.println(om.safeMonths);
}
}
|
Code-4.11:
OysterMonths.java
3. Build and run
the project
- Right click Collection-Iterator
project and select Run.
- Observe the result in the Output
window. (Figure-4.12 below)
The following months are safe for
oysters:
[January, February, March, April, September, October,
November, December]
|
Figure-4.12: Result of the
running the application
return
to top of the exercise
Exercise 5: Sorting, Searching, Shuffling, Data
Manipulation
(5.1) Sort a list
using natural order
1. Create a NetBeans project
- Select File->New Project (Ctrl+Shift+N). The New Project dialog box appears.
- Under Choose Project pane, select Java under Categories and Java Application under Projects. Click Next.
- Under Name and Location pane, for
the Project Name field, type in Sorting-NaturalOrder as project
name.
- For Create Main Class field, take
the IDE filled in value, sortingnaturalorder.Main.
- Click Finish.
- Observe that Sorting-NaturalOrder
project appears and IDE generated Main.java is displayed in the source editor
window of NetBeans IDE.
2. Modify the IDE generated
Main.java as shown in Code-5.11 below.
Study the code by paying special attention to bold-fonted code
fragments.
package sortingnaturalorder;
import
sortingnaturalorder.Name;
import java.util.Arrays;
import
java.util.Collections;
import java.util.List;
public class Main
{
public static void
main(String[] args) {
// Set up test
data
String n[] =
{
new
String("John"),
new
String("Karl"),
new
String("Groucho"),
new String("Oscar")
};
// Create a List from an
array
List l =
Arrays.asList(n);
// Perform the sorting
operation
Collections.sort(l);
System.out.println("Sorting
list of strings = " + l);
// Set up test
data
Integer int1[] =
{
new
Integer(56),
new
Integer(78),
new
Integer(34),
new Integer(10)
};
// Create a List from an
array
List l2 =
Arrays.asList(int1);
// Perform the sorting operation
Collections.sort(l2);
System.out.println("Sorting
list of numbers = " + l2);
}
}
|
Code-5.11: Main.java
3. Build and run the project
- Right click Sorting-NaturalOrder
project and select Run.
- Observe the result in the Output
window. (Figure-5.12 below)
Sorting list of strings = [Groucho, John,
Karl, Oscar]
Sorting list of numbers = [10, 34, 56,
78]
|
Figure-5.12: Result of the running the
application
return
to top of the exercise
(5.2) Sort a list
using Comparator
1. Create a NetBeans project
- Select File->New Project (Ctrl+Shift+N). The New Project dialog box appears.
- Under Choose Project pane, select Java under Categories and Java Application under Projects. Click Next.
- Under Name and Location pane, for
the Project Name field, type in Sorting-Comparator as project
name.
- For Create Main Class field, take
the IDE filled in value, sortingcomparator.Main.
- Click Finish.
- Observe that Sorting-Comparator
project appears and IDE generated Main.java is displayed in the source editor
window of NetBeans IDE.
2. Modify the IDE generated
Main.java as shown in Code-5.11 below.
Study the code by paying special attention to bold-fonted code
fragments.
package sortingcomparator;
import
java.util.ArrayList;
import java.util.Arrays;
import
java.util.Collections;
import java.util.Comparator;
public
class Main {
public static
void main(String[] args) {
// Create an ArrayList
object and add items to it.
ArrayList a1 = new
ArrayList();
a1.add("Boston");
a1.add("New York");
a1.add("Seoul");
a1.add("Tokyo");
a1.add("London");
a1.add("Bangkok");
System.out.println("Before sorting = " +
a1);
// Get String Comparator
object and sort the list
Comparator comp =
Comparators.stringComparator();
Collections.sort(a1, comp);
// Display the sorted
list
System.out.println("Sorted list using String Comparator = " +
a1);
// Create an ArrayList
object and add items to it.
ArrayList a2 = new
ArrayList();
a2.add(new
Integer(33));
a2.add(new
Integer(17));
a2.add(new
Integer(45));
a2.add(new
Integer(100));
a2.add(new
Integer(3));
System.out.println("Before sorting = " +
a2);
// Get Integer Comparator
object and sort the list
Comparator comp2 =
Comparators.integerComparator();
Collections.sort(a2, comp2);
// Display the sorted
list
System.out.println("Sorted list using Integer Comparator = " +
a2);
}
}
|
Code-5.11:
Main.java
3. Write
Comparators.java.
package sortingcomparator;
import
java.util.Comparator;
import java.util.Date;
public class
Comparators {
// String
Comparator object
public static Comparator
stringComparator() {
return new Comparator()
{
public int compare(Object o1, Object o2)
{
String s1 =
(String)o1;
String s2 =
(String)o2;
int len1 =
s1.length();
int len2 =
s2.length();
int n = Math.min(len1,
len2);
char v1[] =
s1.toCharArray();
char v2[] =
s2.toCharArray();
int pos =
0;
while (n-- != 0)
{
char c1 =
v1[pos];
char c2 =
v2[pos];
if (c1 != c2)
{
return c1 -
c2;
}
pos++;
}
return len1 -
len2;
}
};
}
// Integer Comparator
object
public static Comparator integerComparator()
{
return new Comparator()
{
public int compare(Object o1, Object o2)
{
int val1 =
((Integer)o1).intValue();
int val2 =
((Integer)o2).intValue();
return (val1<val2 ? -1 : (val1==val2 ? 0 :
1));
}
};
}
// Date Comparator
object
public static Comparator dateComparator()
{
return new Comparator()
{
public int compare(Object o1, Object o2)
{
long val1 =
((Date)o1).getTime();
long val2 =
((Date)o2).getTime();
return (val1<val2 ? -1 : (val1==val2 ? 0 :
1));
}
};
}
}
|
Code-5.12: Comparators.java
4. Build and run the project
- Right click Sorting-Comparator
project and select Run.
- Observe the result in the Output
window. (Figure-5.13 below)
Before sorting = [Boston, New York, Seoul,
Tokyo, London, Bangkok]
Sorted list using String Comparator = [Bangkok,
Boston, London, New York, Seoul, Tokyo]
Before sorting = [33, 17, 45,
100, 3]
Sorted list using Integer Comparator = [3, 17, 33, 45,
100]
|
Figure-5.13: Result of the running the
application
return
to top of the exercise
(5.3) Shuffle a
list
1. Create a NetBeans project
- Select File->New Project (Ctrl+Shift+N). The New Project dialog box appears.
- Under Choose Project pane, select Java under Categories and Java Application under Projects. Click Next.
- Under Name and Location pane, for
the Project Name field, type in Shuffling
as project name.
- For Create Main Class field, take
the IDE filled in value, shuffling.Main.
- Click Finish.
- Observe that Shuffling project
appears and IDE generated Main.java is
displayed in the source editor window of NetBeans IDE.
2. Modify the IDE generated Main.java as shown in Code-5.31 below.
Study the code by paying special attention to bold-fonted code
fragments.
package shuffling;
import
java.util.Arrays;
import java.util.Collections;
import
java.util.List;
public class Main {
public static void main(String[] args)
{
// Set up testing
data
String name[] =
{
new
String("Sang"),
new
String("Shin"),
new
String("Boston"),
new
String("Passion"),
new String("Shin"),
};
// Create a List object from an
array
List l =
Arrays.asList(name);
System.out.println("Before shuffling = " +
l);
// Shuffle the list
Collections.shuffle(l);
System.out.println("Shuffled list = " +
l);
// Sort the
list
Collections.sort(l);
System.out.println("Sorted list = " + l);
}
} |
Code-5.31:
Main.java
3. Build and run the
project
- Right click Shuffling project and
select Run.
- Observe the result in the Output
window. (Figure-5.32 below)
Before shuffling = [Sang, Shin, Boston,
Passion, Shin]
Shuffled list = [Sang, Passion, Shin, Boston,
Shin]
Sorted list = [Boston, Passion, Sang, Shin,
Shin] |
Figure-5.32: Result
return
to top of the exercise
(5.4) Data
manipulation
1. Create a NetBeans project
- Select File->New Project (Ctrl+Shift+N). The New Project dialog box appears.
- Under Choose Project pane, select Java under Categories and Java Application under Projects. Click Next.
- Under Name and Location pane, for
the Project Name field, type in DataManipulation as project name.
- For Create Main Class field, take
the IDE filled in value, datamanipulation.Main.
- Click Finish.
- Observe that DataManipulation
project appears and IDE generated Main.java is displayed in the source editor
window of NetBeans IDE.
2. Modify the IDE generated Main.java as shown in Code-5.41 below.
Study the code by paying special attention to bold-fonted code
fragments.
package datamanipulating;
import
sortingnaturalorder.Name;
import java.util.Arrays;
import
java.util.Collections;
import java.util.List;
public class Main
{
public static void
main(String[] args) {
// Set up test
data
String n[] =
{
new
String("Boston"),
new String("New
York"),
new
String("Seoul"),
new String("Shanghai")
};
// Create a List from an
array
List l =
Arrays.asList(n);
// Perform the sorting
operation
Collections.sort(l);
System.out.println("Sorted list = " +
l);
// Reverse
the list
Collections.reverse(l);
System.out.println("Reversed list = " +
l);
}
} |
Code-5.41: Main.java
3. Build and run the
project
- Right click DataManipulation
project and select Run.
- Observe the result in the Output
window. (Figure-5.42 below)
Sorted list = [Boston, New York, Seoul,
Shanghai]
Reversed list = [Shanghai, Seoul, New York,
Boston] |
Figure-5.42: Result of the running the
application
return
to top of the exercise
(5.5) Binary
searching
1. Create a NetBeans project
- Select File->New Project (Ctrl+Shift+N). The New Project dialog box appears.
- Under Choose Project pane, select Java under Categories and Java Application under Projects. Click Next.
- Under Name and Location pane, for
the Project Name field, type in BinarySearching as project name.
- For Create Main Class field, take
the IDE filled in value, binarysearching.Main.
- Click Finish.
- Observe that BinarySearching
project appears and IDE generated Main.java is displayed in the source editor
window of NetBeans IDE.
2. Modify the IDE generated
Main.java as shown in Code-5.51 below.
Study the code by paying special attention to bold-fonted code
fragments.
package binarysearching;
import
java.util.Arrays;
import java.util.Collections;
import
java.util.List;
public class Main {
public static void main(String[] args)
{
// Set up testing
data
String name[] =
{
new
String("Sang"),
new
String("Shin"),
new
String("Boston"),
new
String("Passion"),
new String("Shin"),
};
// Create a List
object
List l =
Arrays.asList(name);
// Perform
binary search
int
position = Collections.binarySearch(l, "Boston");
System.out.println("Position of the searched item = " +
position);
}
} |
Code-5.51: Main.java
3. Build and run the project
- Right click DataManipulation
project and select Run.
- Observe the result in the Output
window. (Figure-5.52 below)
| Position of the searched item =
2 |
Figure-5.52: Result of the running the
application
return
to top of the exercise
Homework
1. The homework is to create a NetBeans project
as following. (You can name the homework project in any way you want but
here I am going to call it MyCollectionProject.)
- Create your own HashSet object
- Add the following objects with properly initialized values to the newly
created HashSet object
- 2 String objects
- 2 MyOwnClass object (You will have to create MyOwnClass.java first)
- MyOwnClass class has name (String type) and age (int type)
- 3 Integer ojbects
- Create Iterator object from the
HashSet object and iterate them to get
displayed
- Repeat the above for LinkedHashSet, ArrayList