How To Install Ubuntu On Windows 10/11 Using VirtualBox
Introduction
There are a variety of ways to install a Linux system. For example, if you are currently
running Windows as your primary operating system, then you may be able to dual boot
Linux alongside Windows, but this method is not beginner-friendly. Any error in the
installation process may cause you a lot of headaches, and in some cases, you won't even be
able to boot Windows anymore!. So I am going to
show you how to install Linux as a virtual machine.
Ubuntu is a free and open-source Linux distribution based on Debian. As per Wikipedia, "Ubuntu is released every
six months, with long-term support (LTS) releases every two years. The latest release and also the
most recent long-term support release is 24.04.1.
WHAT IS A VIRTUAL MACHINE?
A virtual machine is a software or a virtual environment that provides the
same functionality as physical computers (eg, a computer system with its own CPU, memory, network interfaces, and
storage capacity). A virtual machine is used to run software or OS like a physical computer.
Oracle VM VirtualBox is a free and open-source
virtualization platform developed by Oracle Corporation. The user can install the VirtualBox on Windows, macOS,
Linux, Solaris, and OpenSolaris. It enables users to install other operating systems by creating virtual machines.
It supports the creation and management of guest virtual machines running Windows, Linux, as well
as limited virtualization of macOS guests on Apple hardware. For some guest operating systems, a "Guest Additions"
package of device drivers and system applications is available, which typically improves performance, especially that
of graphics.
This guide will show you various steps on how to install Ubuntu on Windows 11 using VirtualBox.
Process of installing a virtual machine
The process of installing a virtual machine is straightforward; you only need to follow the
following steps:
- Install VirtualBox (or VMware Player).
- Download an ISO image of any Linux distribution.
- Open up VirtualBox and begin the installation process.
System Requirements
Before downloading and installing Ubuntu on
Windows 10/11 using VirtualBox, the following requirements are essential.
- Operating System Version
- Microsoft Windows 10/11 (32-bit or 64-bit).
- Random Access Memory (RAM) - Minimum 4 GB RAM recommended.
- Free Disk Space - Minimum 25 GB free space recommended.
- Good Internet Connection to download the VirtualBox and Ubuntu ISO file.
- Note: If your PC is HP is possible you need to activate the
HP BIOS Virtualization Technology
Download and Install VirtualBox
To download the VirtualBox, follow the instructions below.
Step 1
To download the latest version of VirtualBox, visit the official
VirtualBox
website and download the VirtualBox platform packages
for Windows hosts.
Step 2
Step 3
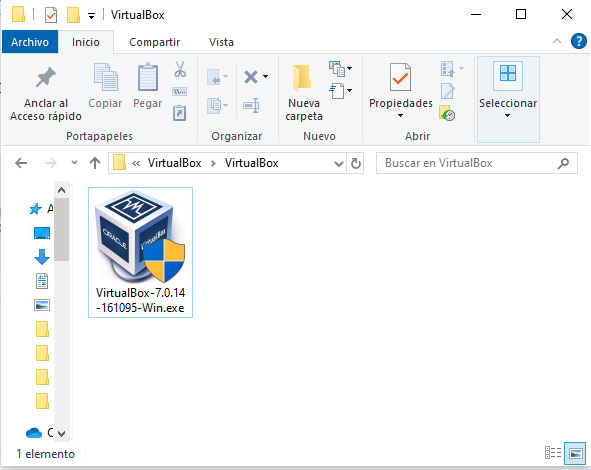
Navigate the folder where you have downloaded your VirtualBox and double-click on the downloaded "VirtualBox" file
to run it.
Step 4
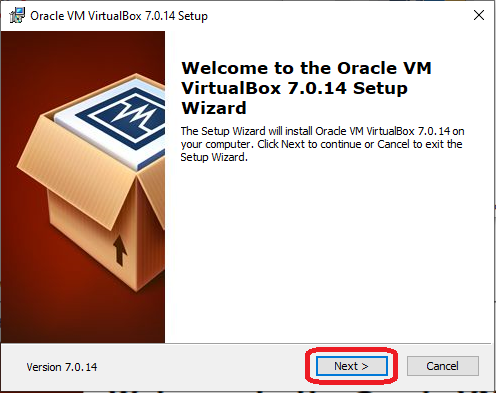
"Oracle VM VirtualBox 7.1.6 Setup" window will appear on the screen and click on the "Next" button to proceed.
Step 5
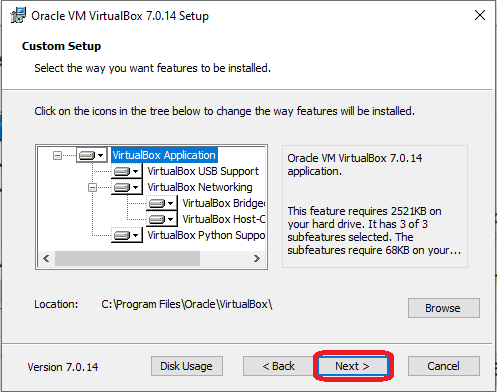
Choose the location where you want to install the VirtualBox and click on the "Next" button to proceed.
Step 7
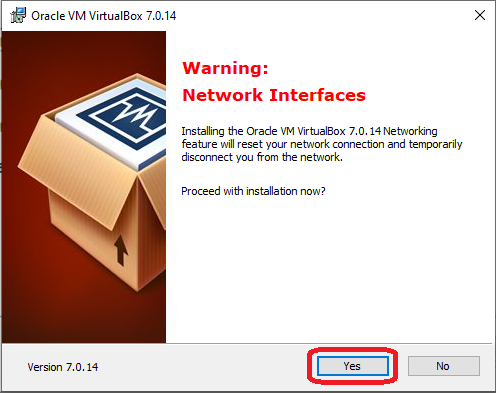
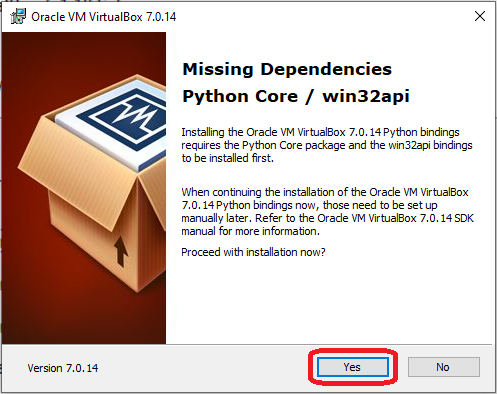
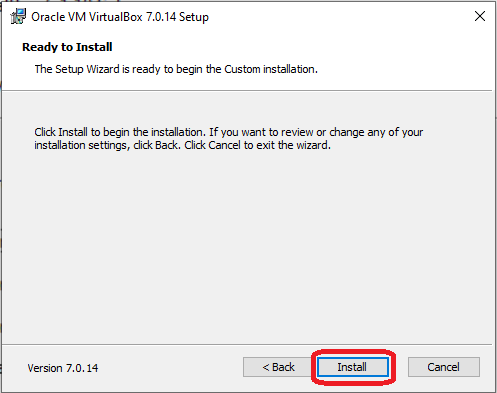
Click on the Yes button, twice, and then the "Install" button.
Download Ubuntu
Follow the instructions below to download the Ubuntu ISO file.
Step 1
To download the latest version of Ubuntu, i.e. Ubuntu 24.04.1 LTS,
visit the official
Ubuntu website in your web browser (Caution: the download can be slowly because the size 5.8 GB).
Step 2
To download
the version 22.04.3 of Ubuntu follow this
link.
Creating a Virtual Machine
Now, it is time to create a Virtual Machine. Follow the instructions below to proceed.
Step 1
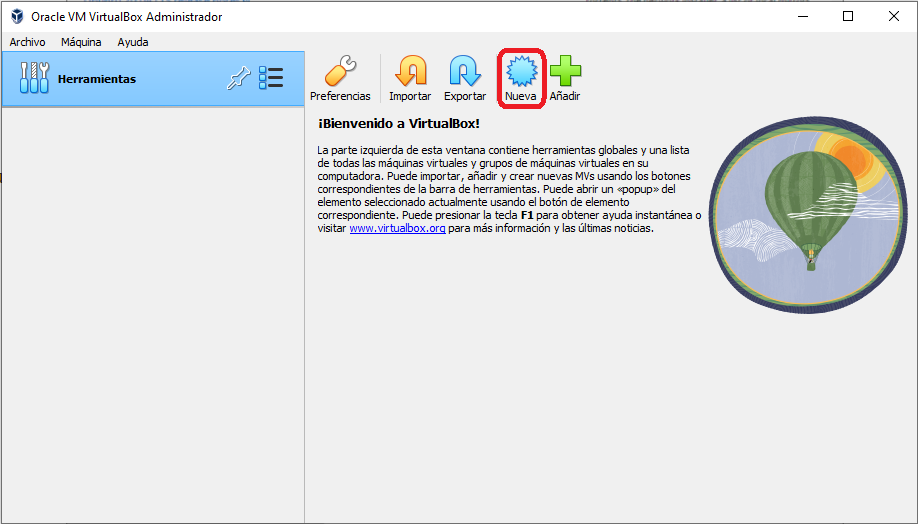
Open VirtualBox and click on the "Nueva" button.
Step 2
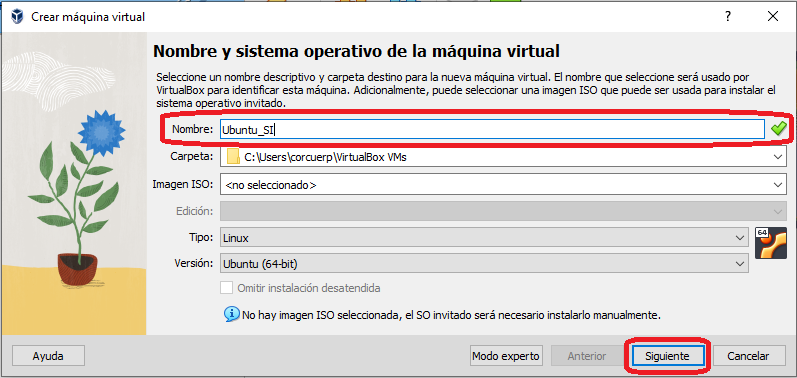
Choose a name for your virtual machine (Ubuntu_SI) with its location.
Based on the name you entered, VirtualBox will try to predict the "Tipo" and "Versión". Otherwise, from the
drop-down menu, select "Linux"
as the type and "Ubuntu" as the version. Select the Ubuntu iso file in the field Imagen ISO, select the
"Omitir instalación desatendida" and click on the "Siguiente" button.
Step 3
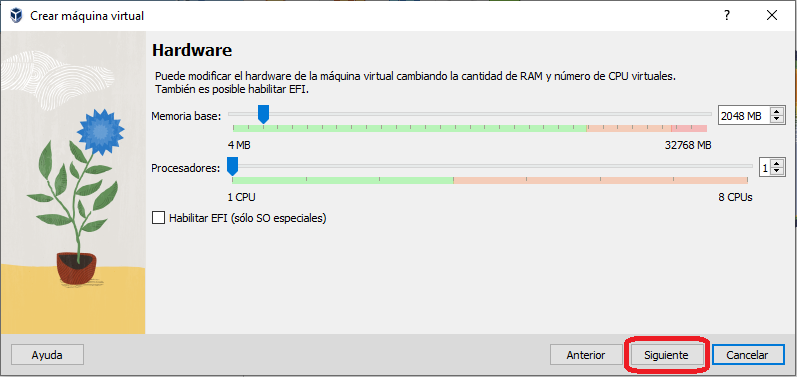
With the help of the slider, choose the amount of memory (RAM) to be allocated
to the virtual machine. (The recommended memory size is 2048 MB (2 GB). This memory will only be used while using a virtual
machine).
Step 4
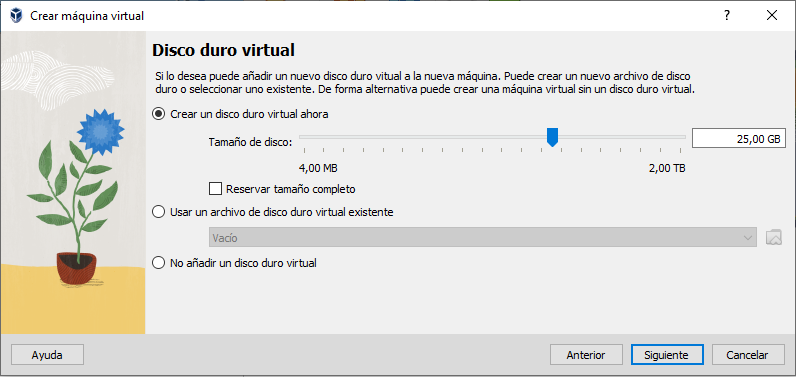
Appear the "Disco duro virtual" dialog and click on the "Siguiente" button to proceed.
Step 5
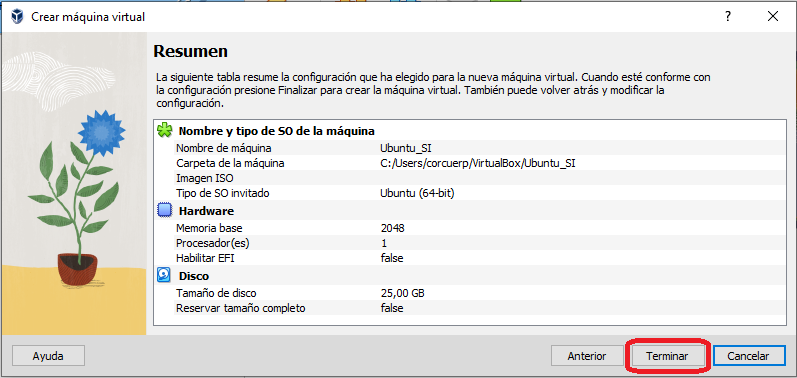
Appear the "Resumen" dialog and click on the "Terminar" button to proceed.
Install Ubuntu Using VirtualBox
Now, your virtual machine has been successfully created and it is time to install Ubuntu on it.
Follow the instructions below to proceed.
Step 1
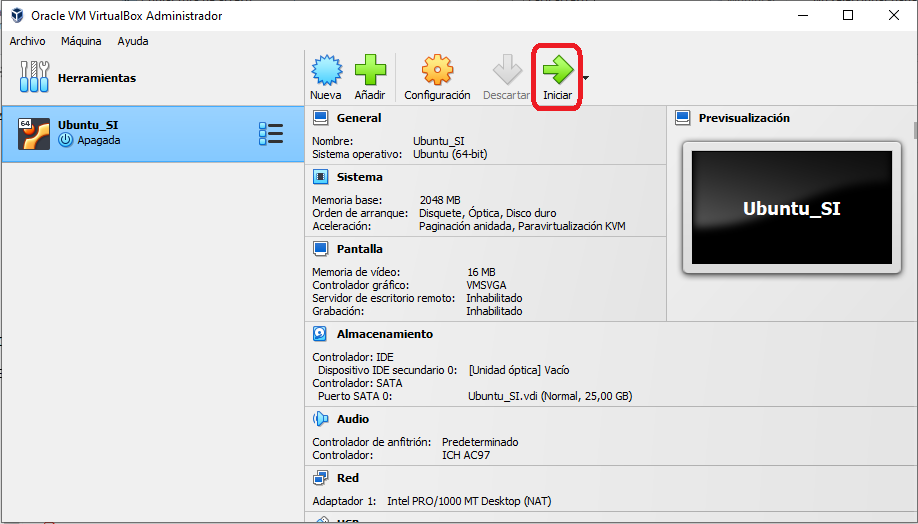
The name of your virtual machine will now appear on the left side of the VirtualBox Manager. Click on the
"Iniciar" button in the
toolbar to launch your VM.
Step 2
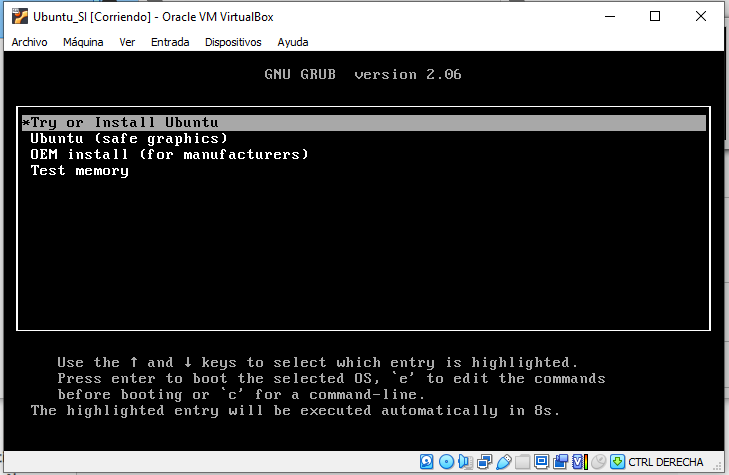
Appear the GNU GRUB dialog. You can wait or press Enter
Step 3
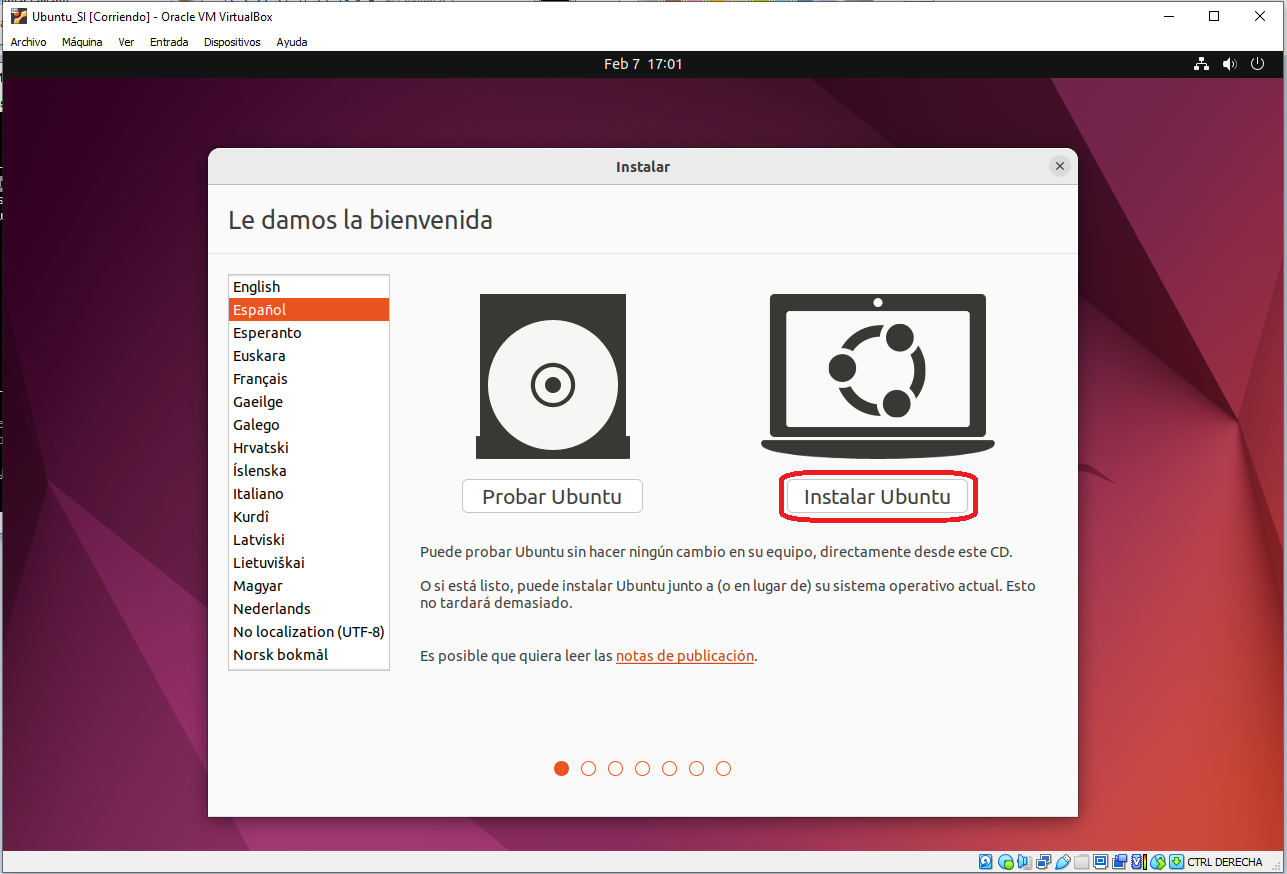
Now, select the language and click on the "Instalar Ubuntu" button to proceed.
Step 4
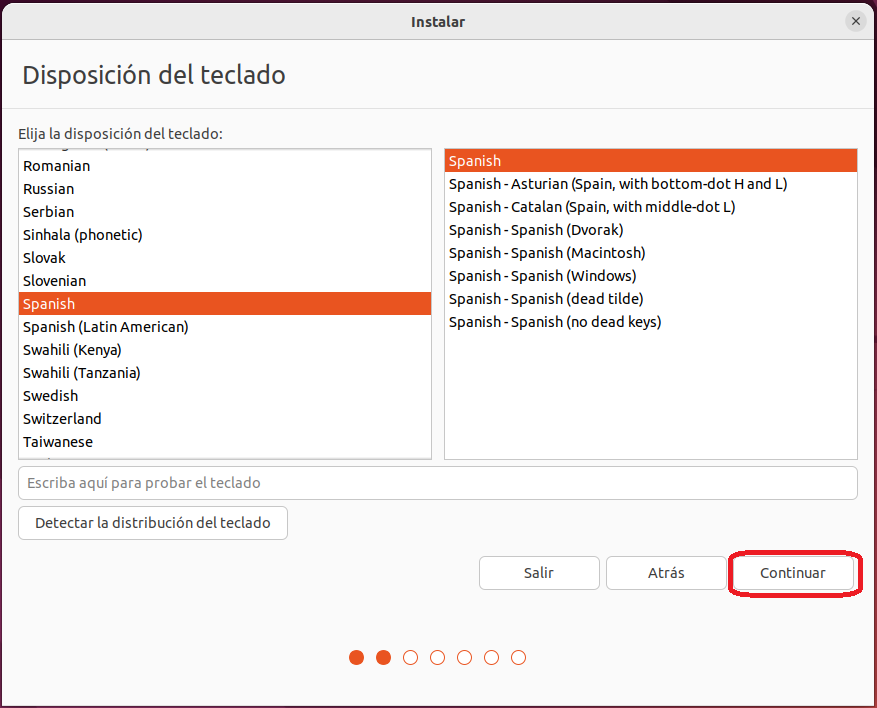
Select your desired "Disposición del teclado" and click on the "Continuar"
button to proceed.
Step 5
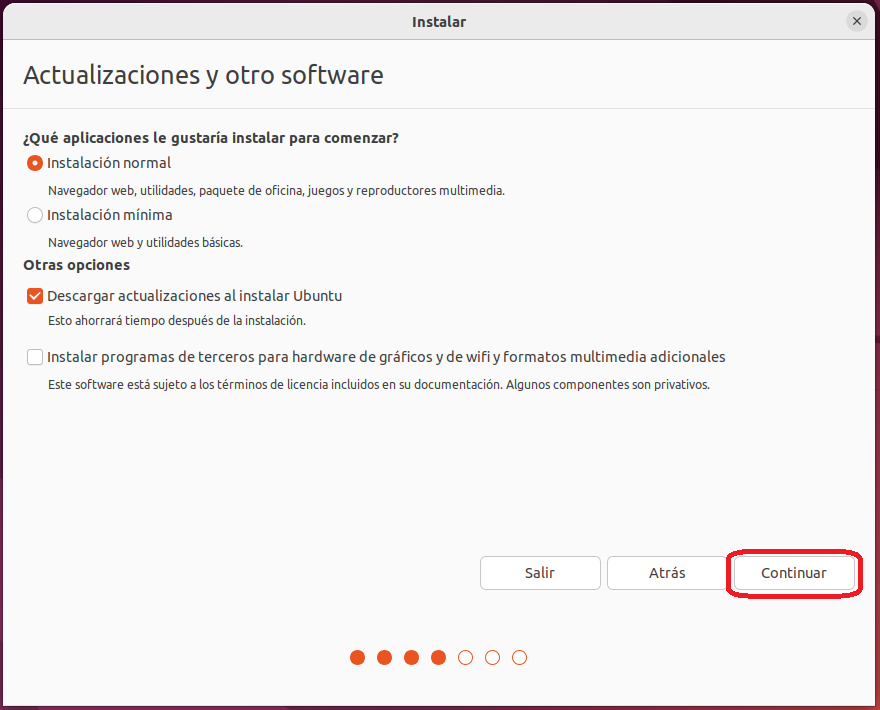
Use the default option as "Instalación normal" with the "Descargar actualizaciones
al instalar Ubuntu" and click on the "Continuar" button.
Step 6
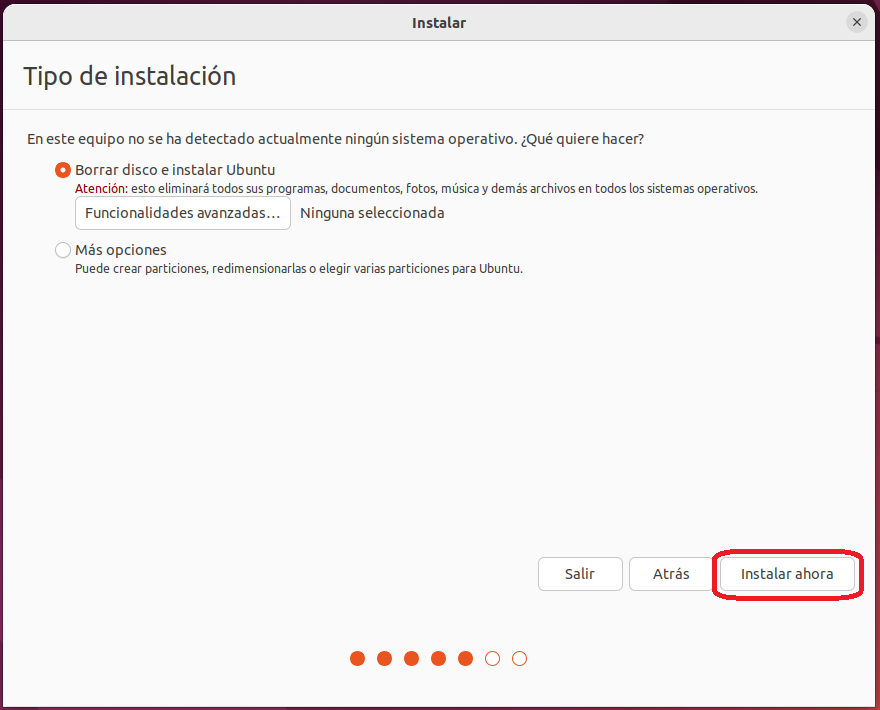
Select the default option as the "Borrar disco e instalar Ubuntu" and click on the
"Instalar Ahora" option to proceed.
Step 7
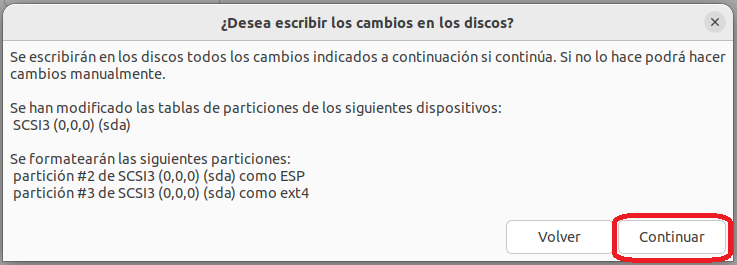
A warning prompt will appear on the screen and click on the "Continuar" button
to ignore this warning.
Step 8
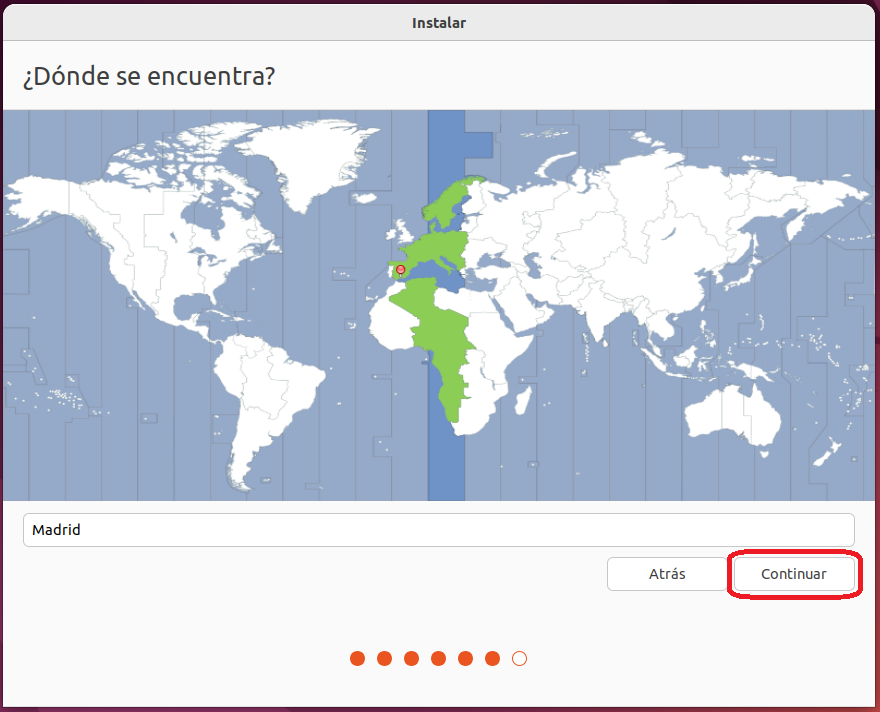
Choose your time zone on the map and click Continuar.
Step 9
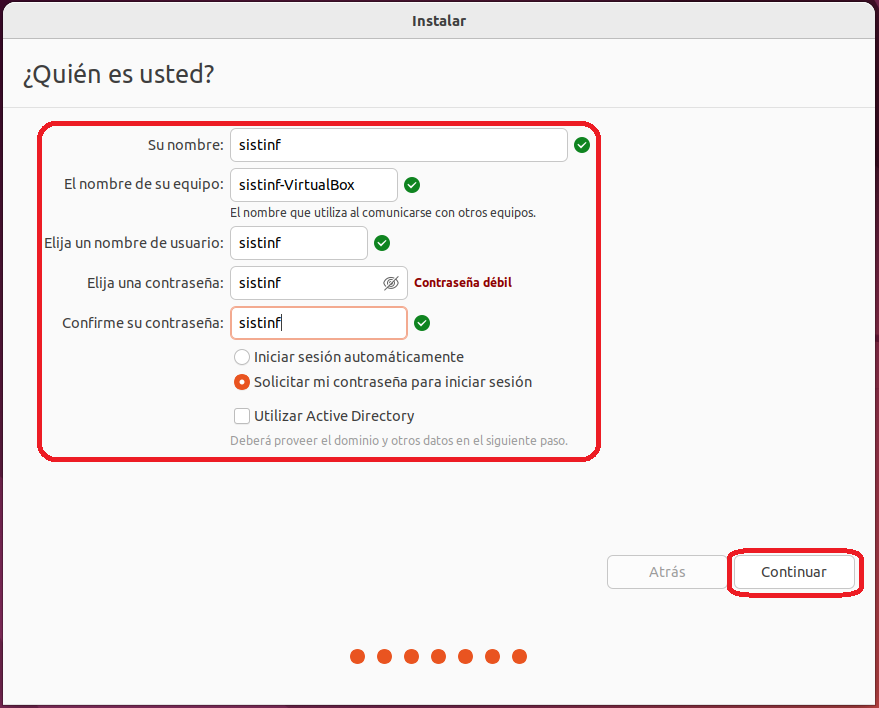
Now, set your user account here by filling the necessary details
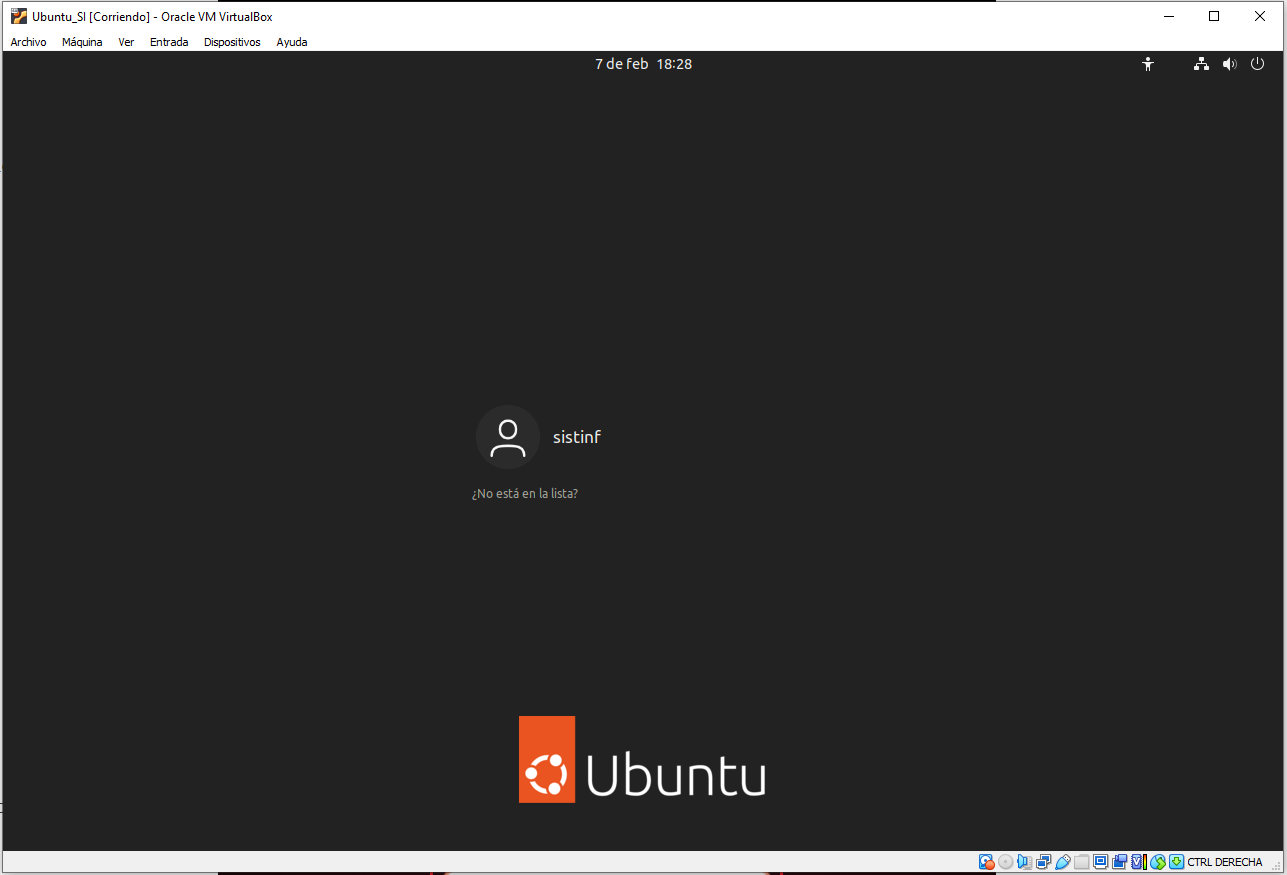
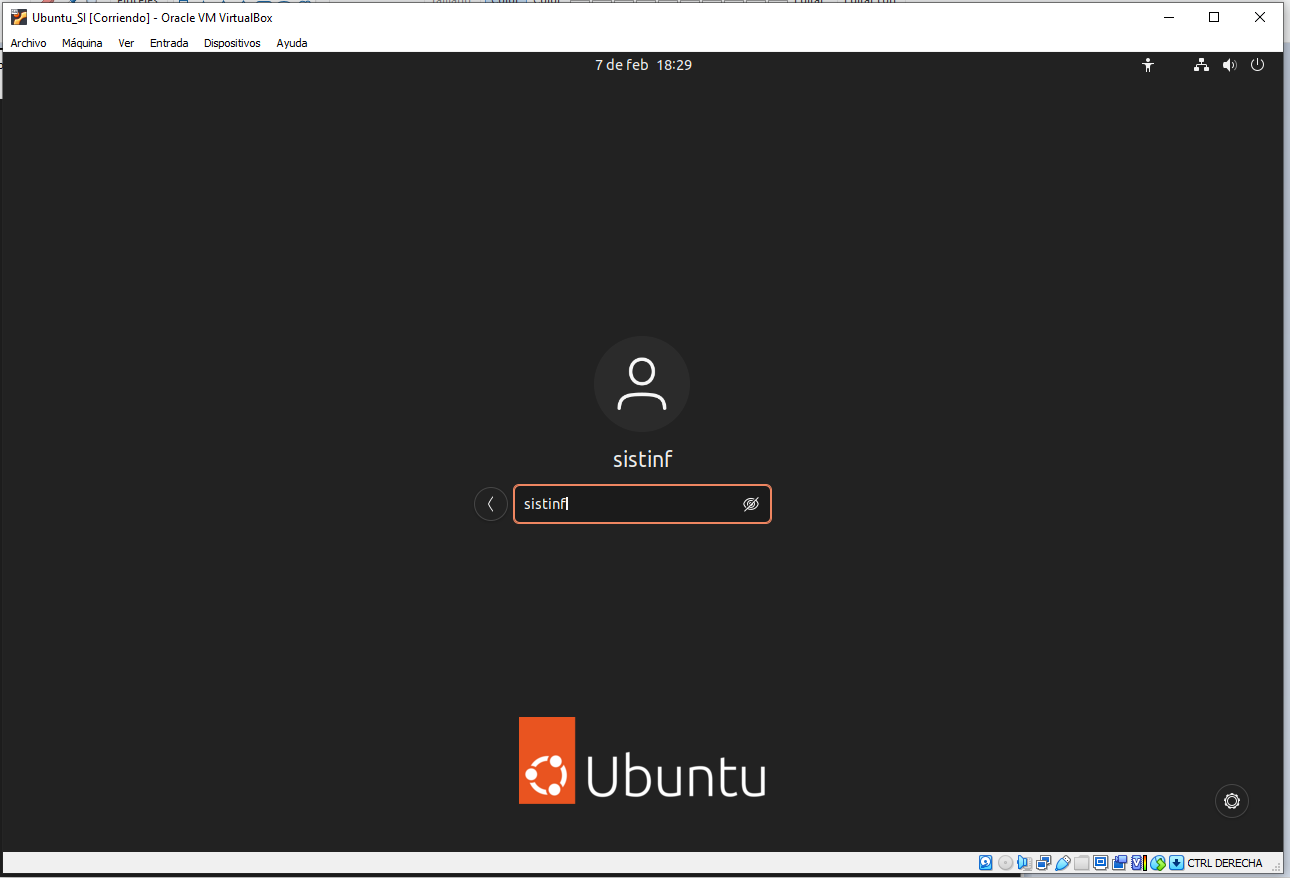
Note: For the classroom's computers:
Nombre: sistinf
contraseña: sistinf
and click on
the "Continuar" button to proceed.
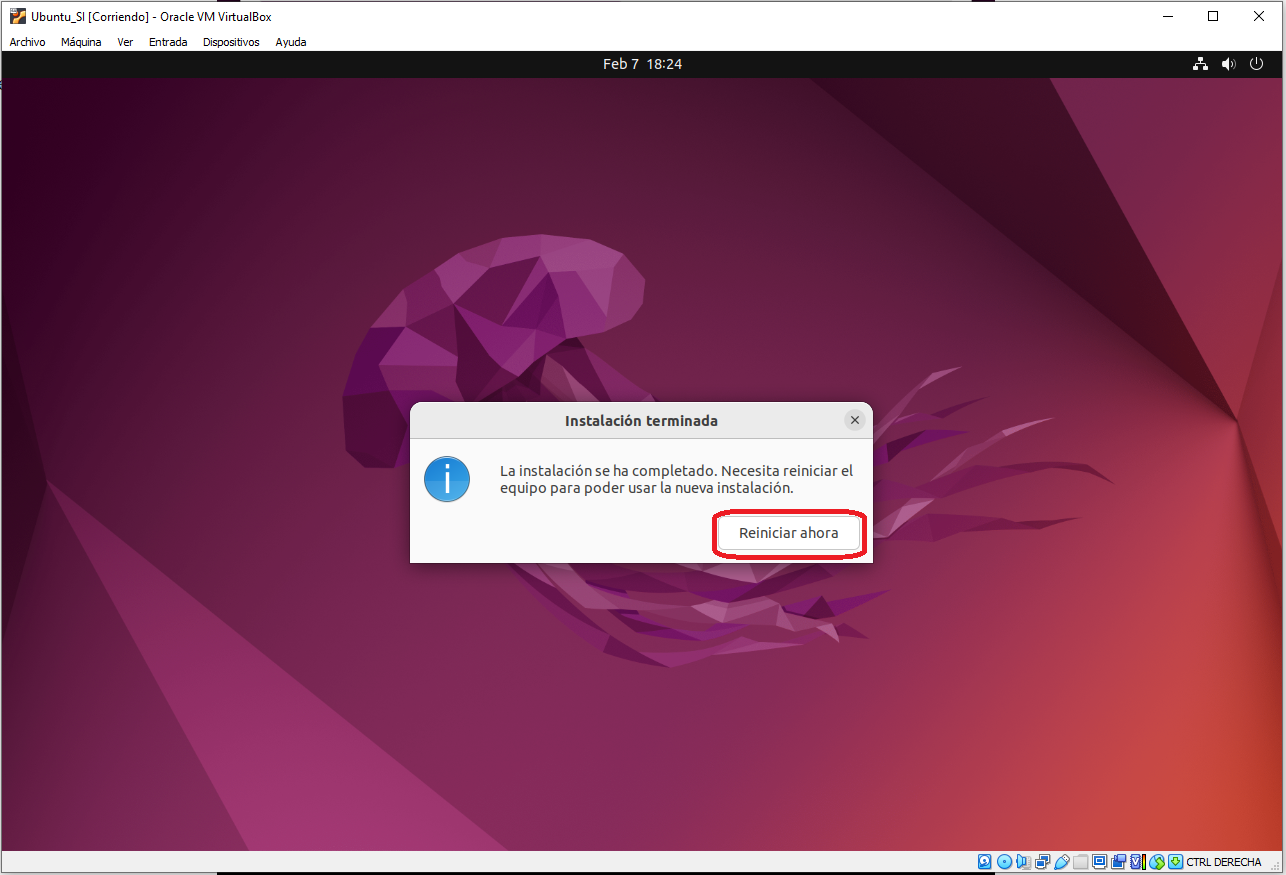
Now, the installation process will begin.
Restart your system by clicking on the "Reiniciar ahora" option.
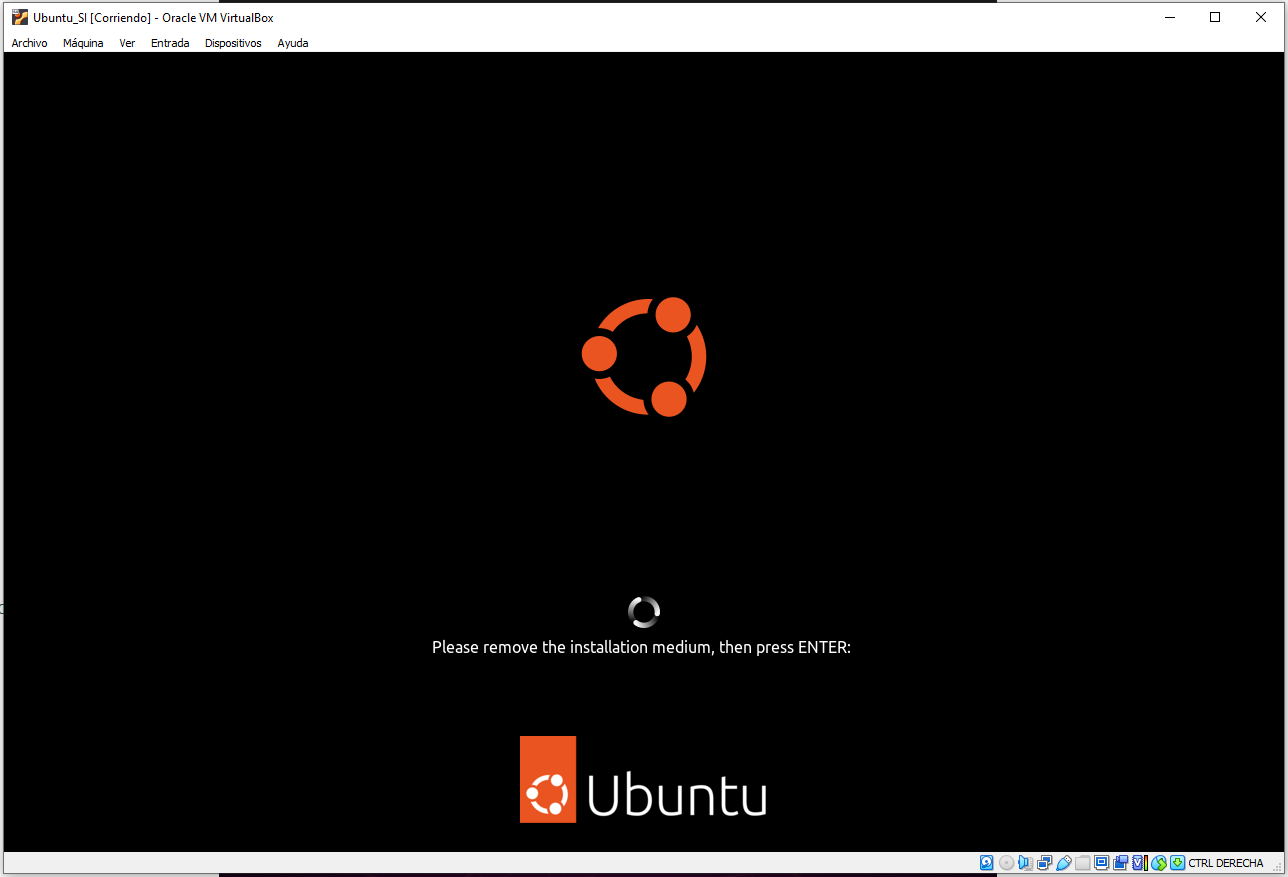
Step 10
Click the "Enter" keyboard.
Enter the user and password
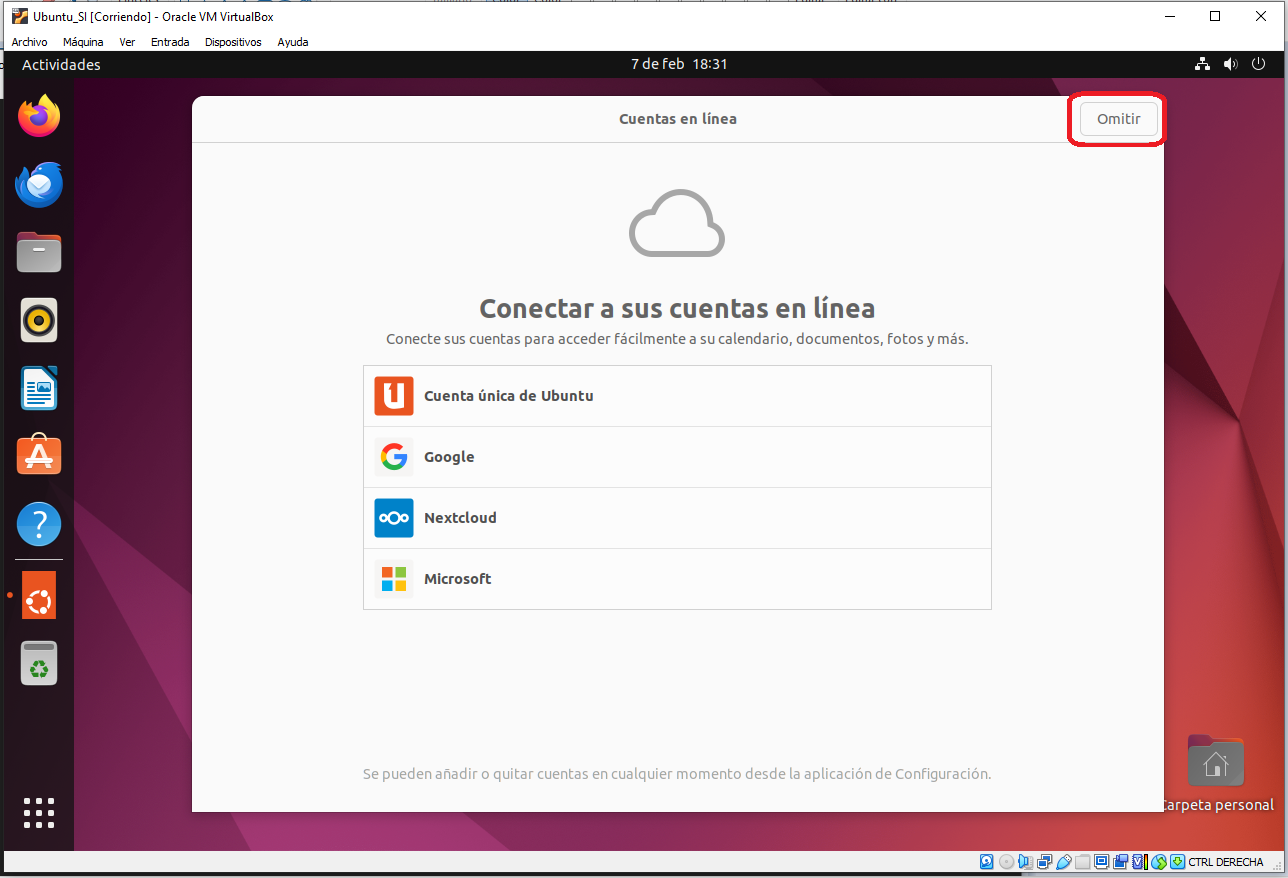
Proceed to avoid the options of the "Cuentas en línea" window, click the "Omitir" button
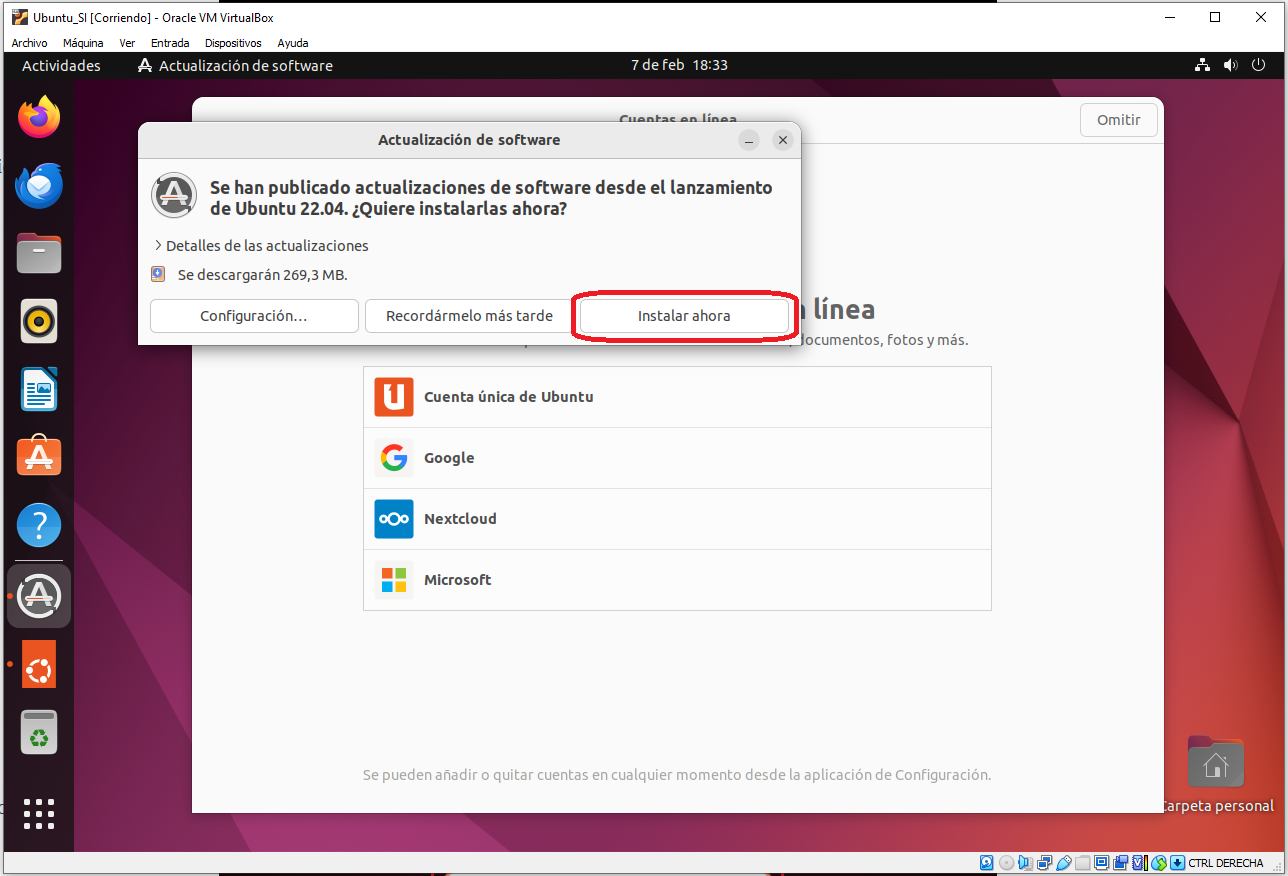
If appear the dialog "Actualización de software" click the "Instalar ahora" button
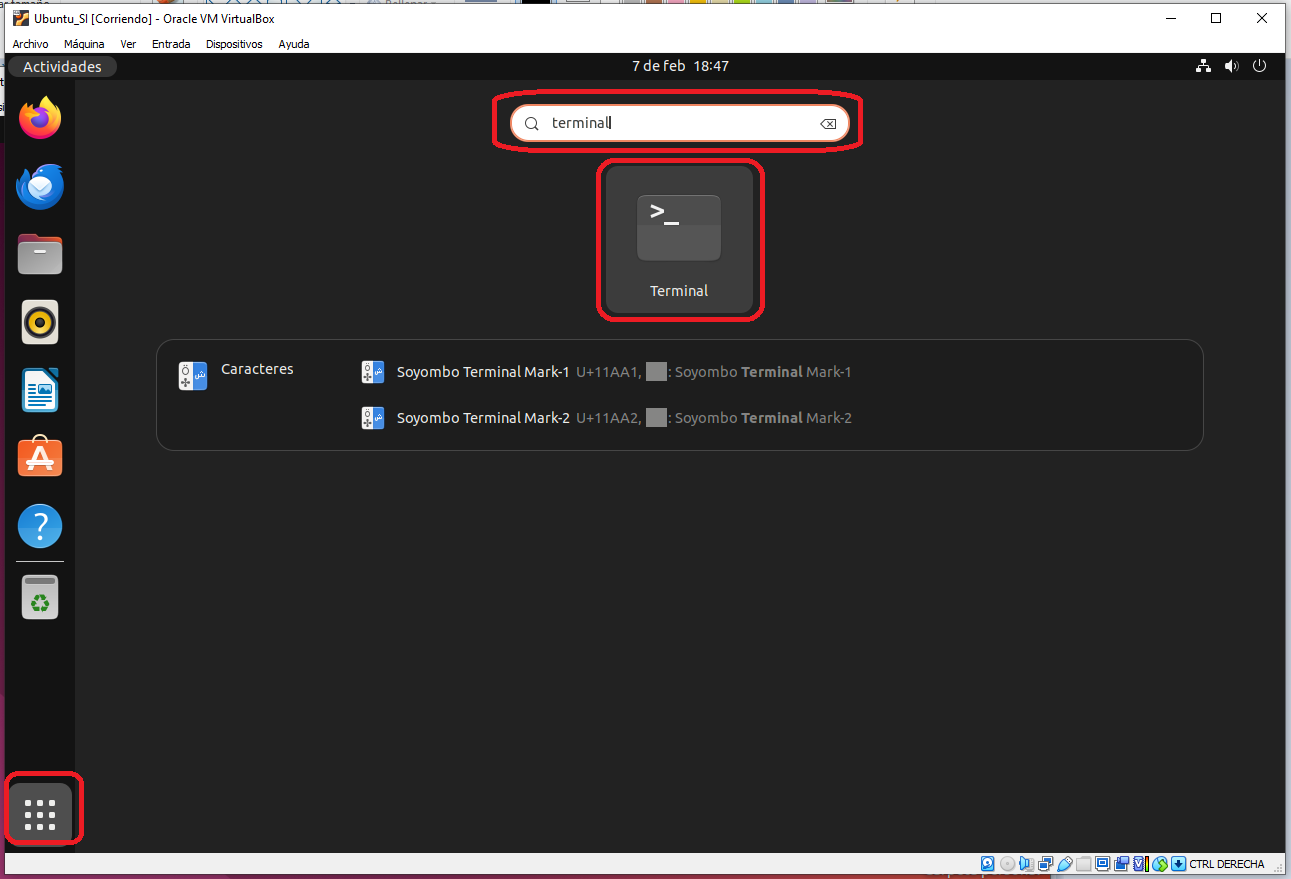
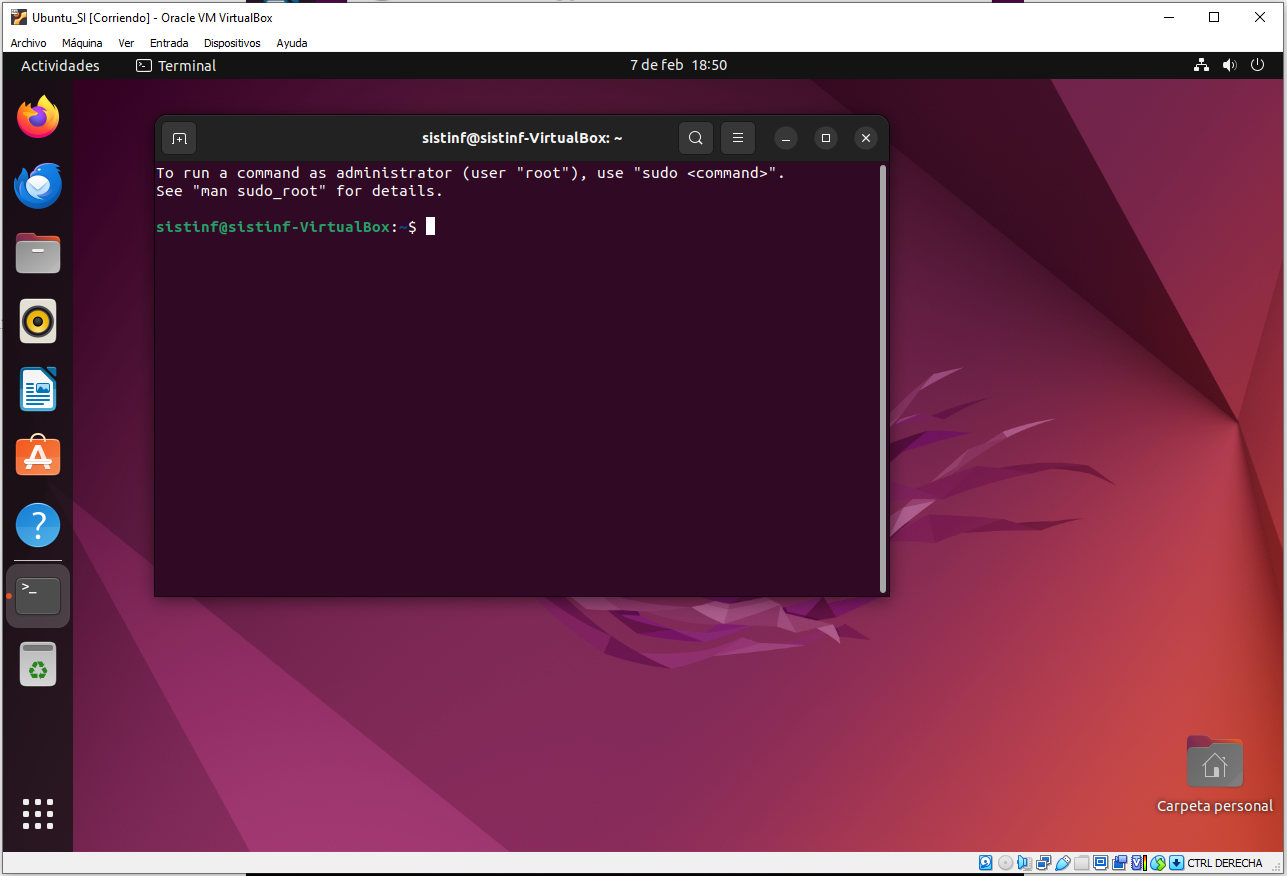
We will normally use the "Terminal" window to introduce commands.
