Java Networking
Through the classes in java.net, Java programs can
use TCP or UDP to communicate over the Internet. The URL, URLConnection, Socket,
and ServerSocket classes all use TCP to communicate over the network. The
DatagramPacket, DatagramSocket, and MulticastSocket classes are for use with
UDP.
This hands-on lab takes you through the basics of
using Java networking.
Exercise 1: Writing Client and Server
(1.1) Build and run
the server side code
0. Start NetBeans IDE if you have not done so
yet.
1. Create a new NetBeans project
- Select File->New Project (Ctrl+Shift+N). The New Project dialog box appears.
- Under Choose Project pane, select
Java under Categories and Java Application under Projects.
- Click Next.

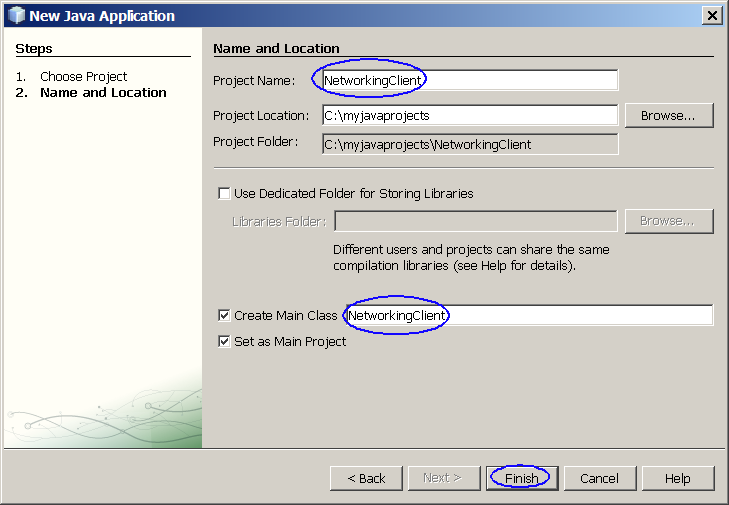
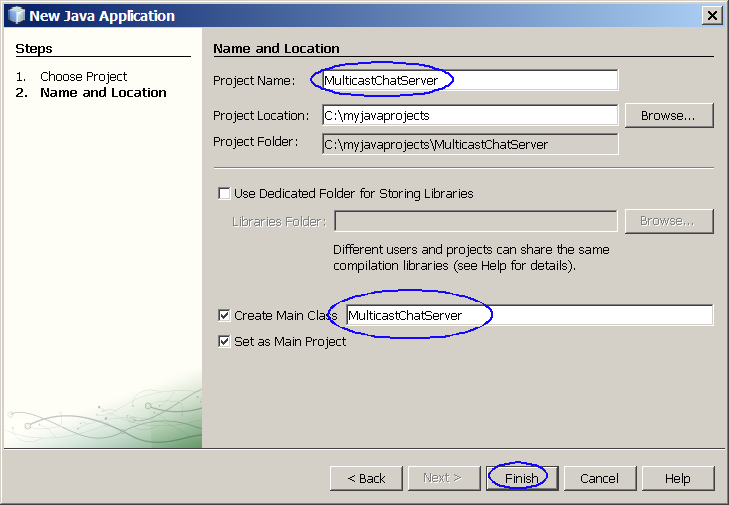
- Under Name and Location pane, for
the Project Name field, type in NetworkingServer
as project name.
- For Create Main Class field, type
in NetworkingServer.
(Figure-1.10 below)
- Click Finish.

Figure-1.10: Create a new
project
- Observe that NetworkingServer
project appears and IDE generated NetworkingServer.java is displayed in the
source editor window of NetBeans IDE.
2. Modify the IDE generated
NetworkingServer.java as shown in
Code-1.11 below. Study the code by paying special attention to the bold
fonted parts.
/* SERVER – may enhance to work for
multiple clients */
import java.net.*;
import
java.io.*;
public class NetworkingServer {
public static void main(String [] args)
{
ServerSocket server =
null;
Socket
client;
// Default port number we
are going to use
int
portnumber = 1234;
if
(args.length >=
1){
portnumber =
Integer.parseInt(args[0]);
}
// Create Server side
socket
try
{
server = new
ServerSocket(portnumber);
} catch (IOException ie)
{
System.out.println("Cannot open socket." +
ie);
System.exit(1);
}
System.out.println("ServerSocket is created " +
server);
// Wait for the data from
the client and reply
while(true)
{
try
{
// Listens for a connection to be made
to
// this socket and accepts it. The method blocks
until
// a connection is
made
System.out.println("Waiting for connect
request...");
client =
server.accept();
System.out.println("Connect request is
accepted...");
String clientHost =
client.getInetAddress().getHostAddress();
int clientPort =
client.getPort();
System.out.println("Client host = " + clientHost + " Client port = " +
clientPort);
// Read data from the client
InputStream clientIn = client.getInputStream();
BufferedReader br = new BufferedReader(new
InputStreamReader(clientIn));
String msgFromClient =
br.readLine();
System.out.println("Message received from client = " +
msgFromClient);
// Send response to the
client
if (msgFromClient != null &&
!msgFromClient.equalsIgnoreCase("bye"))
{
OutputStream clientOut = client.getOutputStream();
PrintWriter pw = new PrintWriter(clientOut, true);
String ansMsg = "Hello, " + msgFromClient;
pw.println(ansMsg);
}
// Close
sockets
if (msgFromClient != null &&
msgFromClient.equalsIgnoreCase("bye"))
{
server.close();
client.close();
break;
}
}
catch (IOException ie)
{
}
}
}
}
|
Code-1.11: NetworkingServer.java
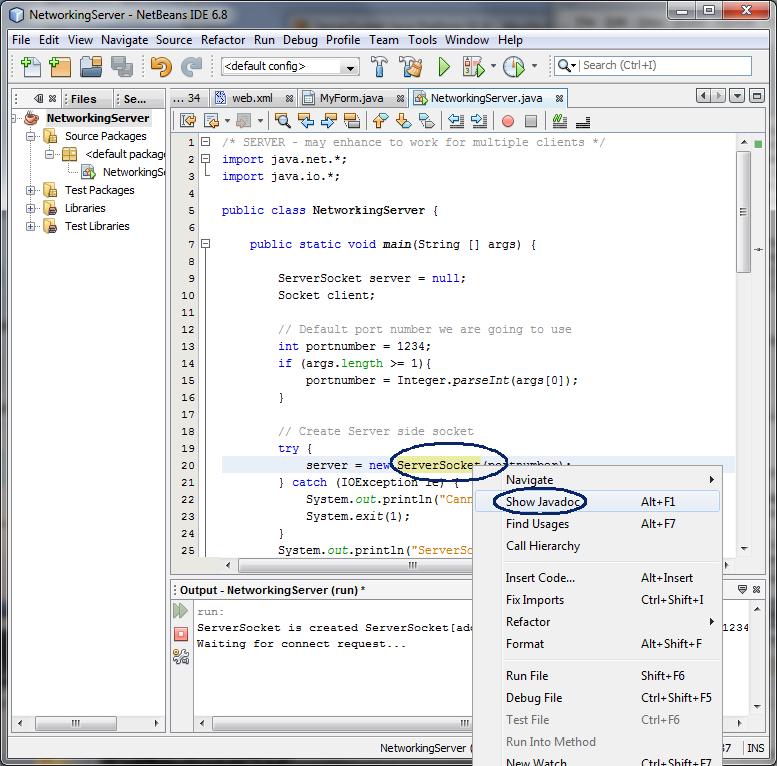
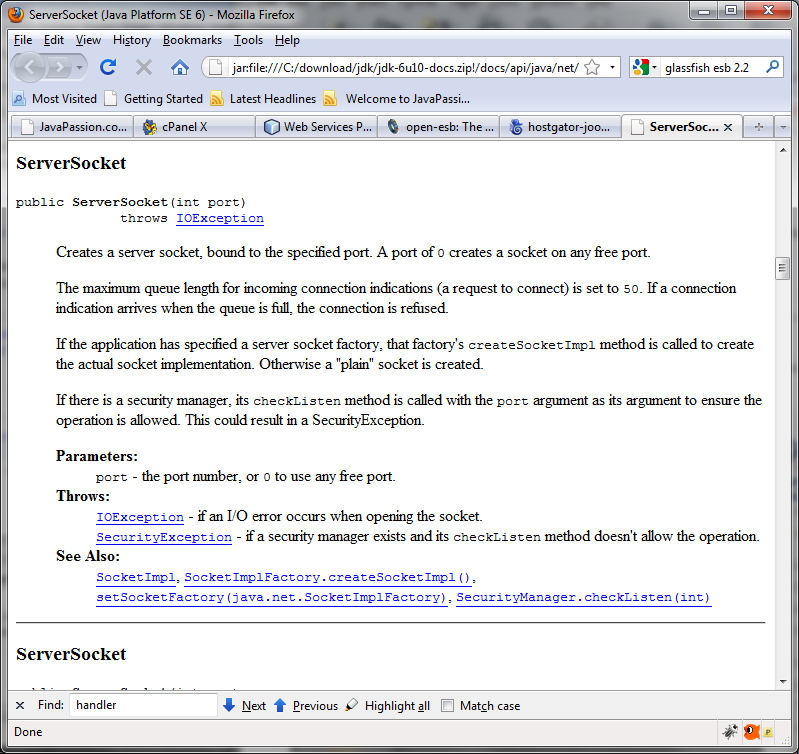
3.
Study
ServerSocket class through
context-sensitive Javadoc.
4. Build and run the
project
- Right click NetworkingServer
project and select Run.
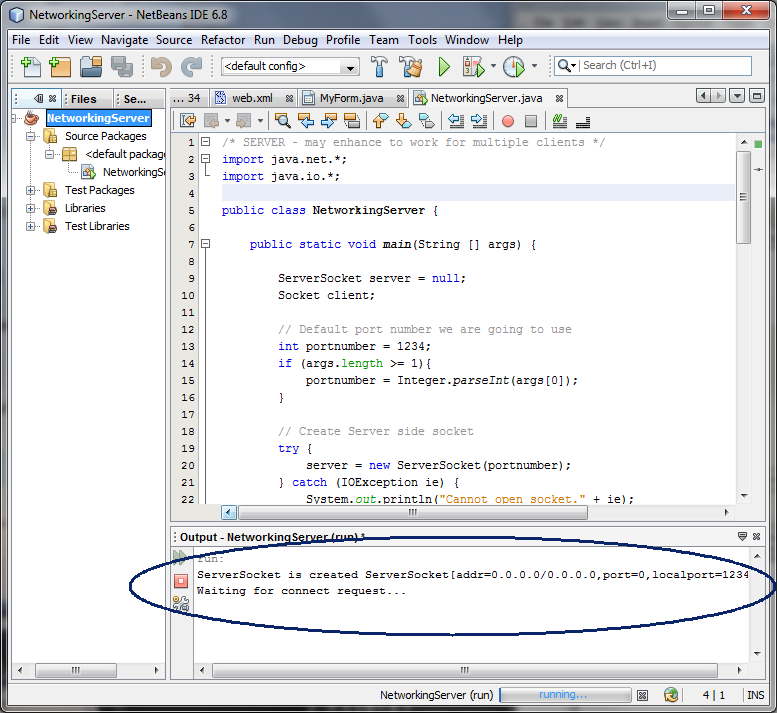
- Observe that the server is waiting for a connection request from a client
in the Output window. (Figure-1.13
below)
ServerSocket is created
ServerSocket[addr=0.0.0.0/0.0.0.0,port=0,localport=1234]
Waiting for
connect request...
|
Figure-1.13: Result of running
NetworkingSever application
(1.2) Build and run
the client side code
1. Create a new NetBeans project
- Select File->New Project (Ctrl+Shift+N). The New Project dialog box appears.
- Under Choose Project pane, select
Java under Categories and Java Application under Projects.
- Click Next.
- Under Name and Location pane, for
the Project Name field, type in NetworkingClient as project name.
- For Create Main Class field, type
in NetworkingClient.
- Click Finish.
- Observe that NetworkingClient
project appears and IDE generated NetworkingClient.java is displayed in the
source editor window of NetBeans IDE.
2. Modify the IDE generated
NetworkingClient.java as shown in
Code-1.21 below. Study the code by paying special attention to the bold
fonted parts.
/* CLIENT */
import
java.io.*;
import java.net.*;
public class NetworkingClient
{
public static void
main(String args[]) {
Socket client =
null;
// Default port number we
are going to use
int
portnumber = 1234;
if
(args.length >=
1){
portnumber =
Integer.parseInt(args[0]);
}
for (int i=0; i <10;
i++)
{
try
{
String msg =
"";
// Create a client socket
client = new Socket(InetAddress.getLocalHost(),
portnumber);
System.out.println("Client socket is created " +
client);
// Create an output stream of the client socket
OutputStream clientOut = client.getOutputStream();
PrintWriter pw = new PrintWriter(clientOut, true);
// Create an input stream of the client socket
InputStream clientIn = client.getInputStream();
BufferedReader br = new BufferedReader(new
InputStreamReader(clientIn));
// Create BufferedReader for a standard
input
BufferedReader stdIn = new
BufferedReader(new
InputStreamReader(System.in));
System.out.println("Enter your name. Type Bye to exit.
");
// Read data from standard input device and write
it
// to the output stream of the client
socket.
msg =
stdIn.readLine().trim();
pw.println(msg);
// Read data from the input stream of the client
socket.
System.out.println("Message returned from the server = " +
br.readLine());
pw.close();
br.close();
client.close();
// Stop the
operation
if (msg.equalsIgnoreCase("Bye"))
{
break;
}
}
catch (IOException ie)
{
System.out.println("I/O error " +
ie);
}
}
}
}
|
Code-1.21: NetworkingClient.java
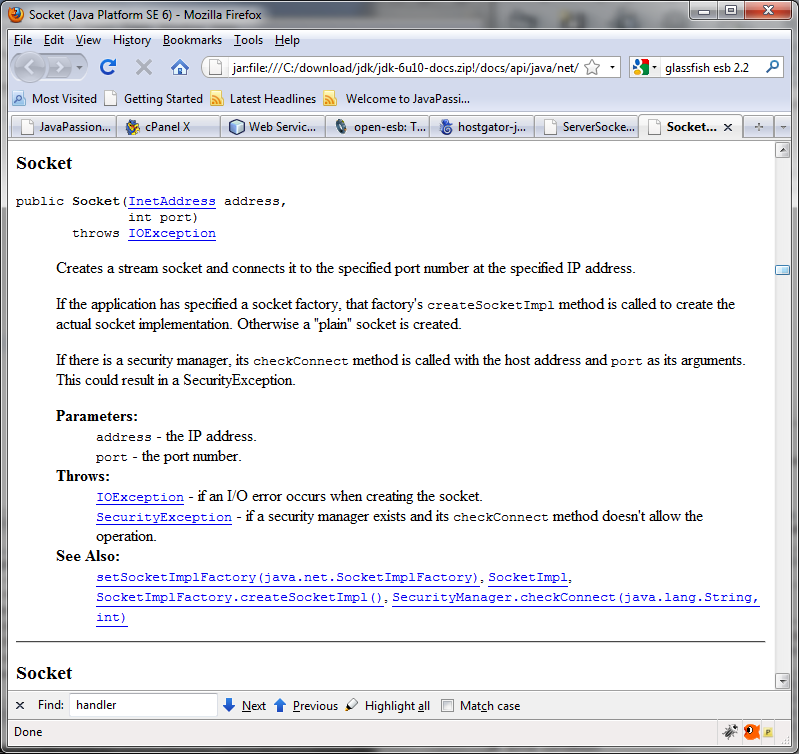
3.
Display and study Socket class through context-sensitive
Javadoc'ing.
4. Build and run the
project
- Right click NetworkingClient
project and select Run.
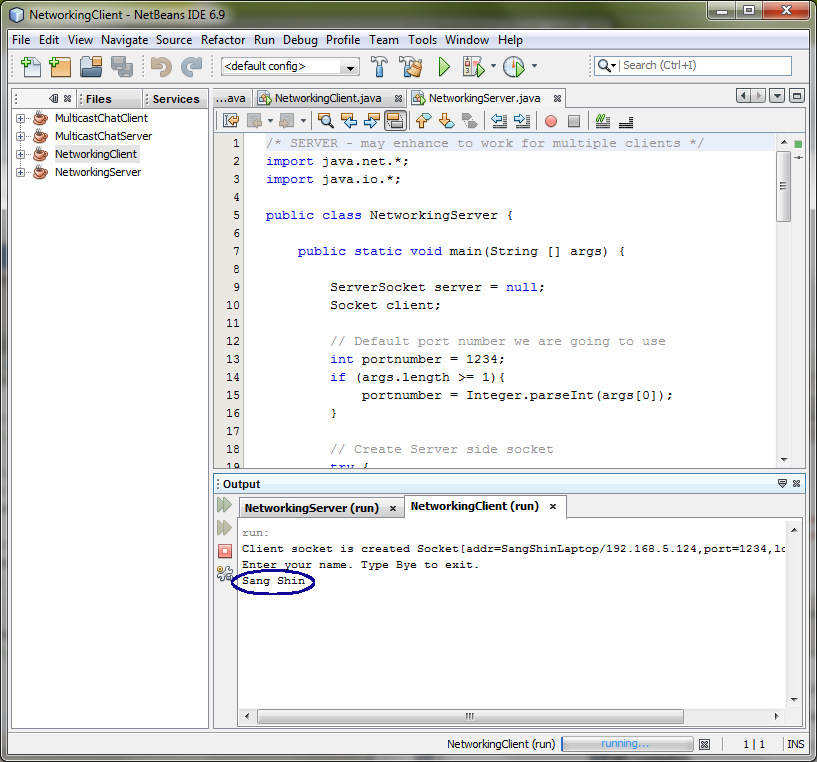
- Observe the client is prompting you to enter your name. (Figure-1.23
below)
Client socket is created
Socket[addr=Passion2/192.168.2.4,port=1234,localport=1775]
Enter your
name. Type Bye to exit.
|
Figure-1.23: Waiting for
the user to enter name
Trouble-shooting: If you see the
following exception, it is highly likely that either you have not started the
server or if you started the server, the firewall on your system blocks the
incoming connection request.
I/O error java.net.ConnectException:
Connection refused: connect
I/O error java.net.ConnectException:
Connection refused: connect
I/O error java.net.ConnectException:
Connection refused: connect
I/O error java.net.ConnectException:
Connection refused: connect
|
Figure-1.24: Error
condition
Solution: Make sure the server is run first. Also make
sure the firewall on your system is turned off.
- Enter your name under the line of "Enter
your name. Type Bye to exit." in the Output window, like Sang Shin in this example, and press Enter key.
- Observe that the server responds back with "Hello, Sang Shin".
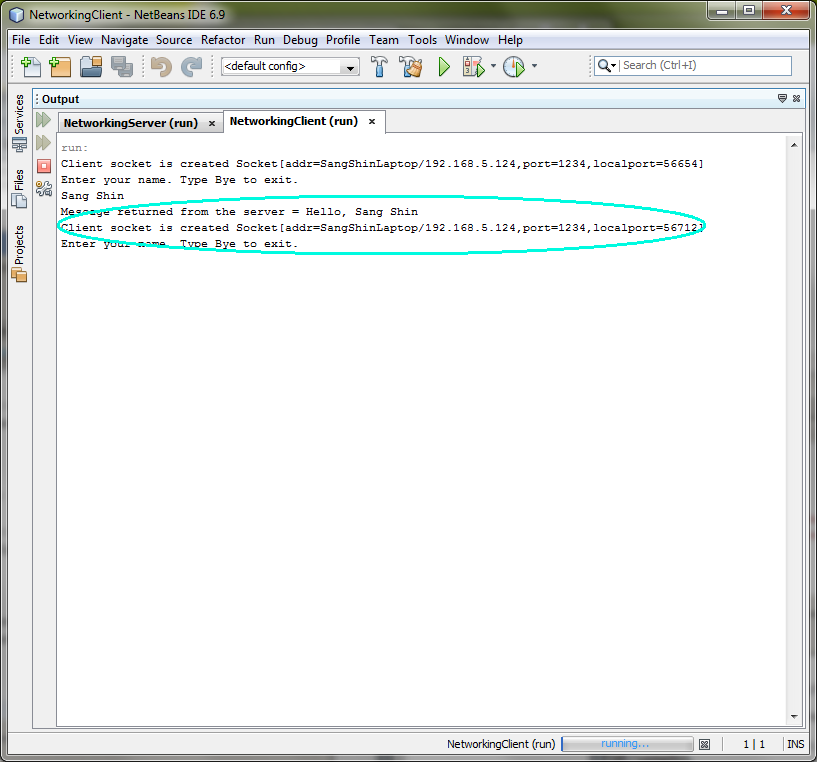
Figure-1.25: Enter your name
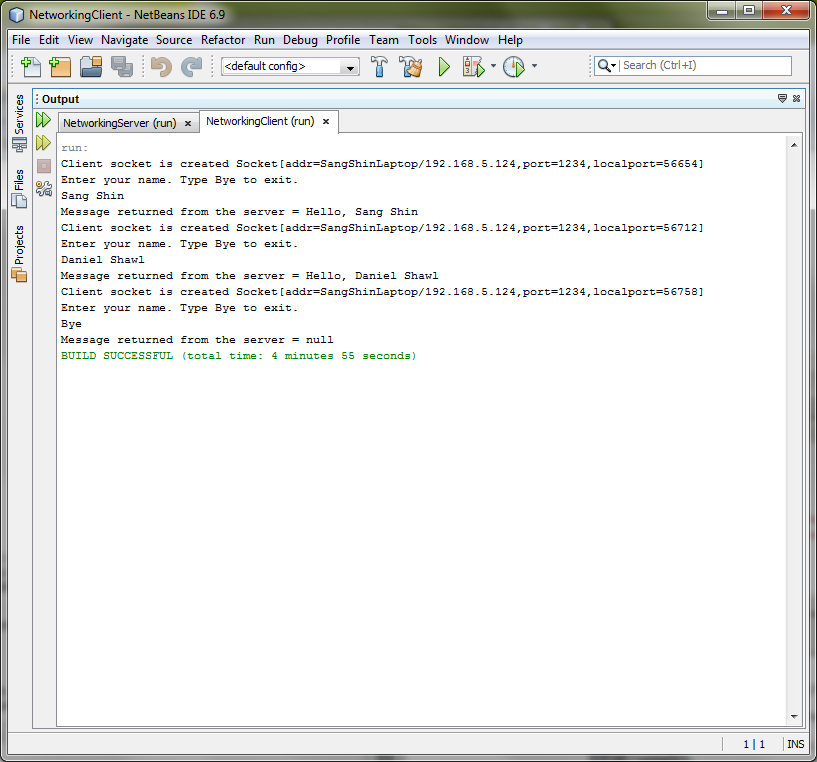
- Enter a few more names and observe that the server kept sending back
responses.
- Type Bye.
5. Observe the server side.
- Click NetworkingServer (run) tab to see the Output window of the server
side.
- Observe that the server received a message, Sang Shin in this
example. (Figure-1.27 and Figure-1.28 below.)
ServerSocket is created
ServerSocket[addr=0.0.0.0/0.0.0.0,port=0,localport=1234]
Waiting for
connect request...
Connect request is accepted...
Client host = 192.168.2.4 Client port =
1775
Message received from client = Sang
Shin
Waiting for connect request...
Connect request is
accepted...
Client host = 192.168.2.4 Client port =
1777
|
Figure-1.27: Client connection request is
accepted and message is received
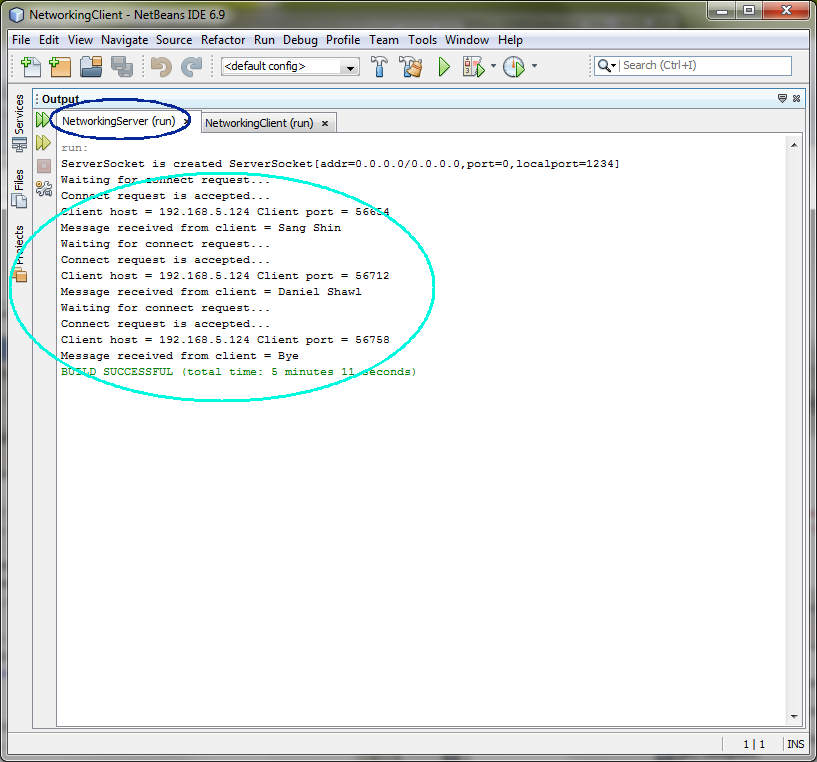
Figure-1.28: Client
connection request is accepted and message is received
return
to top of the exercise
Summary
In this exercise, you learned how to build
and run a simple Hello server and client using Networking API.
Exercise 2: Writing Multicast Client and
Server
(2.1) Build and run
the server side code
1. Create a new NetBeans project
- Select File->New Project (Ctrl+Shift+N). The New Project dialog box appears.
- Under Choose Project pane, select
Java under Categories and Java Application under Projects.
- Click Next.
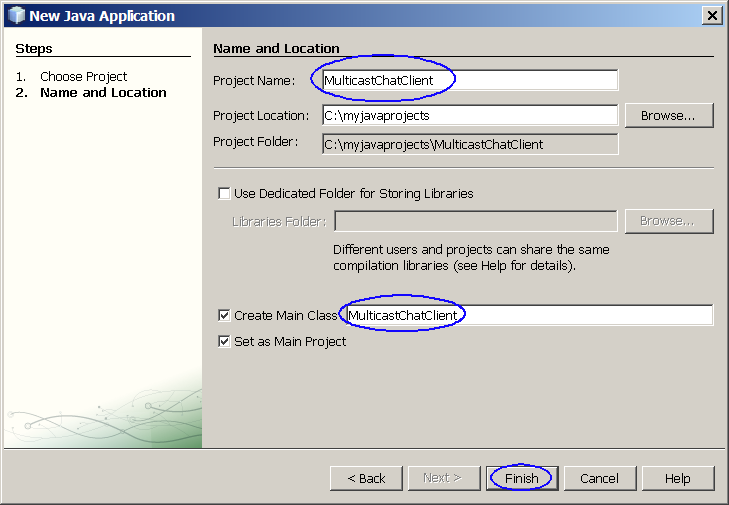
- Under Name and Location pane, for
the Project Name field, type in MulticastChatServer as project name.
- For Create Main Class field, type
in MulticastChatServer.
- Observe that MulticastChatServer
project appears and IDE generated MulticastChatServer.java is displayed in the
source editor window of NetBeans IDE.
2. Modify the IDE generated
MulticastChatServer.java as shown in
Code-2.11 below. Study the code by paying special attention to the bold
fonted parts.
import java.net.*;
public class
MulticastChatServer {
public static void
main(String
args[])
throws Exception {
//
Default port number we are going to
use
int portnumber =
5000;
if (args.length >=
1) {
portnumber =
Integer.parseInt(args[0]);
}
// Create a MulticastSocket
MulticastSocket serverMulticastSocket =
new
MulticastSocket(portnumber);
System.out.println("MulticastSocket is created at port " +
portnumber);
// Determine the IP address of a host, given the
host name
InetAddress group =
InetAddress.getByName("225.4.5.6");
// getByName- returns IP address of given
host
serverMulticastSocket.joinGroup(group);
System.out.println("joinGroup method is
called...");
boolean
infinite = true;
//
Continually receives data and prints
them
while (infinite)
{
byte buf[] = new
byte[1024];
DatagramPacket data
=
new DatagramPacket(buf,
buf.length);
serverMulticastSocket.receive(data);
String msg
=
new
String(data.getData()).trim();
System.out.println("Message received from client = " +
msg);
}
serverMulticastSocket.close();
}
}
|
Code-2.11:
MulticastChatServer.java
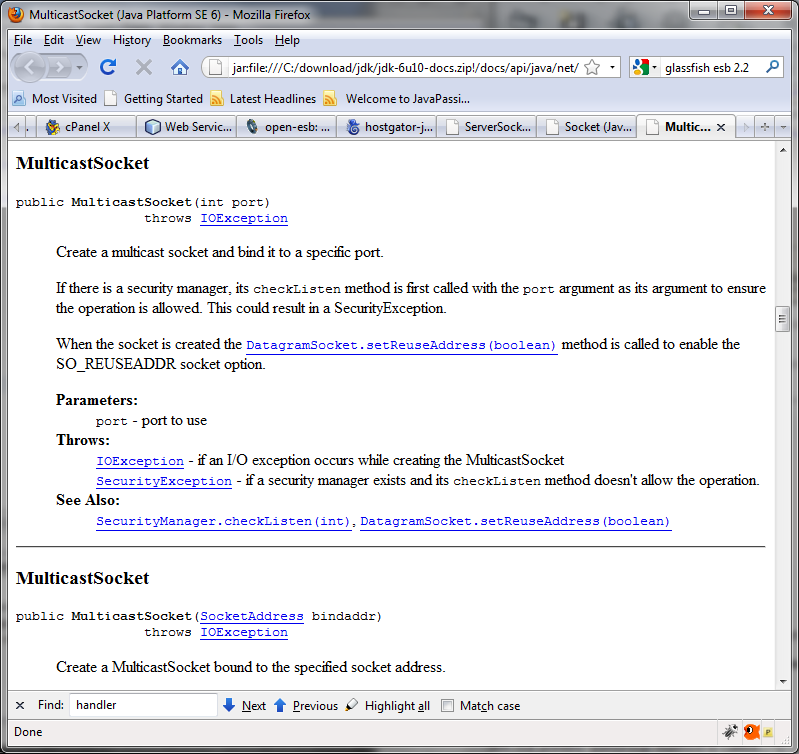
3. Display and study Javadoc of the
MulticastSocket class.
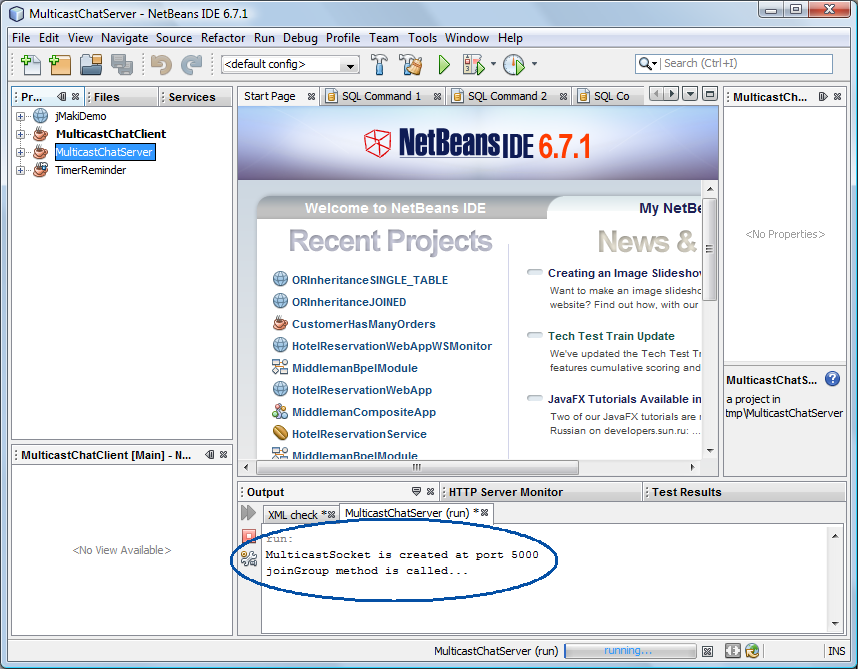
4. Build and run the
project
- Right click MulticastChatServer
project and select Run.
- Observe that the server is waiting for a datagram message from a client in
the Output window. (Figure-2.12 below)
MulticastSocket is created at port
5000
joinGroup method is called...
|
Figure-2.12:
Waiting for a message from a client
(2.2) Build and run
the client side code
1. Create a new NetBeans project
- Select File->New Project (Ctrl+Shift+N). The New Project dialog box appears.
- Under Choose Project pane, select
Java under Categories and Java Application under Projects.
- Click Next.
- Under Name and Location pane, for
the Project Name field, type in MulticastChatClient as project
name.
- For Create Main Class field, type
in MulticastChatClient.
- Click Finish.
- Observe that MulticastChatClient
project appears and IDE generated MulticastChatClient.java is displayed in the
source editor window of NetBeans IDE.
2. Modify the IDE generated
MulticastChatClient.java as shown in
Code-2.21 below. Study the code by paying special attention to the bold
fonted parts.
import java.net.*;
import
java.io.*;
public class MulticastChatClient
{
public static void main(String
args[])
throws Exception {
// Default port number we are going to
use
int portnumber =
5000;
if (args.length >=
1) {
portnumber =
Integer.parseInt(args[0]);
}
// Create a MulticastSocket
MulticastSocket chatMulticastSocket = new
MulticastSocket(portnumber);
// Determine the IP address of a host, given the host
name
InetAddress group
=
InetAddress.getByName("225.4.5.6");
// Joins a multicast
group
chatMulticastSocket.joinGroup(group);
// Prompt a user to enter a
message
String msg =
"";
System.out.println("Type
a message for the server:");
BufferedReader br
=
new BufferedReader(new
InputStreamReader(System.in));
msg = br.readLine();
//
Send the message to Multicast
address
DatagramPacket data
= new DatagramPacket(msg.getBytes(),
0,
msg.length(), group,
portnumber);
chatMulticastSocket.send(data);
// Close the socket
chatMulticastSocket.close();
}
}
|
Code-2.21:
MulticastChatClient.java
3. Build and run the project
- Right click MulticastChatClient
project and select Run.
- Observe the client is prompting you to enter a message. (Figure-2.23
below)
Type a message for the
server:
|
Figure-2.23: Waiting for the user to enter
a message
- Enter a message, like Hello Server in this
example, and press Enter key.
(Figure-2.24 below)
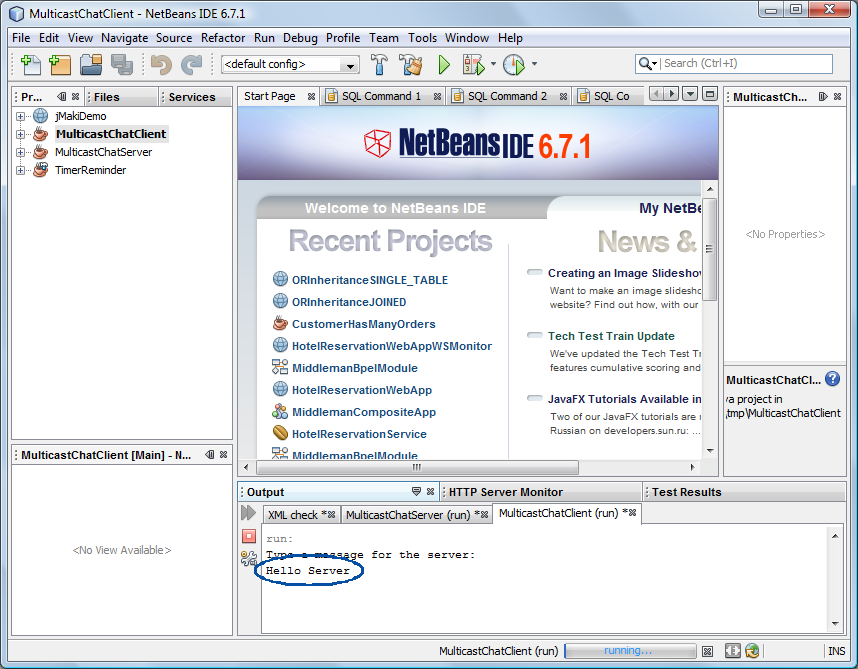
Figure-2.24: Enter a
message
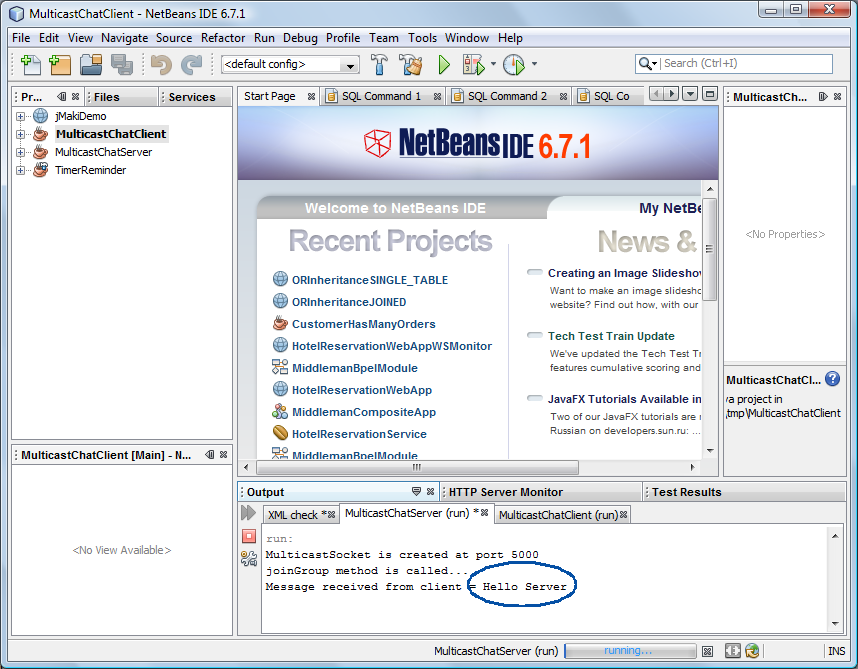
4. Observe the server side.
- Click MulticastChatServer (run) tab to see the Output window of the server
side.
- Observe that the server received a multicast message, Hello, World! in
this example. (Figure-2.25 below)
MulticastSocket is created at port
5000
joinGroup method is called...
Message received from client
= Hello
Server
|
Figure-2.25: Message is received from
a client
 return
to top of the exercise
return
to top of the exercise
Summary
In this exercise, you learned how to build
and run a simple Hello server and client using Multicast.
Homework
1. The homework is to create your own
NetworkingServer and NetworkingClient applications as following. We will
name them as MyComputingServer and MyComputingClient.
- The client send two numbers and the server sends back addition of the two
numbers.