Java Serialization
Object serialization is the process of saving an
object's state to a sequence of bytes, as well as the process of rebuilding
those bytes into a live object at some future time. The Java Serialization API
provides a standard mechanism for developers to handle object serialization. The
API is small and easy to use, provided the classes and methods are
understood. This hands-on lab takes you through the basics of using Java
serialization.
Exercise 1: Serialize and Deserialize an
object
(1.1) Serialize the
current time
0. Start NetBeans IDE if you have not done so
yet.
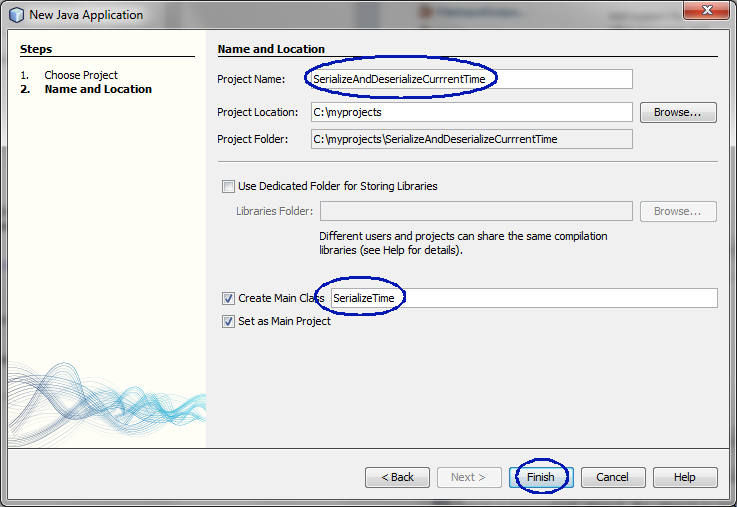
1. Create a new NetBeans project
- Select File->New Project (Ctrl+Shift+N). The New Project dialog box appears.
- Under Choose Project pane, select
Java under Categories and Java Application under Projects.
- Click Next.
- Under Name and Location pane, for
the Project Name field, type in SerializeAndDeserializeCurrrentTime
as project name.
- For Create Main Class field, type
in SerializeTime.
- Click Finish.
- Observe that SerializeAndDeserializeCurrrentTime project
appears and IDE generated SerializeTime.java is displayed in the source
editor window of NetBeans IDE.
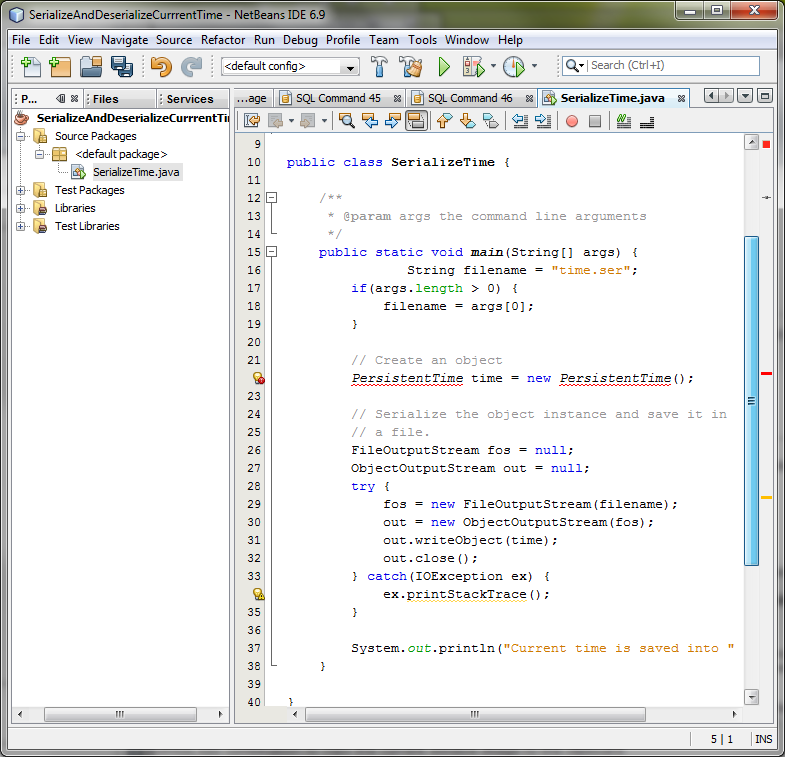
2. Modify the IDE generated
SerializeTime.java as shown in Code-1.11
below. Study the code by paying special attention to the bold fonted
parts.
import
java.io.ObjectOutputStream;
import java.io.FileOutputStream;
import
java.io.IOException;
public class
SerializeTime{
public static
void main(String [] args){
String filename = "time.ser";
if(args.length > 0) {
filename = args[0];
}
// Create an
object
PersistentTime time = new PersistentTime();
// Serialize the
object instance and save it in
// a file.
FileOutputStream fos =
null;
ObjectOutputStream out = null;
try {
fos = new FileOutputStream(filename);
out = new ObjectOutputStream(fos);
out.writeObject(time);
out.close();
} catch(IOException ex) {
ex.printStackTrace();
}
System.out.println("Current time is saved into "
+ filename);
}
}
|
Code-1.11: SerializeTime.java
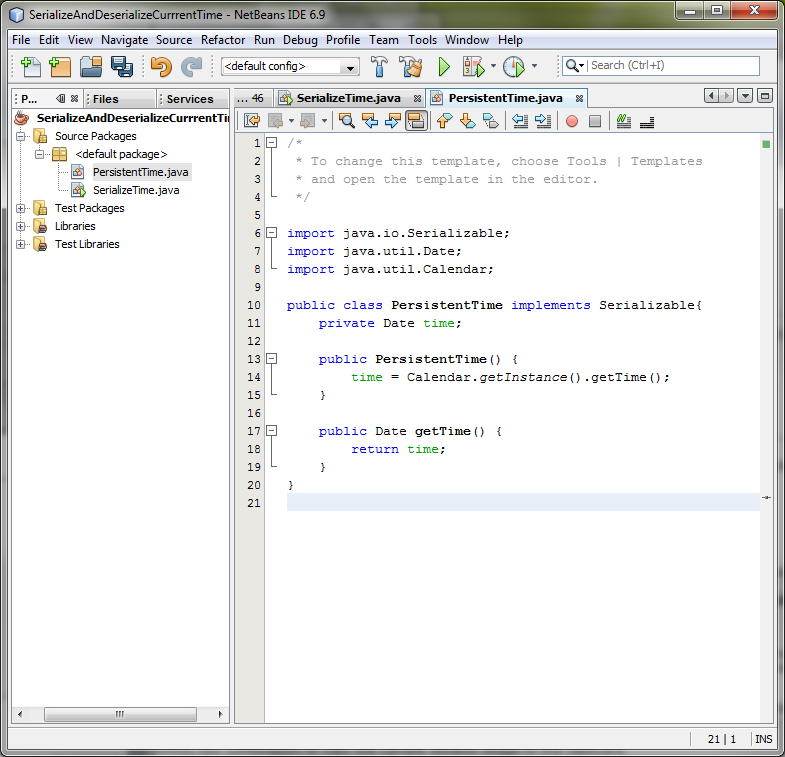
3. Write
PersistentTime.java.
import java.io.Serializable;
import
java.util.Date;
import java.util.Calendar;
public class PersistentTime implements
Serializable{
private Date
time;
public PersistentTime()
{
time =
Calendar.getInstance().getTime();
}
public Date getTime()
{
return
time;
}
}
|
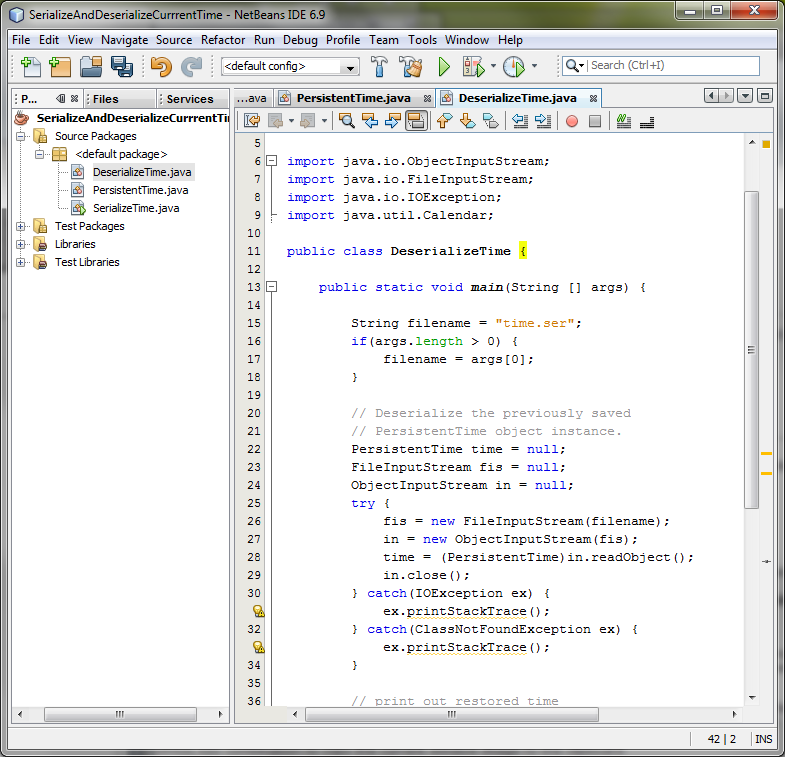
3. Write
DeserializeTime.java.
import
java.io.ObjectInputStream;
import java.io.FileInputStream;
import
java.io.IOException;
import java.util.Calendar;
public class
DeserializeTime {
public
static void main(String [] args)
{
String filename =
"time.ser";
if(args.length
> 0)
{
filename = args[0];
}
//
Deserialize the previously saved
//
PersistentTime object instance.
PersistentTime time = null;
FileInputStream fis = null;
ObjectInputStream in = null;
try
{
fis = new FileInputStream(filename);
in = new ObjectInputStream(fis);
time = (PersistentTime)in.readObject();
in.close();
}
catch(IOException ex) {
ex.printStackTrace();
}
catch(ClassNotFoundException ex) {
ex.printStackTrace();
}
// print out restored
time
System.out.println("Previously serialized time: " +
time.getTime());
// print out the current
time
System.out.println("Current time: " +
Calendar.getInstance().getTime());
}
}
|
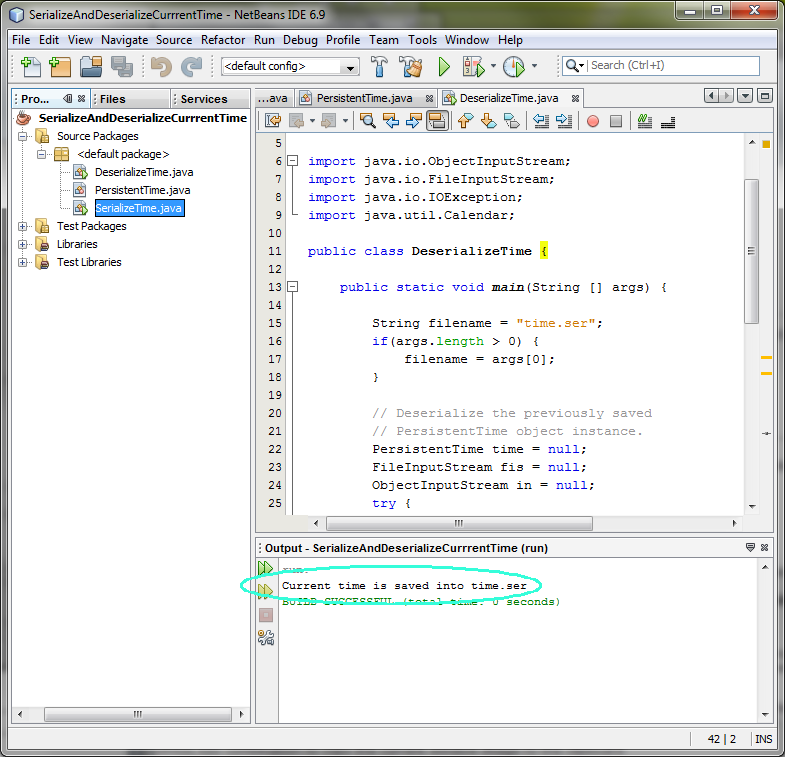
4. Build and run the
Serialization part of the project
- Right click SerializeTime.java
project and select Run File.

- Observe the result in the Output
window. (Figure-1.13 below)
Current time is saved into
time.ser
|
Figure-1.13: Result of running
SerializeAndDeserializeCurrrentTime application
5. Build and run the
Deserialization part of the project
- Right click DeserializeTime.java
project and select Run File.
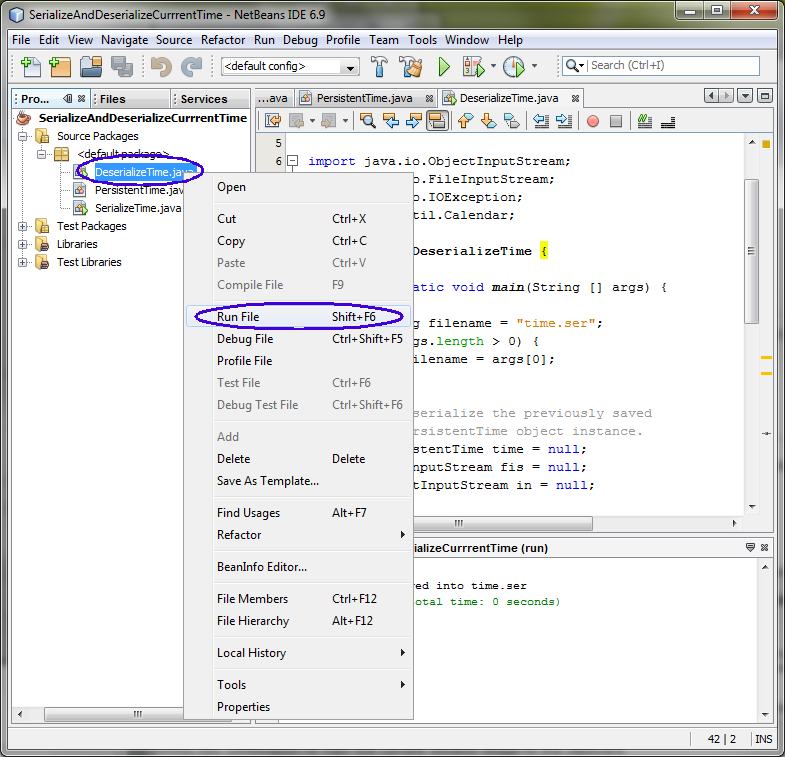
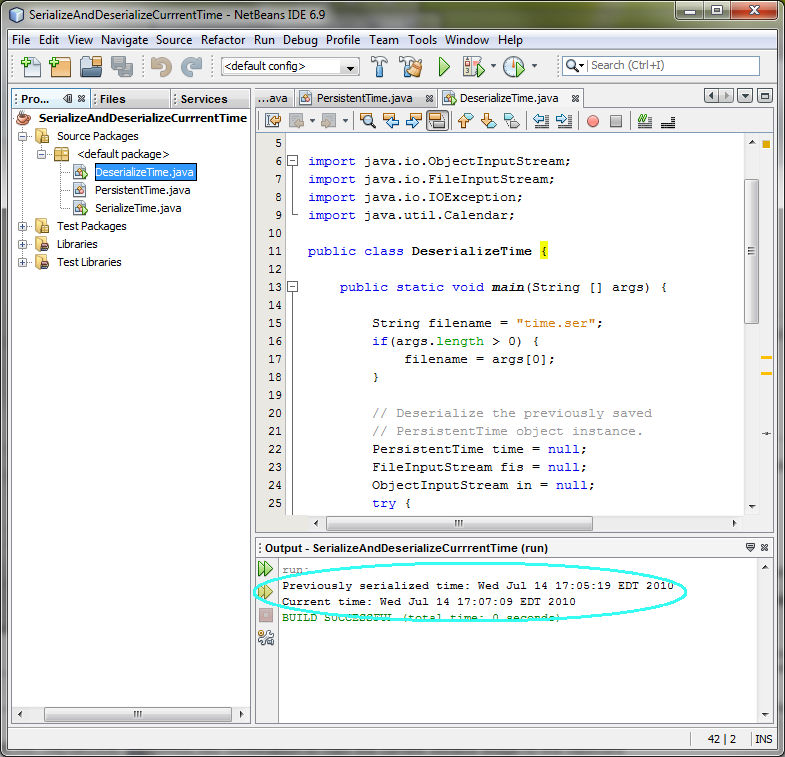
- Observe the result in the Output
window. (Figure-1.13 below)
Previously serialized time: Mon Feb 26
01:57:16 EST 2007
Current time: Mon Feb 26 01:58:58 EST
2007
|
Figure-1.13: Result of running
SerializeAndDeserializeCurrrentTime application
5. For your own exercise,
do the following tasks. Build and run the application.
- Add another field called myName which is String type to the PersistentTIme
class.
- Modify SerializeTime.java and DeserializeTime.java to display the myName
field.
(1.2) Use transient
keyword
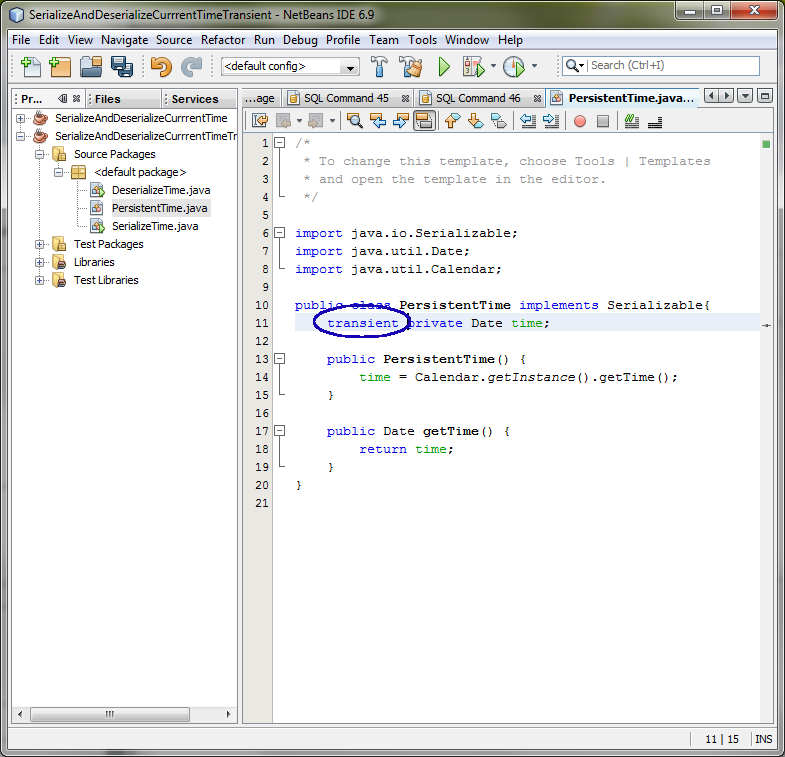
1. Modify
PersistentTime.java as shown in Code-1.11
below. The code fragment that needs to be modified is highlighted in bold and
blue-colored font. The change is to make the time field to be transient.
import java.io.Serializable;
import
java.util.Date;
import java.util.Calendar;
public class
PersistentTime implements Serializable{
transient private
Date time;
public
PersistentTime() {
time =
Calendar.getInstance().getTime();
}
public Date getTime()
{
return
time;
}
}
|
Code-1.11:
SerializeTime.java
2. Build and run the Serialization
part of the project
- Right click SerializeTime.java
project and select Run File.
- Observe the result in the Output
window. (Figure-1.13 below)
Current time is saved into
time.ser
|
Figure-1.13: Result of running
SerializeAndDeserializeCurrrentTime application
3. Build and run the
Deserialization part of the project
- Right click DeserializeTime.java
project and select Run File.
- Observe the result in the Output
window. (Figure-1.13 below)
Previously
serialized time: null
Current time: Mon Feb 26 02:07:09 EST
2007
|
Figure-1.13: Result of running
SerializeAndDeserializeCurrrentTime application

4. For your own exercise,
do the following tasks. Build and run the application.
- Make myName field transient.
- Object that the field is not serialized.
Summary
In this exercise, you learned how to do
serialization and deserialization of the an object. You also learned how
to use transient keyword.
Exercise 2: Version Control
In this exercise, you will learn how to do version
control.
- Modify
the class after serialization
- Use
unique version id
(2.1) Modify the
class after serialization
1. Build and run the Serialization part of
the project.
- Right click SerializeTime.java
project and select Run File.
- Observe the result in the Output
window. (Figure-2.10 below)
Current time is saved into
time.ser
|
Figure-2.10: Result
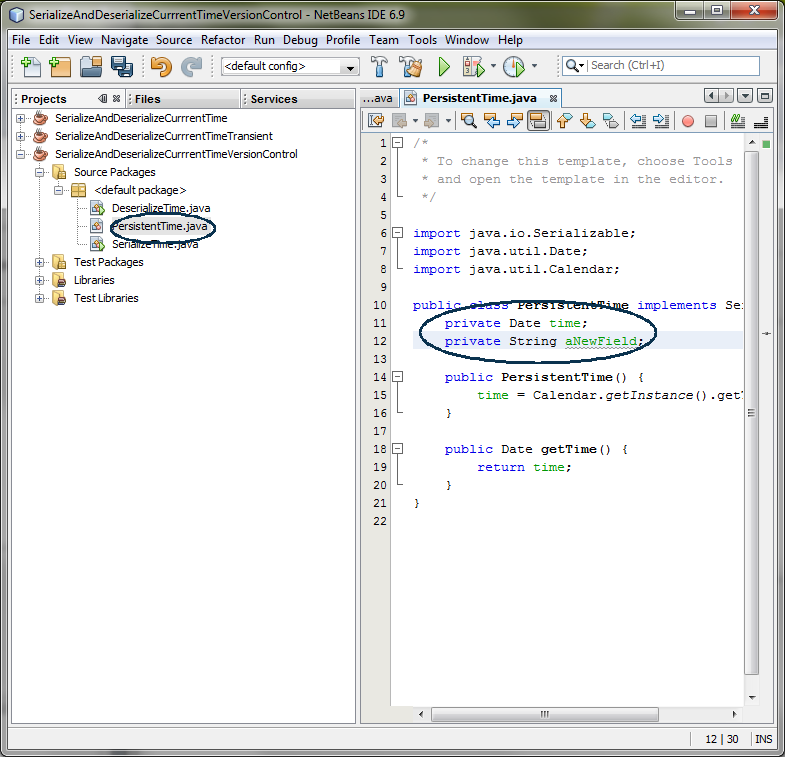
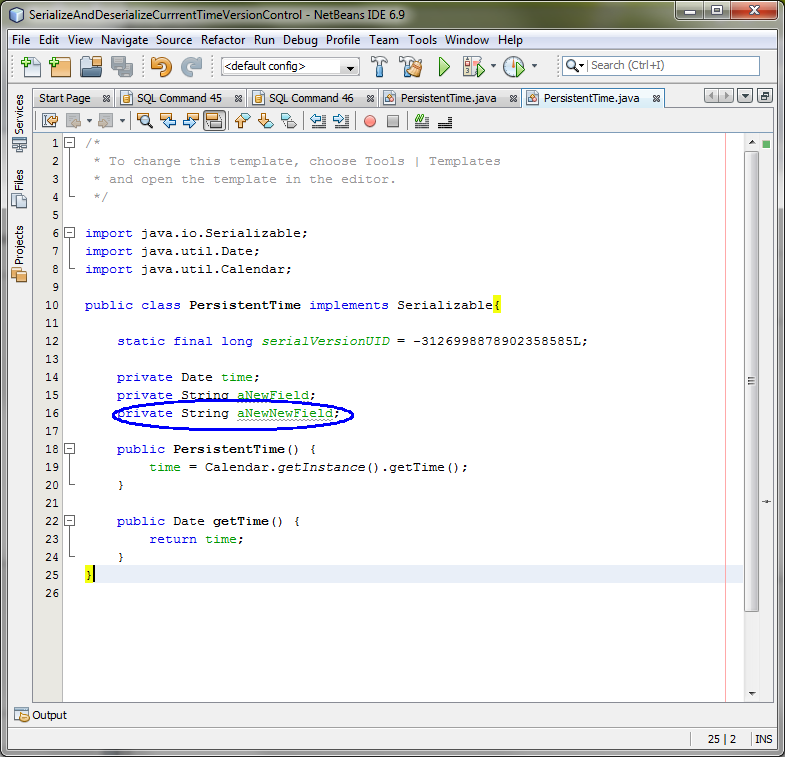
2. Modify the
PersistentTim.java as shown in Code-2.11
below. The change is to add another field to the
PersistentTime class after the
serialization.
import java.io.Serializable;
import
java.util.Date;
import java.util.Calendar;
public class
PersistentTime implements Serializable{
private Date
time;
private String
aNewField;
public
PersistentTime() {
time =
Calendar.getInstance().getTime();
}
public Date getTime()
{
return
time;
}
}
|
Code-2.11:
FileReaderWriter.java
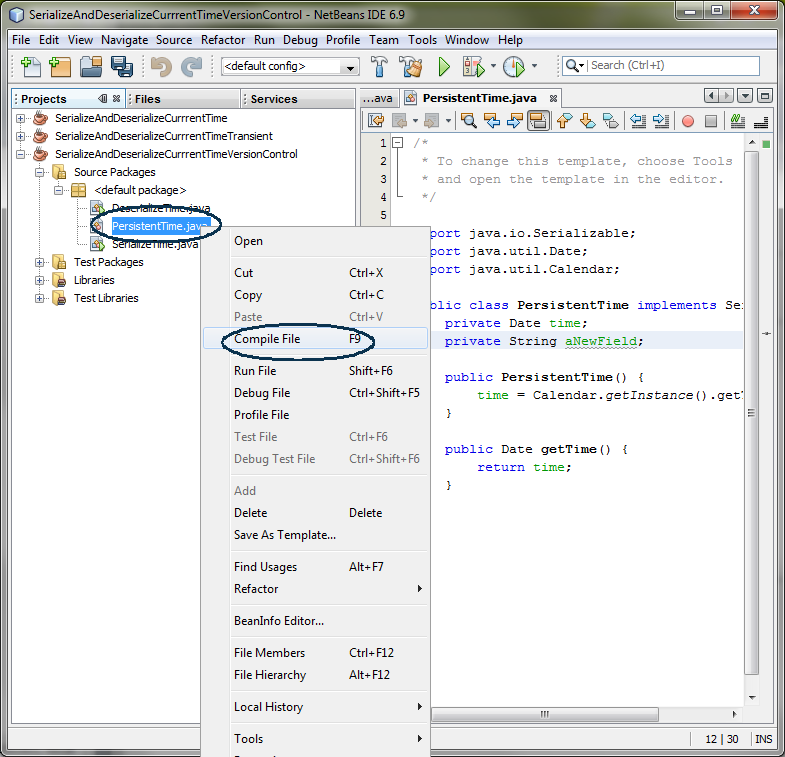
3. Compile the
PersistentTime.java.
- Right click PersistentTime.java and
select Compile File.
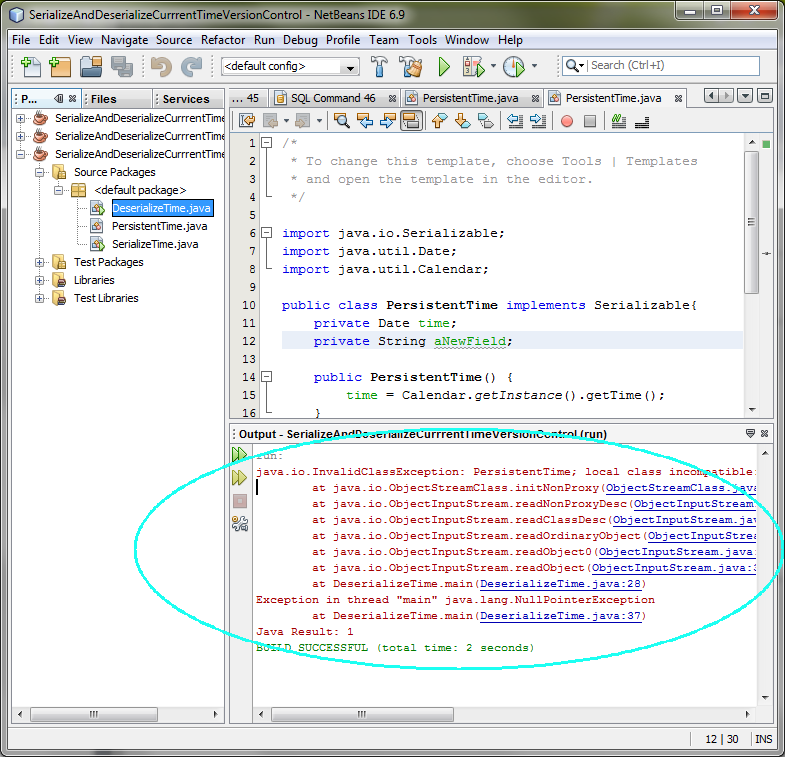
4. Build and run the Deserialization
part of the project
- Right click DeserializeTime.java
project and select Run File.
- Observe the java.io.InvalidClassException exception in
the Output window. (Figure-2.12 below)
java.io.InvalidClassException:
PersistentTime; local class incompatible: stream classdesc
serialVersionUID = -3126998878902358585, local class serialVersionUID =
-5560460247034149373
at
java.io.ObjectStreamClass.initNonProxy(ObjectStreamClass.java:519)
at
java.io.ObjectInputStream.readNonProxyDesc(ObjectInputStream.java:1546)
at
java.io.ObjectInputStream.readClassDesc(ObjectInputStream.java:1460)
at
java.io.ObjectInputStream.readOrdinaryObject(ObjectInputStream.java:1693)
at
java.io.ObjectInputStream.readObject0(ObjectInputStream.java:1299)
at
java.io.ObjectInputStream.readObject(ObjectInputStream.java:339)
at DeserializeTime.main(DeserializeTime.java:23)
Exception in thread
"main" java.lang.NullPointerException
|
Figure-2.12: java.io.InvalidClassException
exception
(2.2) Use a version
id
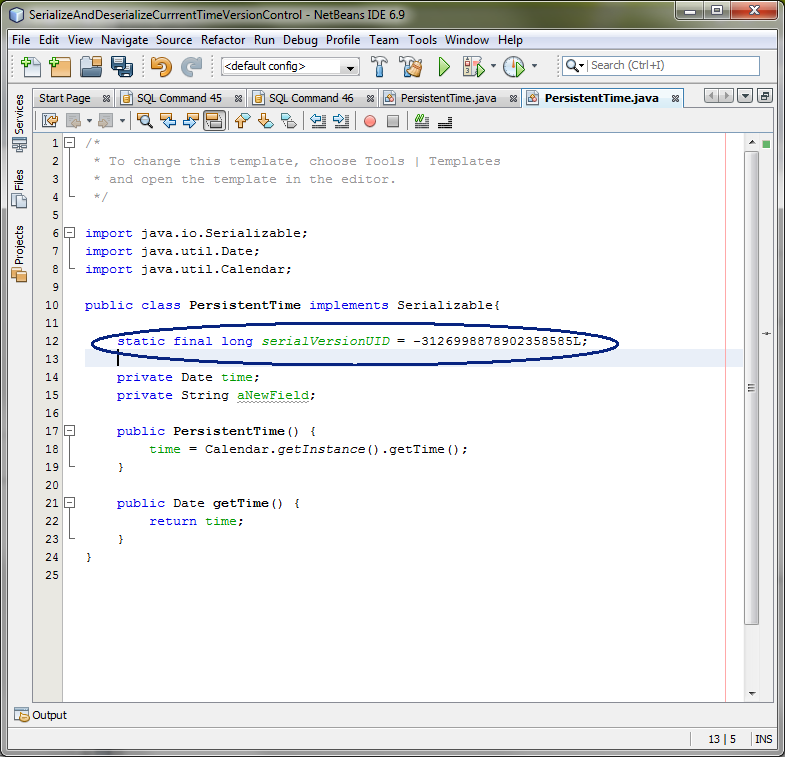
1.
Modify the
PersistentTim.java as
shown in Code-2.11 below. The change is to add unique version id to the
class.
import java.io.Serializable;
import
java.util.Date;
import java.util.Calendar;
public class
PersistentTime implements Serializable{
static final long
serialVersionUID = -3126998878902358585L;
private Date time;
private
String aNewField;
public
PersistentTime() {
time =
Calendar.getInstance().getTime();
}
public Date getTime()
{
return
time;
}
}
|
|
Code-2.21: Assign
a unique version id to the class file
2. Compile the
PersistentTime.java.
- Right click PersistentTime.java and select Compile File. (If Compile
File is grayed out, then NetBeans IDE did automatic compilation)
3.
Build and run the Serialization part of the project.
- Right click SerializeTime.java
project and select Run File.
- Observe the result in the Output
window. (Figure-1.13 below)
Current time is saved into
time.ser
|
Figure-1.13: Result of running
SerializeAndDeserializeCurrrentTime application
4. Modify the
PersistentTim.java as shown in Code-2.11
below. The change is to add another field to the
PersistentTime class after the
serialization.
import java.io.Serializable;
import
java.util.Date;
import java.util.Calendar;
public class
PersistentTime implements Serializable{
static
final long serialVersionUID = -3126998878902358585L;
private Date time;
private
String aNewField;
private String
aNewNewField;
public PersistentTime()
{
time =
Calendar.getInstance().getTime();
}
public Date getTime()
{
return
time;
}
}
|
Code-2.11:
FileReaderWriter.java
5. Compile the
PersistentTime.java.
- Right click PersistentTime.java and select Compile File.
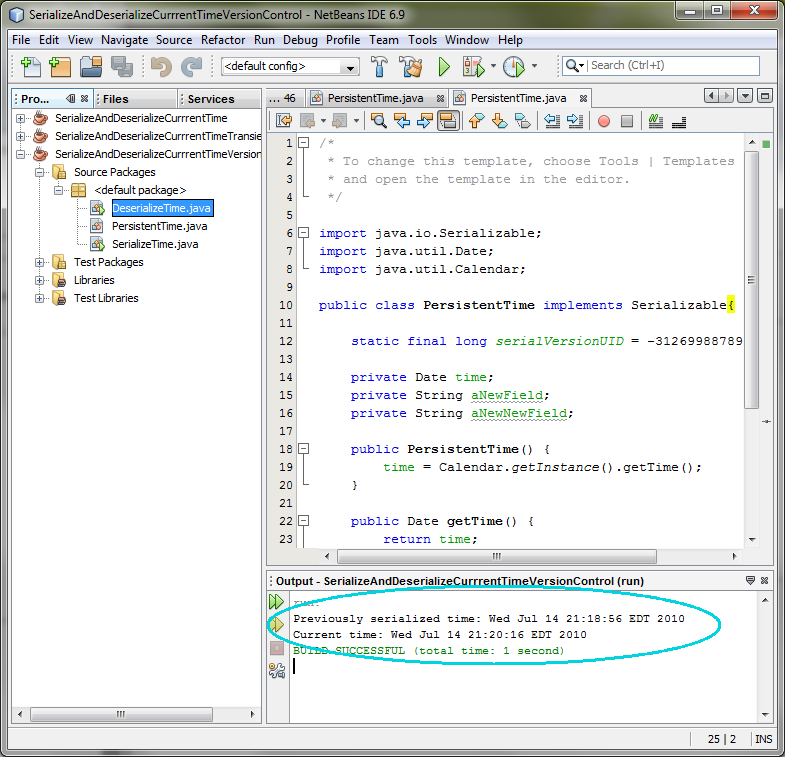
6.
Build and run the Deserialization part of the project
- Right click DeserializeTime.java
project and select Run File.
- Observe the result in the Output
window. (Figure-2.23 below)
Previously serialized time: Mon Feb 26
03:04:59 EST 2007
Current time: Mon Feb 26 03:05:13 EST
2007
|
Figure-2.23:
Result
return
to top of the exerciseSummary
In this exercise, you have learned how to do
version control for serialization and deserialization of an
object.
return
to the top
Exercise 3: Customizing default protocol
In this exercise, you will learn how to provide
your own readObject() and writeObject() methods, thus changing the behavior of
the default protocol.
- Using
the default readObject() and writeObject()
- Using
your own readObject() and writeObject()
(3.1) Using the
default readObject() and writeObject()
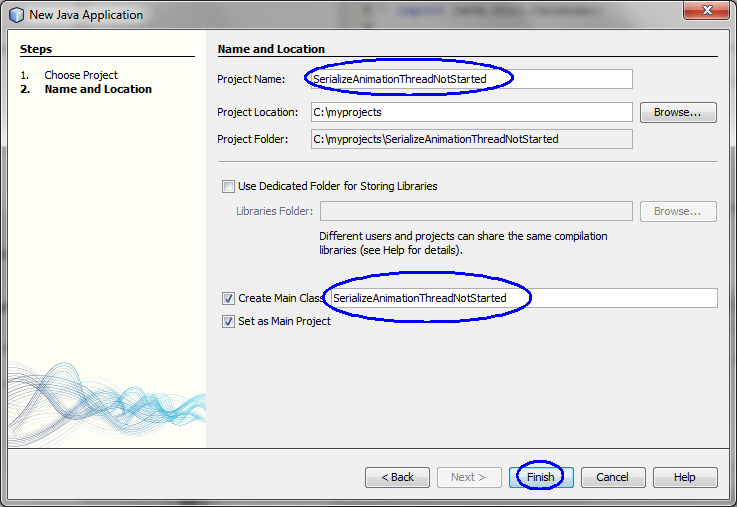
1. Create a new NetBeans project
- Select File->New Project (Ctrl+Shift+N). The New Project dialog box appears.
- Under Choose Project pane, select
Java under Categories and Java Application under Projects.
- Click Next.
- Under Name and Location pane, for
the Project Name field, type in SerializeAnimationThreadNotStarted
as project name.
- For Create Main Class field, type
in SerializeAnimationThreadNotStarted.
- Click Finish.
- Observe that SerializeAnimationThreadNotStarted project
appears and IDE generated SerializeAnimationThreadNotStarted.java is
displayed in the source editor window of NetBeans IDE.
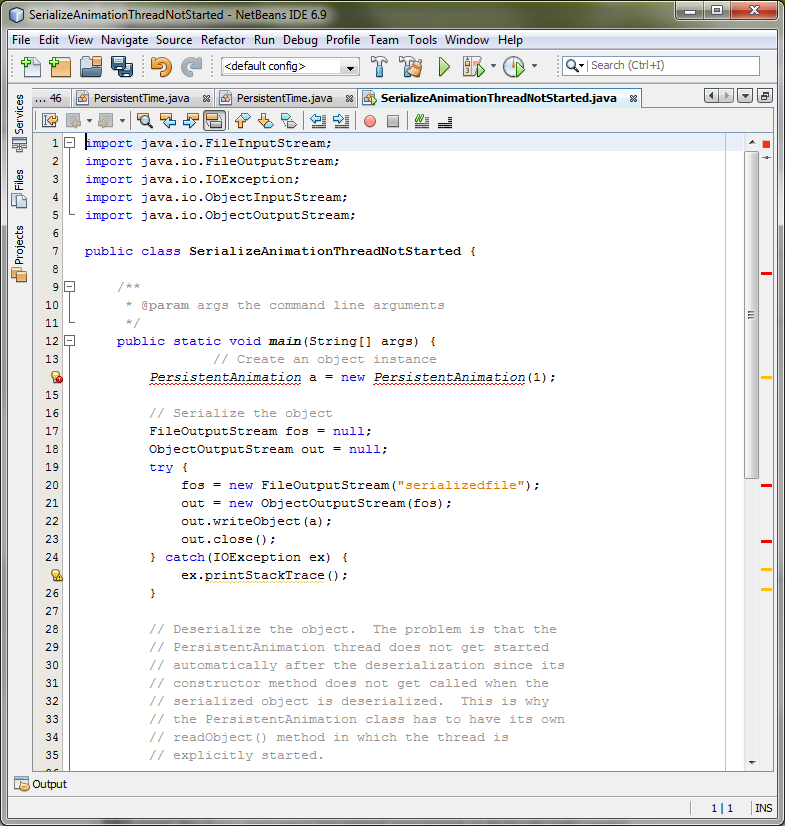
2. Modify the
IDE generated
SerializeAnimationThreadNotStarted.java as
shown in Code-3.11 below. Study the code by paying special attention to
the bold fonted parts.
import java.io.FileInputStream;
import
java.io.FileOutputStream;
import java.io.IOException;
import
java.io.ObjectInputStream;
import
java.io.ObjectOutputStream;
public class
SerializeAnimationThreadNotStarted {
public static void main(String[] args)
{
// Create an object
instance
PersistentAnimation
a = new
PersistentAnimation(1);
// Serialize the
object
FileOutputStream fos
= null;
ObjectOutputStream
out = null;
try
{
fos = new
FileOutputStream("serializedfile");
out = new
ObjectOutputStream(fos);
out.writeObject(a);
out.close();
}
catch(IOException ex)
{
ex.printStackTrace();
}
//
Deserialize the object. The problem is that the
//
PersistentAnimation thread does not get started
//
automatically after the deserialization since its
//
constructor method does not get called when the
//
serialized object is deserialized. This is why
//
the PersistentAnimation class has to have its own
//
readObject() method in which the thread is
//
explicitly started.
PersistentAnimation b = null;
FileInputStream fis = null;
ObjectInputStream in = null;
try
{
fis = new FileInputStream("serializedfile");
in = new ObjectInputStream(fis);
b = (PersistentAnimation)in.readObject();
in.close();
}
catch(IOException ex) {
ex.printStackTrace();
}
catch(ClassNotFoundException ex) {
ex.printStackTrace();
}
}
}
|
Code-3.11:
SerializeAnimationThreadNotStarted.java
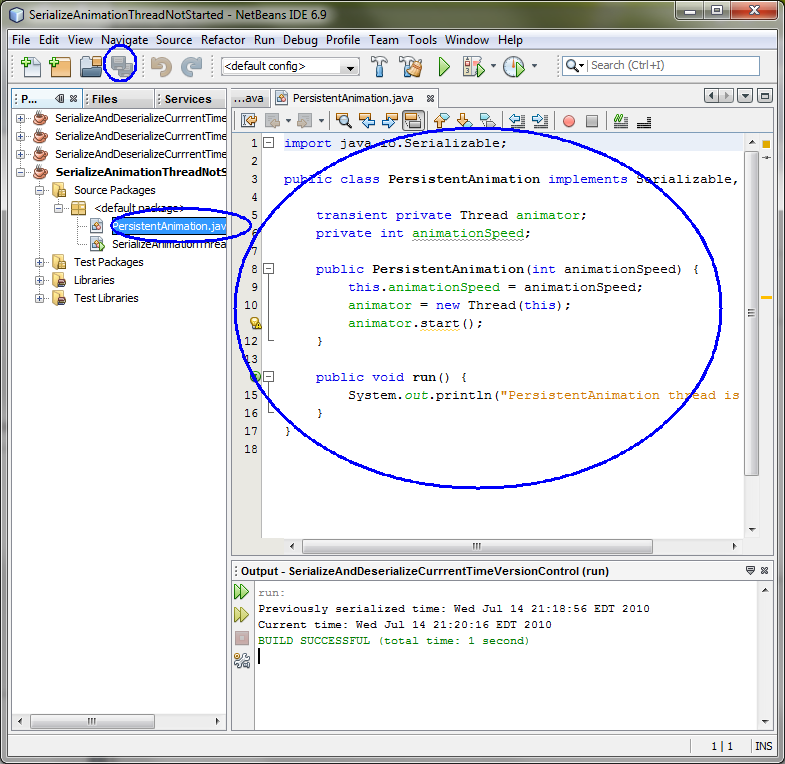
3. Write
PersistentAnimation.java as shown in Code-3.12
below.
import
java.io.Serializable;
public class PersistentAnimation implements
Serializable, Runnable {
transient private Thread animator;
private int
animationSpeed;
public
PersistentAnimation(int animationSpeed)
{
this.animationSpeed =
animationSpeed;
animator =
new Thread(this);
animator.start();
}
public void run()
{
System.out.println("PersistentAnimation thread is
started");
}
}
|
Code-3.12:
PersistentAnimation.java
4. Build and run the project
- Right click SerializeAnimationThreadNotStarted project
and select Run.
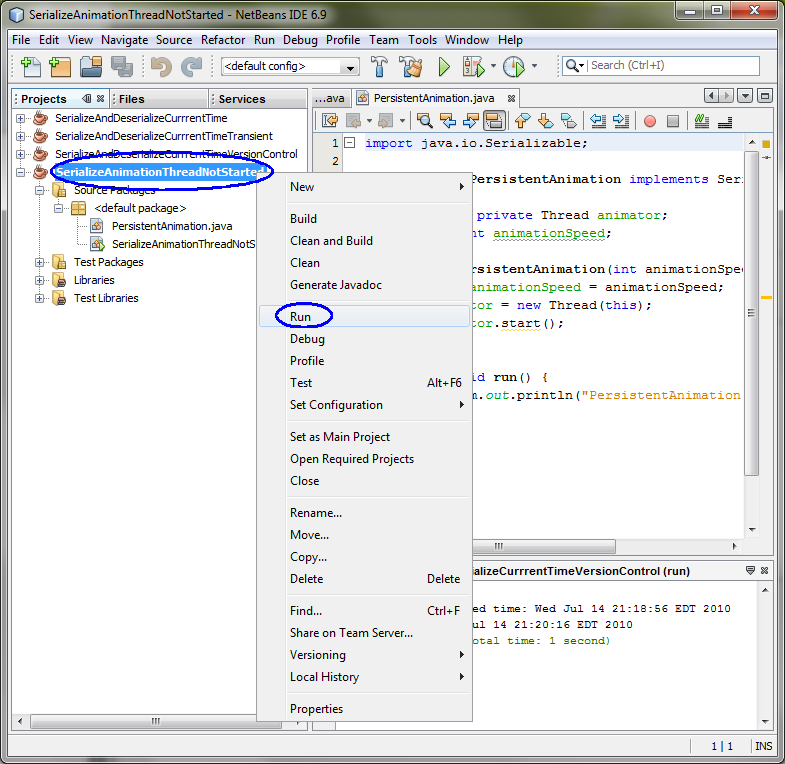
- Observe the result in the Output
window. (Figure-3.13 below) Observe that the thread is not
started automatically when the object is deserialized.
PersistentAnimation thread is
started
|
Figure-3.13: Result of running
SerializeAnimationThreadNotStarted application

(3.2) Using your
own readObject() and writeObject()
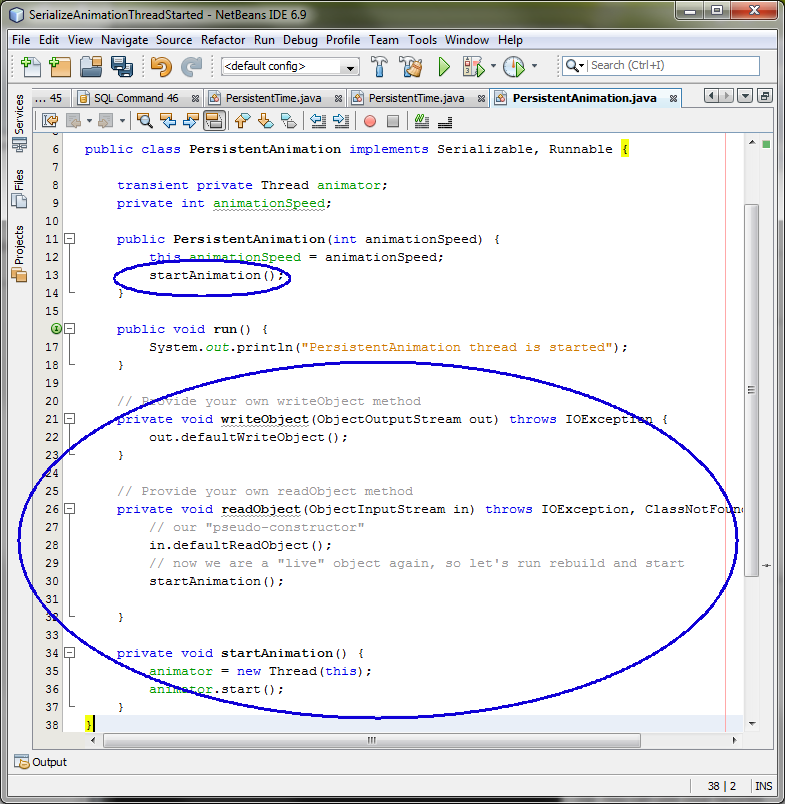
1. Modify
PersistentAnimation.java as shown in Code-3.21
below. The code fragments that need to be changed are highlighted in bold
and blue-colored font.
import java.io.IOException;
import
java.io.ObjectInputStream;
import java.io.ObjectOutputStream;
import
java.io.Serializable;
public class PersistentAnimation implements
Serializable, Runnable {
transient private Thread animator;
private int
animationSpeed;
public
PersistentAnimation(int animationSpeed)
{
this.animationSpeed =
animationSpeed;
startAnimation();
}
public void run()
{
System.out.println("PersistentAnimation thread is
started");
}
//
Provide your own writeObject method
private void writeObject(ObjectOutputStream out) throws IOException
{
out.defaultWriteObject();
}
//
Provide your own readObject method
private void readObject(ObjectInputStream in) throws IOException,
ClassNotFoundException {
// our "pseudo-constructor"
in.defaultReadObject();
// now we are a "live" object again, so let's run rebuild and
start
startAnimation();
}
private void startAnimation() {
animator = new Thread(this);
animator.start();
}
}
|
Code-3.21:
PersistentAnimation.java
2. Build and run the project
- Right click SerializeAnimationThreadStarted project and
select Run.
- Observe the result in the Output
window. (Figure-3.22 below) Observe that the thread is now
started when the object is deserialized.
PersistentAnimation thread is
started
PersistentAnimation thread is
started
|
Figure-3.22: Result of running
SerializeAnimationThreadStarted application

Summary
In this exercise, you learned how to provide
your own readObject() and writeObject() methods, thus changing the behavior of
the default
protocol.
return
to the top
Homework
1. The homework is to either modify
SerializeTime NetBeans project you've done in
Exercise
1 above or create a new project as following. (You might want to
create a new project by copying the
SerializeTime project. You can name the
homework project in any way you want but here I am going to call it
MySerializationProject.)
- Write MyClassToBePersisted.java, which contains the following properties
- Profile field, which has the following fields
- String name
- int age
- String hobby
- School field, which has the following fields
- String nameOfSchool
- int yearStarted (this is transient field)
- Write SerializeMyClassToBePersisted.java which creates an instance of
MyClassToBePersisted class and serialize it into a file in its main method.
- Write DeserializeMyClassToBePersisted.java which read the serialized
file and deserialize it into instance of MyClassToBePersisted class in its
main method.
- Write MyClassToBePersisted.java, which contains the following properties
with version control.