Java Exceptions and Assertions
This hands-on lab takes you through the basics of
using Exceptions and Assertions. Java programming language has a
well-designed Exception handling framework, which helps developers separate
their exception handlng logic from the business logic.
Exercise 1: Exception Handling
In this exercise, you are going to trigger and
catch built-in exceptions through try-catch-finally block.
- Catch
a runtime exception - divide a number by zero
- Catch
multiple runtime exceptions
- Experience
various exceptions
- ArrayIndexOutOfBoundsException
- Call
built-in methods of Exception class
(1.1) Catch a
runtime exception
In this step, you are going to trigger a runtime
exception by dividing a number by 0. First, you will see how the default
handler that is provided by the Java runtime system catches the exception.
You will then catch the exception yourself through try-catch.
0. Start the NetBeans IDE if you have not done
so.
1. Create a NetBeans project
- Select File from top-level menu and
select New Project.
- Observe that the New Project dialog
box appears.
- Select Java under Categories section and Java Application under Projects section.
- Click Next.
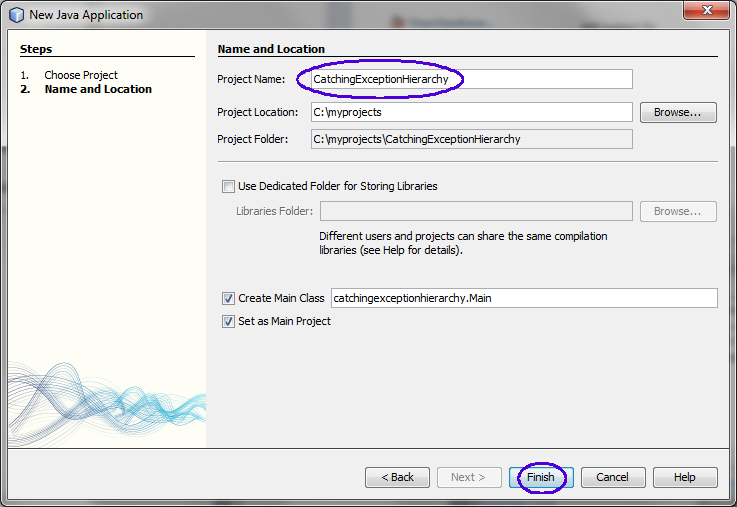
- Under Name and Location pane, for
the Project Name field, enter DivideByZero.
(Figure-1.10 below)
- Click Finish.
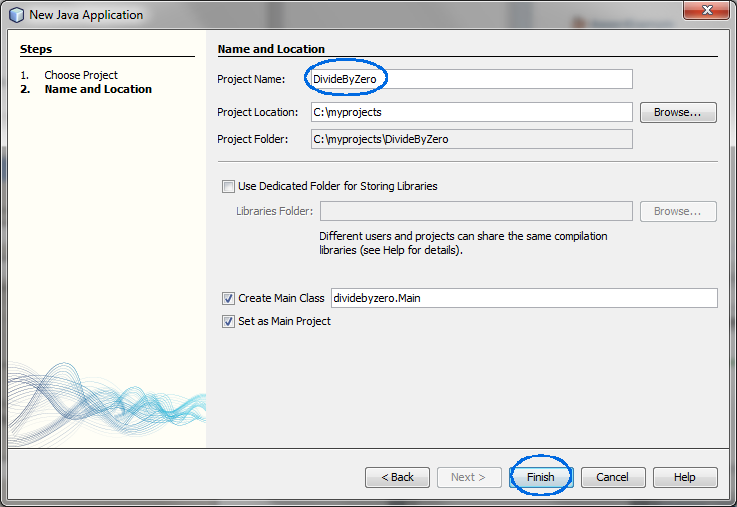
Figure-1.10: Create DivideByZero
project
- Observe that the DivideByZero
project node is created under Projects
pane of the NetBeans IDE and IDE generated Main.java is displayed in the editor window
of the IDE.
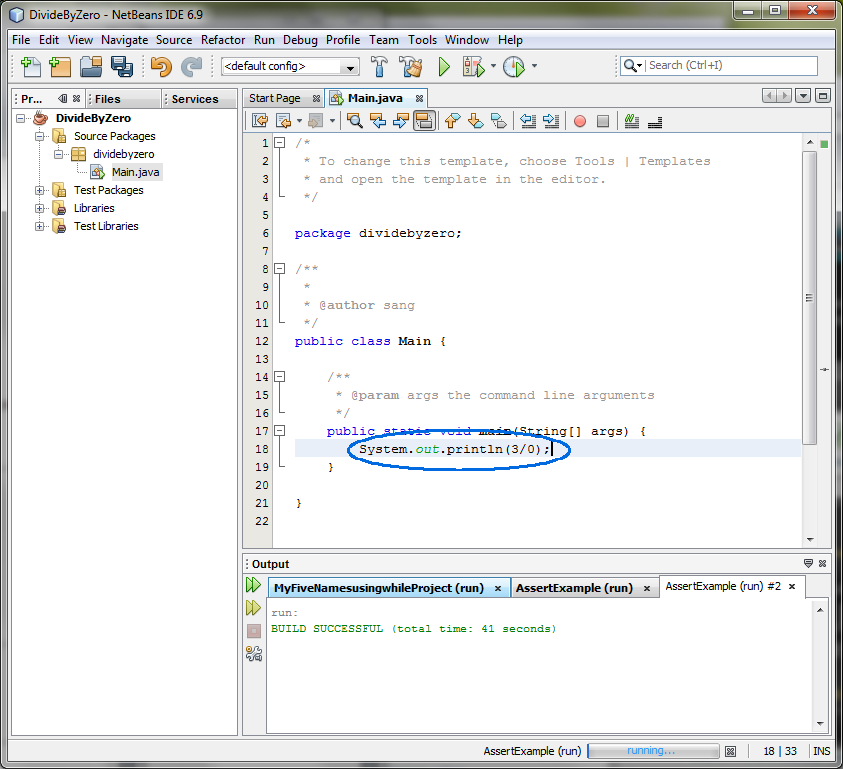
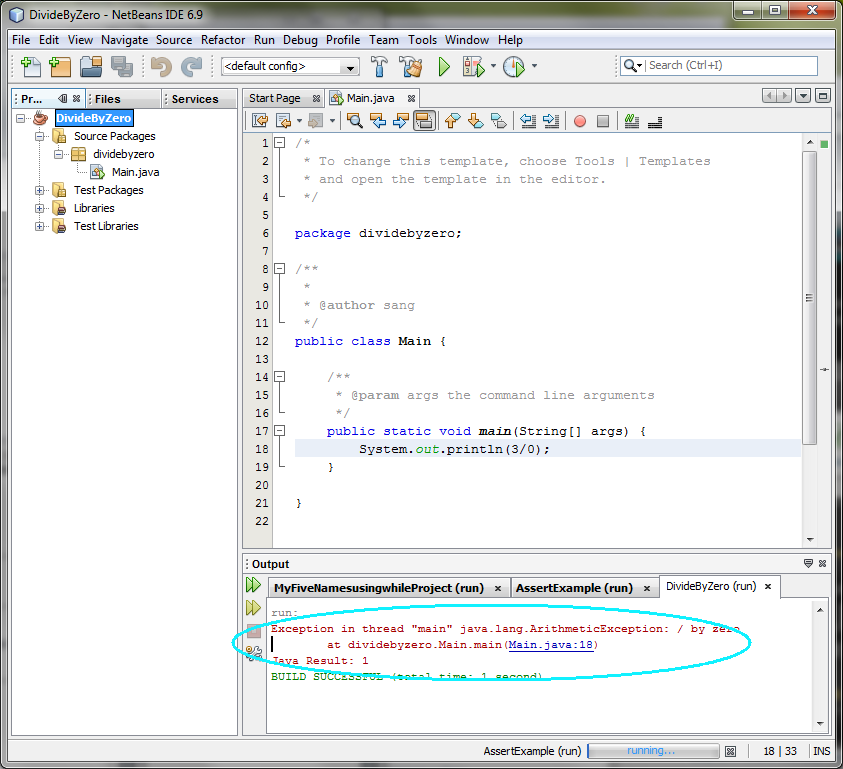
2. Modify
Main.java as shown in Code-1.11 below.
The change is to generate an exception.
package dividebyzero;
public class
Main {
/**
* @param args the command line
arguments
*/
public
static void main(String[] args)
{
System.out.println(3/0);
}
}
|
Code-1.10:
Main.java
3. Build and run the program
- Right click DivideByZero project
node and select Run.
- Observe the result in the Output
window of the NetBeans IDE. (Figure-1.12 below)
Exception in thread "main"
java.lang.ArithmeticException: / by
zero
at
dividebyzero.Main.main(Main.java:14)
Java Result:
1
|
Figure-1.12: Result of running the
application
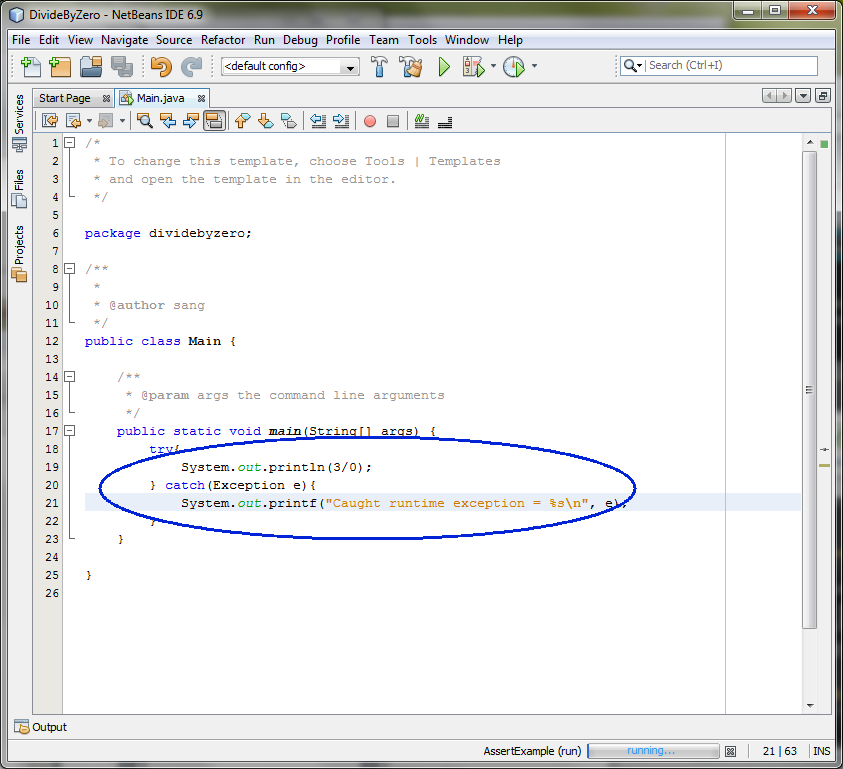
4. Modify the
Main.java as shown in Code-1.13 below. The
change is to catch an exception through try-catch block. The code fragments that
need to be added are highlighted in
bold and blue colored
font.
package dividebyzero;
public class
Main {
/**
* @param args the command line
arguments
*/
public
static void main(String[] args) {
try{
System.out.println(3/0);
} catch(Exception e){
System.out.printf("Caught runtime exception = %s\n", e);
}
}
}
|
Code-1.13: Catch Exception exception
type
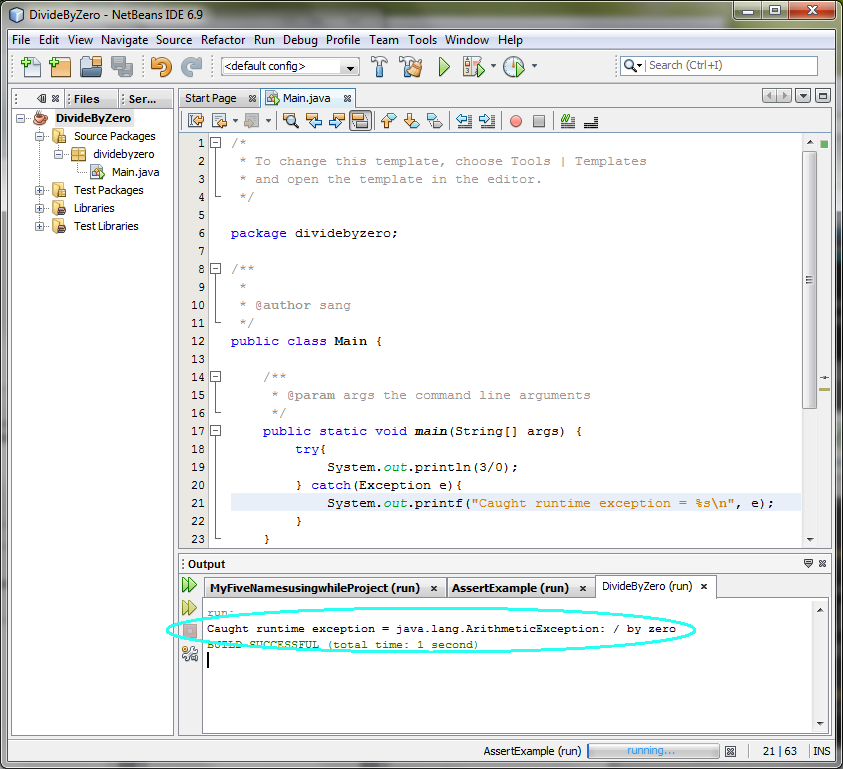
5. Build and run the program
- Right click DivideByZero project
node and select Run.
- Observe the result in the Output
window of the NetBeans IDE. (Figure-1.14 below)
Caught runtime exception =
java.lang.ArithmeticException: / by
zero
|
Figure-1.14: Catching the
exception
6. Modify the
Main.java as shown in Code-1.16 below. The
change is to use more specific Exception class, ArithmeticException in this
case. The code fragments that need to be added are highlighted in
bold and blue colored
font.
package dividebyzero;
public class
Main {
/**
* @param args the command line
arguments
*/
public
static void main(String[] args) {
try{
System.out.println(3/0);
}
catch(ArithmeticException
e){
System.out.printf("Caught runtime exception = %s", e);
}
}
}
|
Code-1.16: Catch ArithmetricException
exception type
7. Build and run the program
- Right click DivideByZero project
node and select Run.
- Observe the result in the Output
window of the NetBeans IDE. (Figure-1.17 below)
Caught runtime exception =
java.lang.ArithmeticException: / by
zero
|
Figure-1.17: Catching the
exception
8. For your own exercise, please do the following tasks:
- Add a code fragement that divides a number by 0 inside the catch block and
see what happens.
return
to top of the exercise
(1.2) Catch
multiple exceptions
In this step, you are going to use multiple catch
statements to catch an exception. If the first catch statement does not
catch an exception, the next one will be tried.
1. Create a NetBeans project
- Select File from top-level menu and
select New Project.
- Observe that the New Project dialog
box appears.
- Select Java under Categories section and Java Application under Projects section.
- Click Next.
- Under Name and Location pane, for
the Project Name field, enter MultipleCatch.
- Click Finish.
- Observe that the MultipleCatch
project node is created under Projects
pane of the NetBeans IDE and IDE generated Main.java is displayed in the editor window
of the IDE.
2. Modify the IDE generated
Main.java as shown in Code-1.21. Study the code
by special attention to the
bold-fonted
parts.
package multiplecatch;
import
javax.swing.JOptionPane;
public class Main {
public static void main(String[] args)
{
// Enter the following values and see what
exception is caught.
// 0, 4, character, <no
value>
try
{
String value = JOptionPane.showInputDialog(null, "Enter
value:");
// Non-numerica value will result an
NumberFormatException
int divisor =
Integer.parseInt(value);
// If the divisor is 0, it will result in
ArithmetricException
System.out.println(3/divisor);
} catch (NumberFormatException
nfe){
System.out.println("Exception caught by this program: Enter numeric
value.");
}
catch (ArithmeticException exc) {
System.out.println("Exception caught by this program: Divisor was
0.");
}
System.out.println("After exception.");
}
}
|
Code-1.21:
Main.java
3. Build and run the program
- Right click MultipleCatch and
select Run.
- Observe Input dialog box appears.
- Enter 0 in the field. (Figure-1.22
below)
- Click OK.
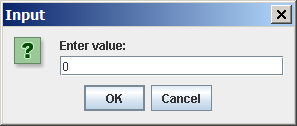
Figure -1.22: Enter 0
- Observe the display message in the output window of the IDE. (Figure-1.23
below)
Exception caught by this program: Divisor
was 0.
After exception.
|
Figure-1.23: Catching an
exception
- Right click MultipleCatch and
select Run.
- Observe Input dialog box appears.
- Enter 4 in the field.
- Click OK.
- Observe the display message in the output window of the IDE. (Figure-1.24
below)
Figure-1.24: Catching an exception
- Right click MultipleCatch and
select Run.
- Observe Input dialog box appears.
- Enter somecharacter in the
field. (Figure-2.15 below)
- Click OK.
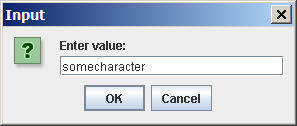
Figure-1.25: Enter characters
- Observe the display message in the output window of the IDE. (Figure-1.26
below)
Exception caught by this program: Enter
numeric value.
After exception.
|
Figure-1.26:
Catching an exception
- Right click MultipleCatch and
select Run.
- Observe Input dialog box appears.
- Do not type anything in the field.
- Click OK.
- Observe the display message in the output window of the IDE. (Figure-1.27
below)
Exception caught by this program: Enter
numeric value.
After exception.
|
Figure-1.27:
Catching an exception
return
to top of the exercise
(1.3) Experience
various exceptions
In this step, you are going to generate various
exceptions and see how they get caught by the catch statements.
1. Create a NetBeans project
- Select File from top-level menu and
select New Project.
- Observe that the New Project dialog
box appears.
- Select Java under Categories section and Java Application under Projects section.
- Click Next.
- Under Name and Location pane, for
the Project Name field, enter ExperienceExceptions.
- Click Finish.
- Observe that the ExperienceExceptions
project node is created under Projects
pane of the NetBeans IDE and IDE generated Main.java is displayed in the editor window
of the IDE.
2. Modify the IDE generated
Main.java as shown in Code-1.31. Study the code
by special attention to the bold-fonted parts.
import java.awt.Frame;
import
java.awt.GridLayout;
import java.awt.event.ActionEvent;
import
java.awt.event.ActionListener;
import
java.awt.event.WindowAdapter;
import
java.awt.event.WindowEvent;
import
java.io.FileInputStream;
import javax.swing.ButtonGroup;
import
javax.swing.JFrame;
import javax.swing.JPanel;
import
javax.swing.JRadioButton;
public class Main extends JFrame
implements ActionListener {
private double[]
a;
private JRadioButton
divideByZeroButton;
private
JRadioButton badCastButton;
private JRadioButton arrayBoundsButton;
private JRadioButton
nullPointerButton;
private
JRadioButton negSqrtButton;
private JRadioButton overflowButton;
private JRadioButton
noSuchFileButton;
private
JRadioButton throwUnknownButton;
public Main()
{
// Create a JPanel and
GridLayout
JPanel p = new
JPanel();
p.setLayout(new
GridLayout(8, 1));
// Create buttons and add
them to the panel
ButtonGroup g = new
ButtonGroup();
divideByZeroButton = addRadioButton("Divide by zero", g,
p);
badCastButton =
addRadioButton("Bad cast", g,
p);
arrayBoundsButton =
addRadioButton("Array bounds", g,
p);
nullPointerButton =
addRadioButton("Null pointer", g,
p);
negSqrtButton =
addRadioButton("sqrt(-1)", g,
p);
overflowButton =
addRadioButton("Overflow", g,
p);
noSuchFileButton =
addRadioButton("No such file", g,
p);
throwUnknownButton =
addRadioButton("Throw unknown", g,
p);
getContentPane().add(p);
}
private JRadioButton addRadioButton(String s,
ButtonGroup g, JPanel p) {
JRadioButton button = new JRadioButton(s,
false);
button.addActionListener(this);
g.add(button);
p.add(button);
return
button;
}
// Trigger and
catch various exceptions
public void
actionPerformed(ActionEvent evt)
{
try
{
Object source =
evt.getSource();
if (source == divideByZeroButton)
{
a[1] = a[1] / a[1] -
a[1];
} else if (source == badCastButton)
{
Frame f = (Frame)
evt.getSource();
} else if (source == arrayBoundsButton)
{
a[1] =
a[10];
} else if (source == nullPointerButton)
{
Frame f =
null;
f.setSize(200,
200);
} else if (source == negSqrtButton)
{
a[1] =
Math.sqrt(-1);
} else if (source == overflowButton)
{
a[1] = 1000 * 1000 * 1000 *
1000;
int n = (int)
a[1];
} else if (source == noSuchFileButton)
{
FileInputStream is = new FileInputStream("Java Source and
Support");
} else if (source == throwUnknownButton)
{
throw new
UnknownError();
}
} catch
(RuntimeException e) {
System.out.println("Caught RuntimeException: " + e);
}
catch (Exception e) {
System.out.println("Caught Exception: " + e);
}
}
public static void main(String[] args)
{
JFrame frame = new
Main();
frame.setSize(150,
200);
frame.addWindowListener(new WindowAdapter()
{
public void windowClosing(WindowEvent e)
{
System.exit(0);
}
});
frame.setVisible(true);
}
}
|
Code-1.31: Main.java
3. Build and run
the program.
- Right click ExperienceExceptions
and select Run.
- Observe dialog box appears.
- Click any of the radio buttons. (Figure-1.32 below) Clicking a
button will execute code fragement that generates an
exception.
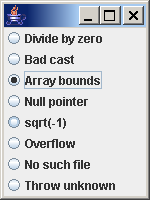
Figure-1.32 below
- Observe the display message in the output window of the IDE. (Figure-1.33
below)
Caught RuntimeException:
java.lang.NullPointerException
|
Figure-1.33:
Catching an exception
4. For your own exercise, please
do the following tasks.
- Try other buttons and observe the exceptions that are caught
- Try to catch exceptions using more specific exception classes (over
RuntimeException and Exception classes).
return
to top of the exercise
(1.4)
ArrayIndexOutOfBoundsException
1. Create a NetBeans project
- Select File from top-level menu and
select New Project.
- Observe that the New Project dialog
box appears.
- Select Java under Categories section and Java Application under Projects section.
- Click Next.
- Under Name and Location pane, for
the Project Name field, enter ListOfNumbers-ArrayIndexOutOfBoundsException.
- Click Finish.
- Observe that the ListOfNumbers-ArrayIndexOutOfBoundsException project node is created under Projects pane of the NetBeans IDE and IDE
generated Main.java is displayed in the
editor window of the IDE.
2. Modify the IDE generated
Main.java as shown in Code-1.41. Study the code
by special attention to the bold-fonted parts.
package
listofnumbersarrayindexoutofboundsexception;
public class
ListOfNumbersTest {
public static void main(String[]
args) {
ListOfNumbers list =
new ListOfNumbers();
list.writeList();
}
}
|
Code-1.41: Main.java
3. Write
ListOfNumbers.java.
package
listofnumbersarrayindexoutofboundsexception;
import
java.io.*;
import java.util.Vector;
public class ListOfNumbers
{
private Vector victor;
private static final int SIZE = 10;
public ListOfNumbers()
{
victor = new
Vector(SIZE);
for (int i =
0; i < SIZE;
i++)
victor.addElement(new Integer(i));
}
public void writeList()
{
PrintWriter out =
null;
try
{
System.out.println("Entering try
statement");
out = new PrintWriter(new
FileWriter("OutFile.txt"));
for
(int i = 0; i < (SIZE + 1) ;
i++)
System.out.println("Value at: " + i + " = " +
victor.elementAt(i));
}
catch (ArrayIndexOutOfBoundsException e)
{
System.out.println("Caught ArrayIndexOutOfBoundsException: "
+
e.getMessage());
} catch
(IOException e)
{
System.out.println("Caught IOException: " +
e.getMessage());
} finally
{
if
(out != null)
{
System.out.println("Finally: Closing
PrintWriter");
out.close();
} else
{
System.out.println("Finally: PrintWriter not
open");
}
}
}
}
|
Code-1.42: ListOfNumbers.java
4.
Build and run the program.
- Right click ListOfNumbers-ArrayIndexOutOfBoundsException and select Run.
- Observe the display message in the output window of the IDE. (Figure-1.43
below)
Entering try statement
Value at: 0 =
0
Value at: 1 = 1
Value at: 2 = 2
Value at: 3 = 3
Value at: 4
= 4
Value at: 5 = 5
Value at: 6 = 6
Value at: 7 = 7
Value at:
8 = 8
Value at: 9 = 9
Caught ArrayIndexOutOfBoundsException: 10
>= 10
Finally: Closing
PrintWriter
|
Figure-1.42: Result
return
to top of the exercise
(1.5) Call built-in
methods of Exception class
1. Create a NetBeans project
- Select File from top-level menu and
select New Project.
- Observe that the New Project dialog
box appears.
- Select Java under Categories section and Java Application under Projects section.
- Click Next.
- Under Name and Location pane, for
the Project Name field, enter CallExceptionMethods.
- Click Finish.
- Observe that the CallExceptionMethods
project node is created under Projects
pane of the NetBeans IDE and IDE generated Main.java is displayed in the editor window
of the IDE.
2. Modify the IDE generated
Main.java as shown in Code-1.51. Study the code
by special attention to the bold-fonted parts.
package
callexceptionmethods;
public class Main {
public static void main(String[] args)
{
try
{
throw new Exception("My
Exception");
} catch
(Exception e)
{
System.err.println("Caught
Exception");
System.err.println("getMessage():" + e.getMessage());
System.err.println("getLocalizedMessage():"
+ e.getLocalizedMessage());
System.err.println("toString():" +
e);
System.err.println("printStackTrace():");
e.printStackTrace();
}
}
}
|
Code-1.51:
Main.java
3. Build and run the program.
- Right click CallExceptionMethods
and select Run.
- Observe the display message in the output window of the IDE. (Figure-1.33
below)
Caught Exception
getMessage():My
Exception
getLocalizedMessage():My
Exception
toString():java.lang.Exception: My
Exception
printStackTrace():
java.lang.Exception: My
Exception
at
callexceptionmethods.Main.main(Main.java:7)
|
Figure-1.52:
Result
return
to top of the exercise
Summary
In this exercise, you learned how to capture
built-in exceptions.
return
to the top
Exercise 2: Custom exception
In this exercise, you are going to create and throw
your own exception classes.
(2.1) Create your
own exception 1
In this step, you are creating your own exception
class called MyException.
1. Create a NetBeans project
- Select File from top-level menu and
select New Project.
- Observe that the New Project dialog
box appears.
- Select Java under Categories section and Java Application under Projects section.
- Click Next.
- Under Name and Location pane, for
the Project Name field, enter YourOwnException.
- For Create Main Class field, accept
the default value, yourownexception.Main that is provided by the
IDE.
- Click Finish.
- Observe that the YourOwnException
project node is created under Projects
pane of the NetBeans IDE and IDE generated Main.java is displayed in the editor window
of the IDE.
2. Modify the IDE generated
Main.java as shown in Code-2.11. Study
the code by special attention to the bold-fonted parts.
package
yourownexception;
class MyException extends Exception {
public MyException()
{
}
public MyException(String
msg) {
super(msg);
}
}
public class Main
{
public static void f()
throws MyException {
System.out.println("Throwing MyException from
f()");
throw new
MyException();
}
public static void g() throws MyException
{
System.out.println("Throwing MyException from
g()");
throw new
MyException("Originated in g()");
}
public static void
main(String[] args) {
try
{
f();
} catch (MyException e)
{
e.printStackTrace();
}
try
{
g();
} catch (MyException e)
{
e.printStackTrace();
}
}
} ///:~
|
Code-2.11:
Main.java
3. Build and run the program
- Right click YourOwnException and
select Run.
- Observe the result in the Output window of the IDE. (Figure-2.12
below)
Throwing MyException from
f()
MyException
at
Main.f(Main.java:18)
Throwing MyException from
g()
at
Main.main(Main.java:28)
MyException: Originated in
g()
at
Main.g(Main.java:23)
at
Main.main(Main.java:33)
|
Figure-2.12:
Result
return
to top of the exercise
(2.2) Create your
own exception 2
1. Create a NetBeans project
- Select File from top-level menu and
select New Project.
- Observe that the New Project dialog
box appears.
- Select Java under Categories section and Java Application under Projects section.
- Click Next.
- Under Name and Location pane, for
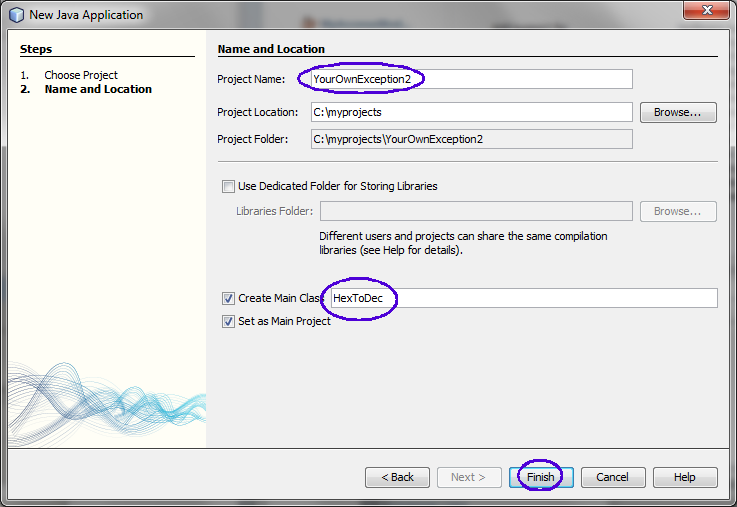
the Project Name field, enter YourOwnException2.
- For Create Main Class field, enter
HexToDec.
- Click Finish.
- Observe that the YourOwnException2
project node is created under Projects
pane of the NetBeans IDE and IDE generated HexToDec.java is displayed in the editor
window of the IDE.
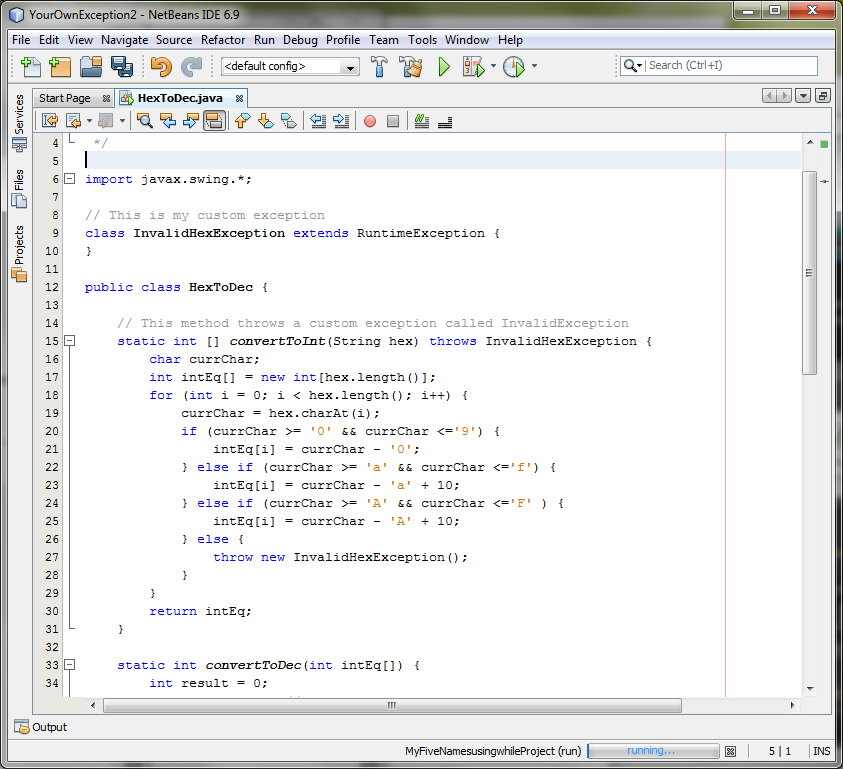
2. Modify the IDE generated
HexToDec.java as shown in Code-2.21.
import
javax.swing.*;
// This is my
custom exception
class InvalidHexException extends
RuntimeException {
}
class HexToDec
{
// This method throws a custom exception
called InvalidException
static int []
convertToInt(String hex) throws InvalidHexException {
char
currChar;
int
intEq[] = new int[hex.length()];
for
(int i = 0; i < hex.length(); i++) {
currChar = hex.charAt(i);
if (currChar >= '0' && currChar <='9') {
intEq[i] = currChar - '0';
} else if (currChar >= 'a' && currChar <='f') {
intEq[i] = currChar - 'a' + 10;
} else if (currChar >= 'A' && currChar <='F' ) {
intEq[i] = currChar - 'A' + 10;
} else {
throw new InvalidHexException();
}
}
return intEq;
}
static int convertToDec(int
intEq[]) {
int
result = 0;
int
mult = 1; //multiplier
for
(int j = intEq.length - 1; j >= 0; j--) {
result += intEq[j]*mult;
mult *= 16;
}
return result;
}
public static void
main(String args[]) {
String hex;
int
intEq[];
//
Receive hex value from a user
hex =
JOptionPane.showInputDialog(null, "Input hex: ");
try
{
// convertToInt() method will throw InvalidHexExceptions if
// the value is not in a valid format
intEq = convertToInt(hex);
Integer dec = new Integer(convertToDec(intEq));
// Display the result
JOptionPane.showMessageDialog(null, dec);
System.exit(0);
}
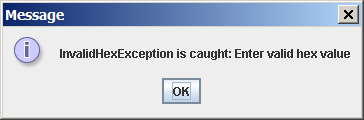
catch (InvalidHexException e) {
JOptionPane.showMessageDialog(null, "InvalidHexException is caught: Enter
valid hex value");
}
System.exit(0);
}
}
|
Code-2.21: HexToDec.java
3. Build and run the program
- Right click YourOwnException2 and
select Run.
- Observe that a dialog box appears.
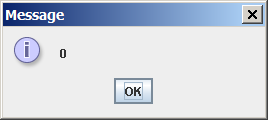
- Enter 0 in the input form field and
click OK.

- Observe that the value is OK.
- Click OK to close the message
box.
4. Build and run the program, which
causes
InvalidHexException
exception.
- Right click YourOwnException2 and
select Run.
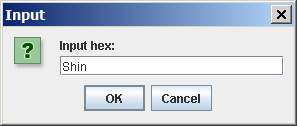
- Observe that a dialog box appears.
- Enter some characters, Shin in this
example, in the input form field and click OK. This will trigger an exception.
5. Build and run the program, which
causes
InvalidHexException exception.
- Right click YourOwnException2 and
select Run.
- Observe that a dialog box appears.
- Enter some characters, -100 in this
example, in the input form field and click OK. This will trigger an
exception.
4. For your own exercise, please do the following tasks:
- Modify HexToDec.java so that when a
negative value such as -100 is entered, trigger a different exception called
NegativeValueEnteredException
return
to top of the exercise
(2.3) Create your
own exception class hierarchy
In this step, you have two exception classes which
are related as parent and child exception class.
1. Create a NetBeans project
- Select File from top-level menu and
select New Project.
- Observe that the New Project dialog
box appears.
- Select Java under Categories section and Java Application under Projects section.
- Click Next.
- Under Name and Location pane, for
the Project Name field, enter CatchingExceptionHierarchy.
- Click Finish.
- Observe that the CatchingExceptionHierarchy project node is
created under Projects pane of the
NetBeans IDE and IDE generated Main.java is displayed in the editor window
of the IDE.
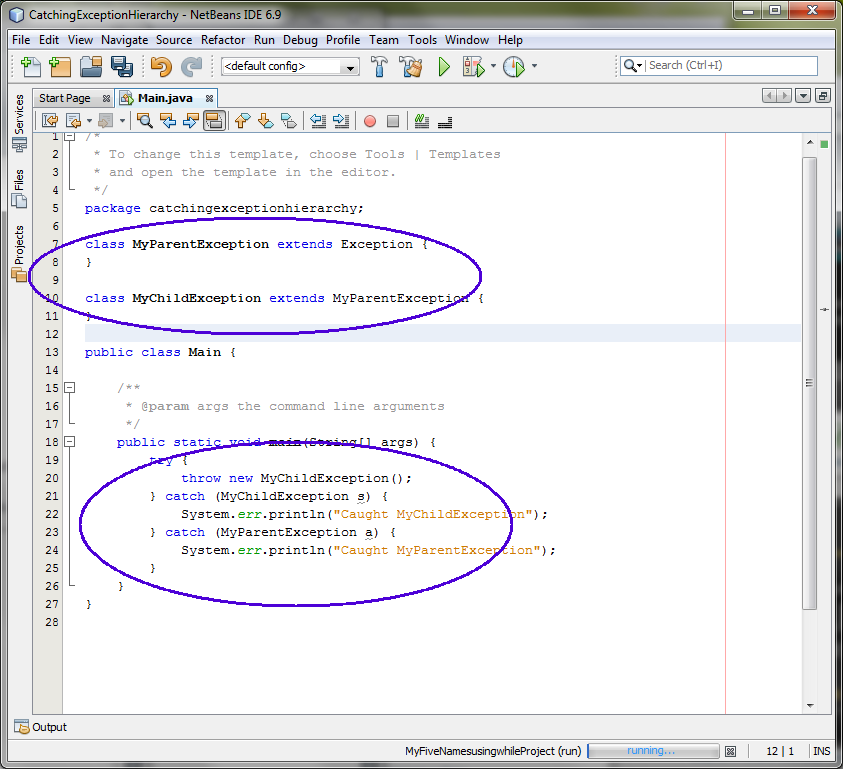
2. Modify the IDE generated
Main.java as shown in Code-2.31. Study the code
by special attention to the bold-fonted parts.
package catchingexceptionhierarchy;
class MyParentException extends
Exception {
}
class
MyChildException extends MyParentException {
}
public class Main
{
public static void
main(String[] args) {
try {
throw new MyChildException();
}
catch (MyChildException s) {
System.err.println("Caught MyChildException");
}
catch (MyParentException a) {
System.err.println("Caught MyParentException");
}
}
}
|
Code-2.31:
Main.java
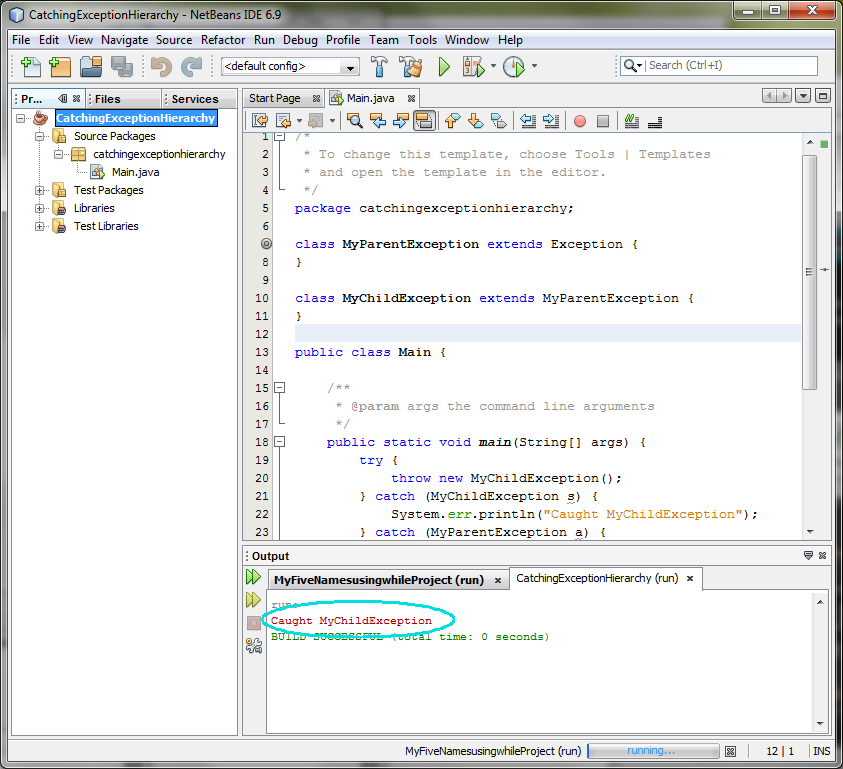
3. Build and run the program
- Right click CatchingExceptionHierarchy
and select Run.
- Observe the display message in the output window of the IDE. (Figure-2.32
below)
Figure-2.32: Result
4. For your own exercise, please do the following tasks:
- Modify Main.java in which a subclass of the
MyChildException class is created and throw an exception of the newly created
exception class in the try block and capture
it.
return
to top of the exercise
(2.4) Create your
own exception hierarchy compile error
In this step, you are going to see a compile error
when parent exception class is used before child exception class in the multiple
catch statements structure.
1. Create a NetBeans project
- Select File from top-level menu and
select New Project.
- Observe that the New Project dialog
box appears.
- Select Java under Categories section and Java Application under Projects section.
- Click Next.
- Under Name and Location pane, for
the Project Name field, enter CatchingExceptionHierarchy-CompileError.
- Click Finish.
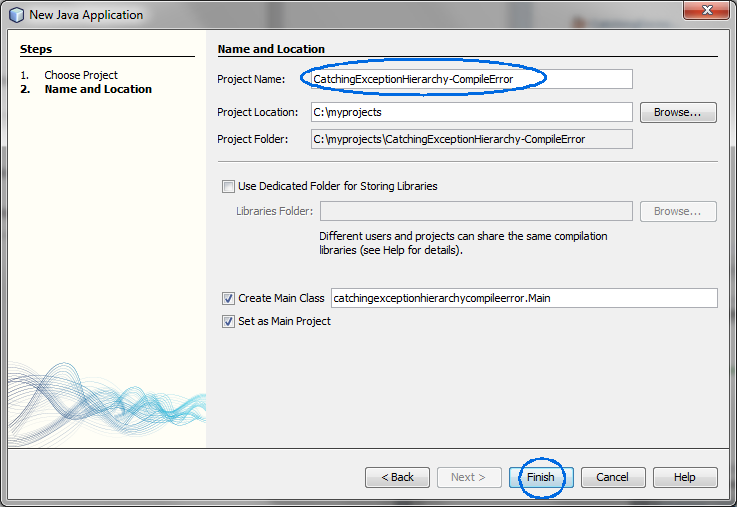
- Observe that the CatchingExceptionHierarchy-CompileError
project node is created under Projects
pane of the NetBeans IDE and IDE generated Main.java is displayed in the editor window
of the IDE.
2. Modify the IDE generated
Main.java as shown in Code-2.41. Observe
the compile error. (Figure-2.42 below)
package
catchingexceptionhierarchycompileerror;
class MyParentException extends Exception
{
}
class
MyChildException extends MyParentException {
}
public class Main
{
public static void
main(String[] args) {
try {
throw new MyChildException();
}
catch (MyParentException s) {
System.err.println("Caught
MyParentException");
} catch (MyChildException a)
{ // Compile error
expected
System.err.println("Caught
MyChildtException");
}
}
}
|
Code-2.41:
Main.java

Figure-2.42: Compile error
return
to top of the exercise
(2.5)
Finally
1. Create a NetBeans project
- Select File from top-level menu and
select New Project.
- Observe that the New Project dialog
box appears.
- Select Java under Categories section and Java Application under Projects section.
- Click Next.
- Under Name and Location pane, for
the Project Name field, enter FinallyWorks.
- Click Finish.
- Observe that the CatchingExceptionHierarchy project node is
created under Projects pane of the
NetBeans IDE and IDE generated Main.java is displayed in the editor window
of the IDE.
2. Modify the IDE generated
Main.java as shown in Code-2.51. Study the code
by special attention to the bold-fonted parts.
package finallyworks;
class MyException extends Exception {
}
public class Main
{
static int count =
0;
public static void
main(String[] args) {
while (true) {
try {
// Post-increment is zero first time:
if (count++ == 0)
throw new MyException();
System.out.println("No exception");
} catch (MyException e) {
System.out.println("MyException");
} finally { //
finally is always called
System.out.println("In finally clause");
if (count == 2)
break; // out of "while"
}
}
}
}
|
Code-2.51:
Main.java
3. Build and run the program
- Right click FinallyWorks project
node and select Run.
- Observe the display message in the output window of the IDE. (Figure-1.42
below)
MyException
In finally clause
No
Exception
In finally clause
|
Figure-2.52:
Result
return
to top of the exercise
(2.6) Ignore
Runtime exception
1. Create a NetBeans project
- Select File from top-level menu and
select New Project.
- Observe that the New Project dialog
box appears.
- Select Java under Categories section and Java Application under Projects section.
- Click Next.
- Under Name and Location pane, for
the Project Name field, enter
IgnoringRuntimeException.
- Click Finish.
- Observe that the IgnoringRuntimeException
project node is created under Projects
pane of the NetBeans IDE and IDE generated Main.java is displayed in the editor window
of the IDE.
2. Modify the IDE generated
Main.java as shown in Code-2.61. Study the code
by special attention to the bold-fonted parts.
package
ignoringruntimexception;
public class Main {
static void someMethod2() {
throw new
RuntimeException("From someMethod2()");
}
// Note that this method does not need
to
// catch the
RunTimeException.
static void
someMethod() {
someMethod2();
}
public static void main(String[] args)
{
someMethod();
}
}
|
Code-2.61: Main.java
3. Build and run the
program
- Right click IgnoringRuntimeException
and select Run.
- Observe the display message in the output window of the IDE. (Figure-2.63
below)
Exception in thread "main"
java.lang.RuntimeException: From
someMethod2()
at
ignoringruntimexception.Main.someMethod2(Main.java:7)
at
ignoringruntimexception.Main.someMethod(Main.java:13)
at ignoringruntimexception.Main.main(Main.java:17)
Java Result:
1
|
Figure-2.63: Catching an exception
Solution: This step is
provided as a ready-to-open-and-run NetBeans project as part of hands-on lab zip
file. You can find it as
<LAB_UNZIPPED_DIRECTORY>/javase_exceptions/samples/IgnoringRuntimeException. You can just open it and run it.
return
to top of the exercise
(2.7) Ignore
Runtime exception 2
1. Create a NetBeans project
- Select File from top-level menu and
select New Project.
- Observe that the New Project dialog
box appears.
- Select Java under Categories section and Java Application under Projects section.
- Click Next.
- Under Name and Location pane, for
the Project Name field, enter
IgnoringRuntimeException2.
- Click Finish.
- Observe that the IgnoringRuntimeException2
project node is created under Projects
pane of the NetBeans IDE and IDE generated Main.java is displayed in the editor window
of the IDE.
2. Modify the IDE generated
Main.java as shown in Code-2.71. Study the code
by special attention to the bold-fonted parts.
package
ignoringruntimeexception2;
class MyException extends
RuntimeException {
public
MyException(String x){
super(x);
}
}
public
class Main {
static void
someMethod2() {
throw new MyException("From
someMethod2()");
}
// Note
that this method does not need to
// catch the
RunTimeException.
static void
someMethod() {
someMethod2();
}
public static void main(String[] args)
{
someMethod();
}
}
|
Code-2.71: Main.java
3. Build and run the
program
- Right click IgnoringRuntimeException2
and select Run.
- Observe the display message in the output window of the IDE. (Figure-2.72
below)
Exception in thread "main"
ignoringruntimexception.MyException: From
someMethod2()
at
ignoringruntimexception.Main.someMethod2(Main.java:13)
at
ignoringruntimexception.Main.someMethod(Main.java:19)
at ignoringruntimexception.Main.main(Main.java:23)
Java Result:
1
|
Figure-2.72: Catching an exception
return
to top of the exercise
(2.8) Rethrow
different exception
1. Create a NetBeans project
- Select File from top-level menu and
select New Project.
- Observe that the New Project dialog
box appears.
- Select Java under Categories section and Java Application under Projects section.
- Click Next.
- Under Name and Location pane, for
the Project Name field, enter
RethrowDifferentException.
- Click Finish.
- Observe that the RethrowDifferentException
project node is created under Projects
pane of the NetBeans IDE and IDE generated Main.java is displayed in the editor window
of the IDE.
2. Modify the IDE generated
Main.java as shown in Code-2.81. Study the code
by special attention to the bold-fonted parts.
package
rethrowdifferentexception;
class
OneException extends Exception {
public OneException(String s)
{
super(s);
}
}
class TwoException extends Exception {
public TwoException(String s)
{
super(s);
}
}
public class Main
{
public static void someMethod() throws
OneException {
System.out.println("originating the exception in someMethod()");
throw
new OneException("thrown from f()");
}
public static void
main(String[] args) throws TwoException
{
try {
someMethod();
}
catch (OneException e) {
System.err.println("Caught in main, e.printStackTrace()");
e.printStackTrace();
// The TwoException will be handled by
default exception
// handler.
throw new TwoException("from
main()");
}
}
}
|
Code-2.81: Main.java
3. Build and run the
program
- Right click RethrowDifferentException
and select Run.
- Observe the display message in the output window of the IDE. (Figure-2.82
below)
originating the exception in
someMethod()
Caught in main,
e.printStackTrace()
rethrowdifferentexception.OneException: thrown from
f()
at
rethrowdifferentexception.Main.someMethod(Main.java:19)
at rethrowdifferentexception.Main.main(Main.java:24)
Exception in
thread "main" rethrowdifferentexception.TwoException: from
main()
at
rethrowdifferentexception.Main.main(Main.java:31)
Java Result:
1
|
Figure-2.82: Result
return
to top of the exercise
Summary
In this exercise, you have learned how to create,
throw, and catch your own custom exceptions.
return
to the top
Exercise 3: Assert
In this exercise, you are going to exercise Assert
feature of Java programming language.
(3.1) Build and run
AssertExample program
1. Create a NetBeans project
- Select File from top-level menu and
select New Project.
- Observe that the New Project dialog
box appears.
- Select Java under Categories section and Java Application under Projects section.
- Click Next.
- Under Name and Location pane, for
the Project Name field, enter AssertExample.
- For Class Main Class field, enter assertexample.Diamond.
- Click Finish.
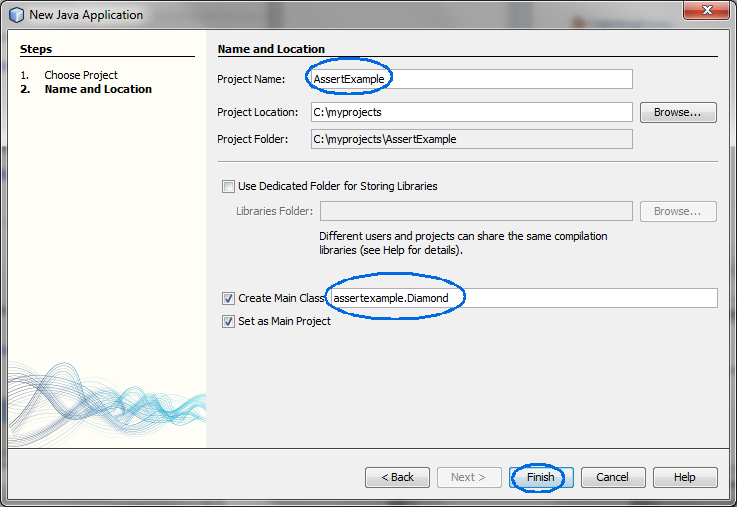
Figure-3.10: Create a new project
- Observe that the AssertExample
project node is created under Projects
pane of the NetBeans IDE and IDE generated Diamond.java is displayed in the editor
window of the IDE.
2. Modify the IDE generated
Diamond.java as shown in Code-3.11. Study the
code by special attention to the bold-fonted parts.
package assertexample;
import javax.swing.*;
class
Diamond {
static void printDiamond(int size) {
String diamond = "";
/*
print upper triangle */
for
(int r = 1, a = 1; r <= size; r++, a+=2) {
/* print spaces */
for (int i = size - r; i >= 1; i--) {
diamond += " ";
}
/* print *'s */
for (int j = 1; j <= a; j++) {
diamond += "*";
}
diamond += "\n";
}
/*
print lower triangle */
for
(int r = size - 1, a = 2*(size-1)-1; r >= 1; r--, a-=2) {
/* print spaces */
for (int i = size - r; i >= 1; i--) {
diamond += " ";
}
/* print *'s */
for (int j = 1; j <= a; j++) {
diamond += "*";
}
diamond += "\n";
}
JOptionPane.showMessageDialog(null, diamond);
System.out.println(diamond);
}
public static void main(String args[])
{
String strSize;
//
Get the size of the diamond to draw
strSize = JOptionPane.showInputDialog(null, "Enter diamond
size:");
int
size =
Integer.parseInt(strSize);
// Assert that the value entered is greater
than 0, otherwise,
// it will generate AssertionError exception.
try {
assert(size > 0);
printDiamond(size);
} catch (AssertionError e) {
JOptionPane.showMessageDialog(null, "AssertionError is captured: Size
should be > 0.");
}
System.exit(0);
}
}
|
Code-3.11: Diamond.java
3. Build and
run the program without Assert enabled (which is the default)
- Right click AssertExample project
node and select Run.
- Observe that an input dialog box appears. (Figure-3.12 below)
- Enter a positive number, like 5.
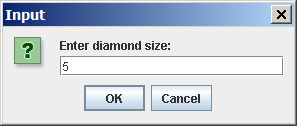
Figure-3.12: Enter diamond size
- Observe that a diamond gets displayed.
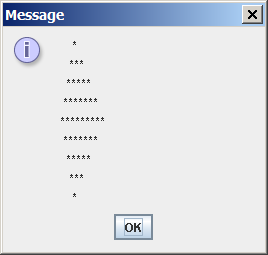
Figure-3.13: Display of the diamond
- Right click AssertExample project
node and select Run.
- Observe that an input dialog box appears.
- Enter a negative number, like -8.
- Observe that a display with nothing gets displayed. (Figure-3.14
below)
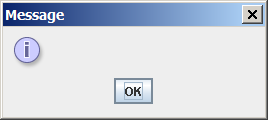
Figure-3.14: No diamond gets displayed
4. Run the program with Assert Feature
enabled.
- Right click AssertExample project
and select Properties.
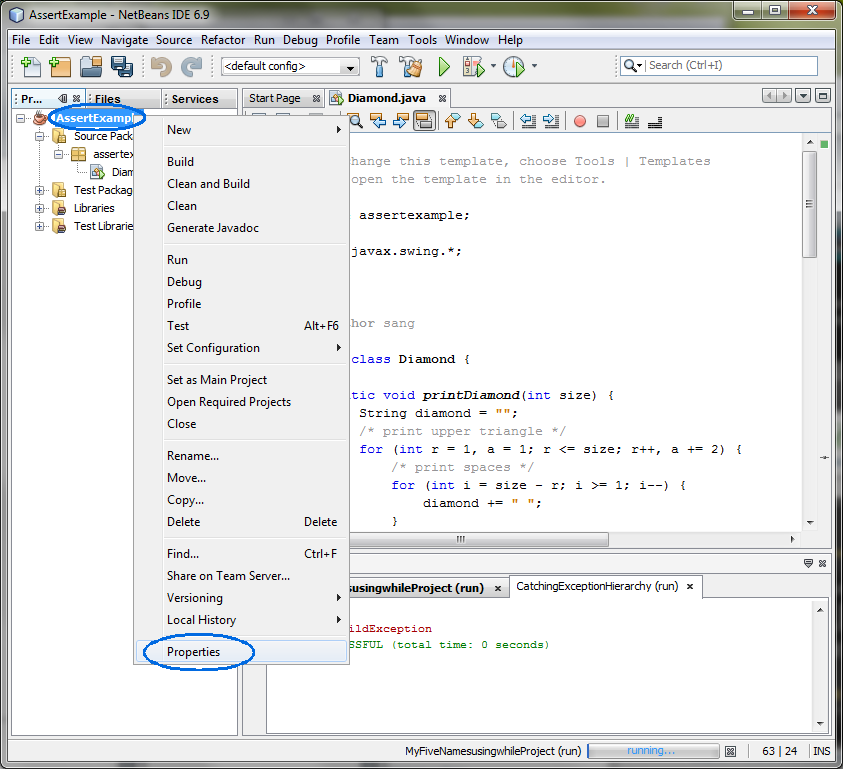
- Observe that the Project Properties
dialog box appears.
- Select Run on the left and for
the VM Options field, enter -ea. The -ea option indicates your intention of
running the application with Assert feature enabled. (Figure-3.15 below)
- Click OK.
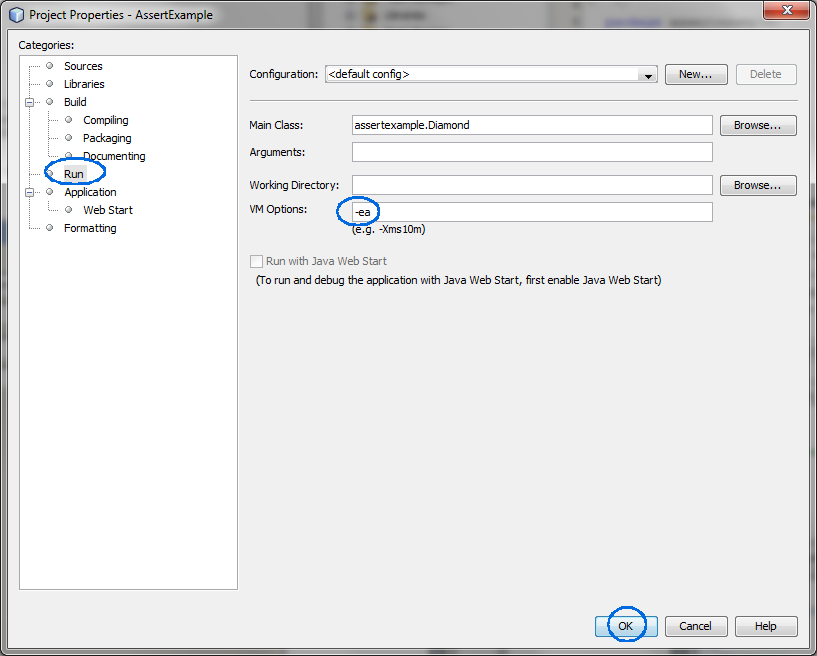
Figure-3.15: Enable Assert
5.
Build and run the program again
- Right click AssertExample project
node and select Run.
- Observe that an input dialog box appears.
- Enter a negative number, like -5.
- Click OK.
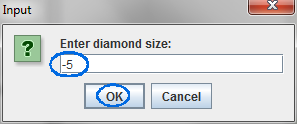
- Observe that the Assert feature is now working. (Figure-3.16 below)
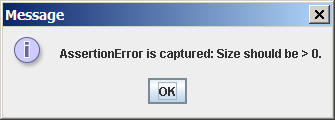
Figure-3.16: Assert is now
enabled.
6. For your own exercise, modify Diamond.java so that the a number that is
greater than 20 generates AssertionError
Summary
In this exercise, you have learned how to use
assert feature of Java programming language.
Homework
1. The homework is to modify AssertExample project above as following.
(You might want to create a new project by copying the AssertExample project. You can name the
homework project in any way you want but here I am going to call it MyExceptionProject.)
- Run
the program without assertion so that you can catch user errors through
exceptions.
- If a user enters a negative value, throw a
MyOwnNegativeValueEnteredException, which is an extension of
ArithmeticException. The display of the error information should display the
negative number that was entered.
- If a user enters zero, throw a MyOwnZeroValueEnteredException, which is an
extension of ArithmeticException.